Create Your First Crowd
The Crowd feature lets you generate a diverse group of NPCs based on one or more Templates. You can vary each character’s shape, height, weight, and clothing combinations; creating realistic, dynamic crowds in just a few minutes.
🎬 Check our Tutorial Video:
1. Create a New Crowd
- Go to the Project tab and locate the Crowds section
- Right-click on Crowds and choose: → Create → Crowd
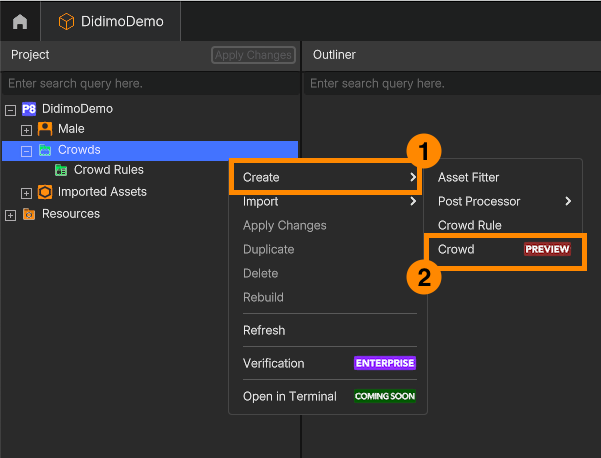
- A new Crowd object will appear in the project tree. We suggest you give it a meaningful name.
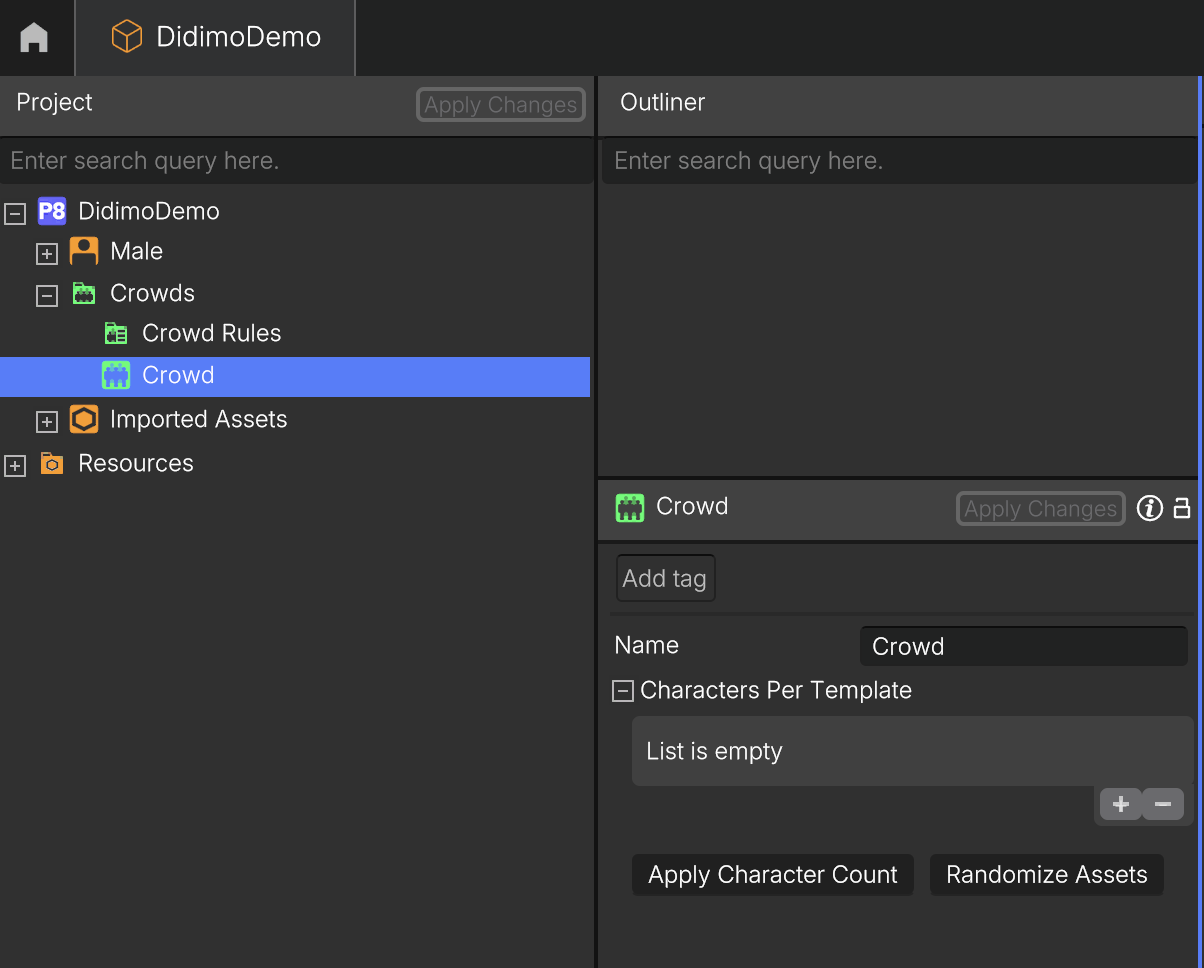
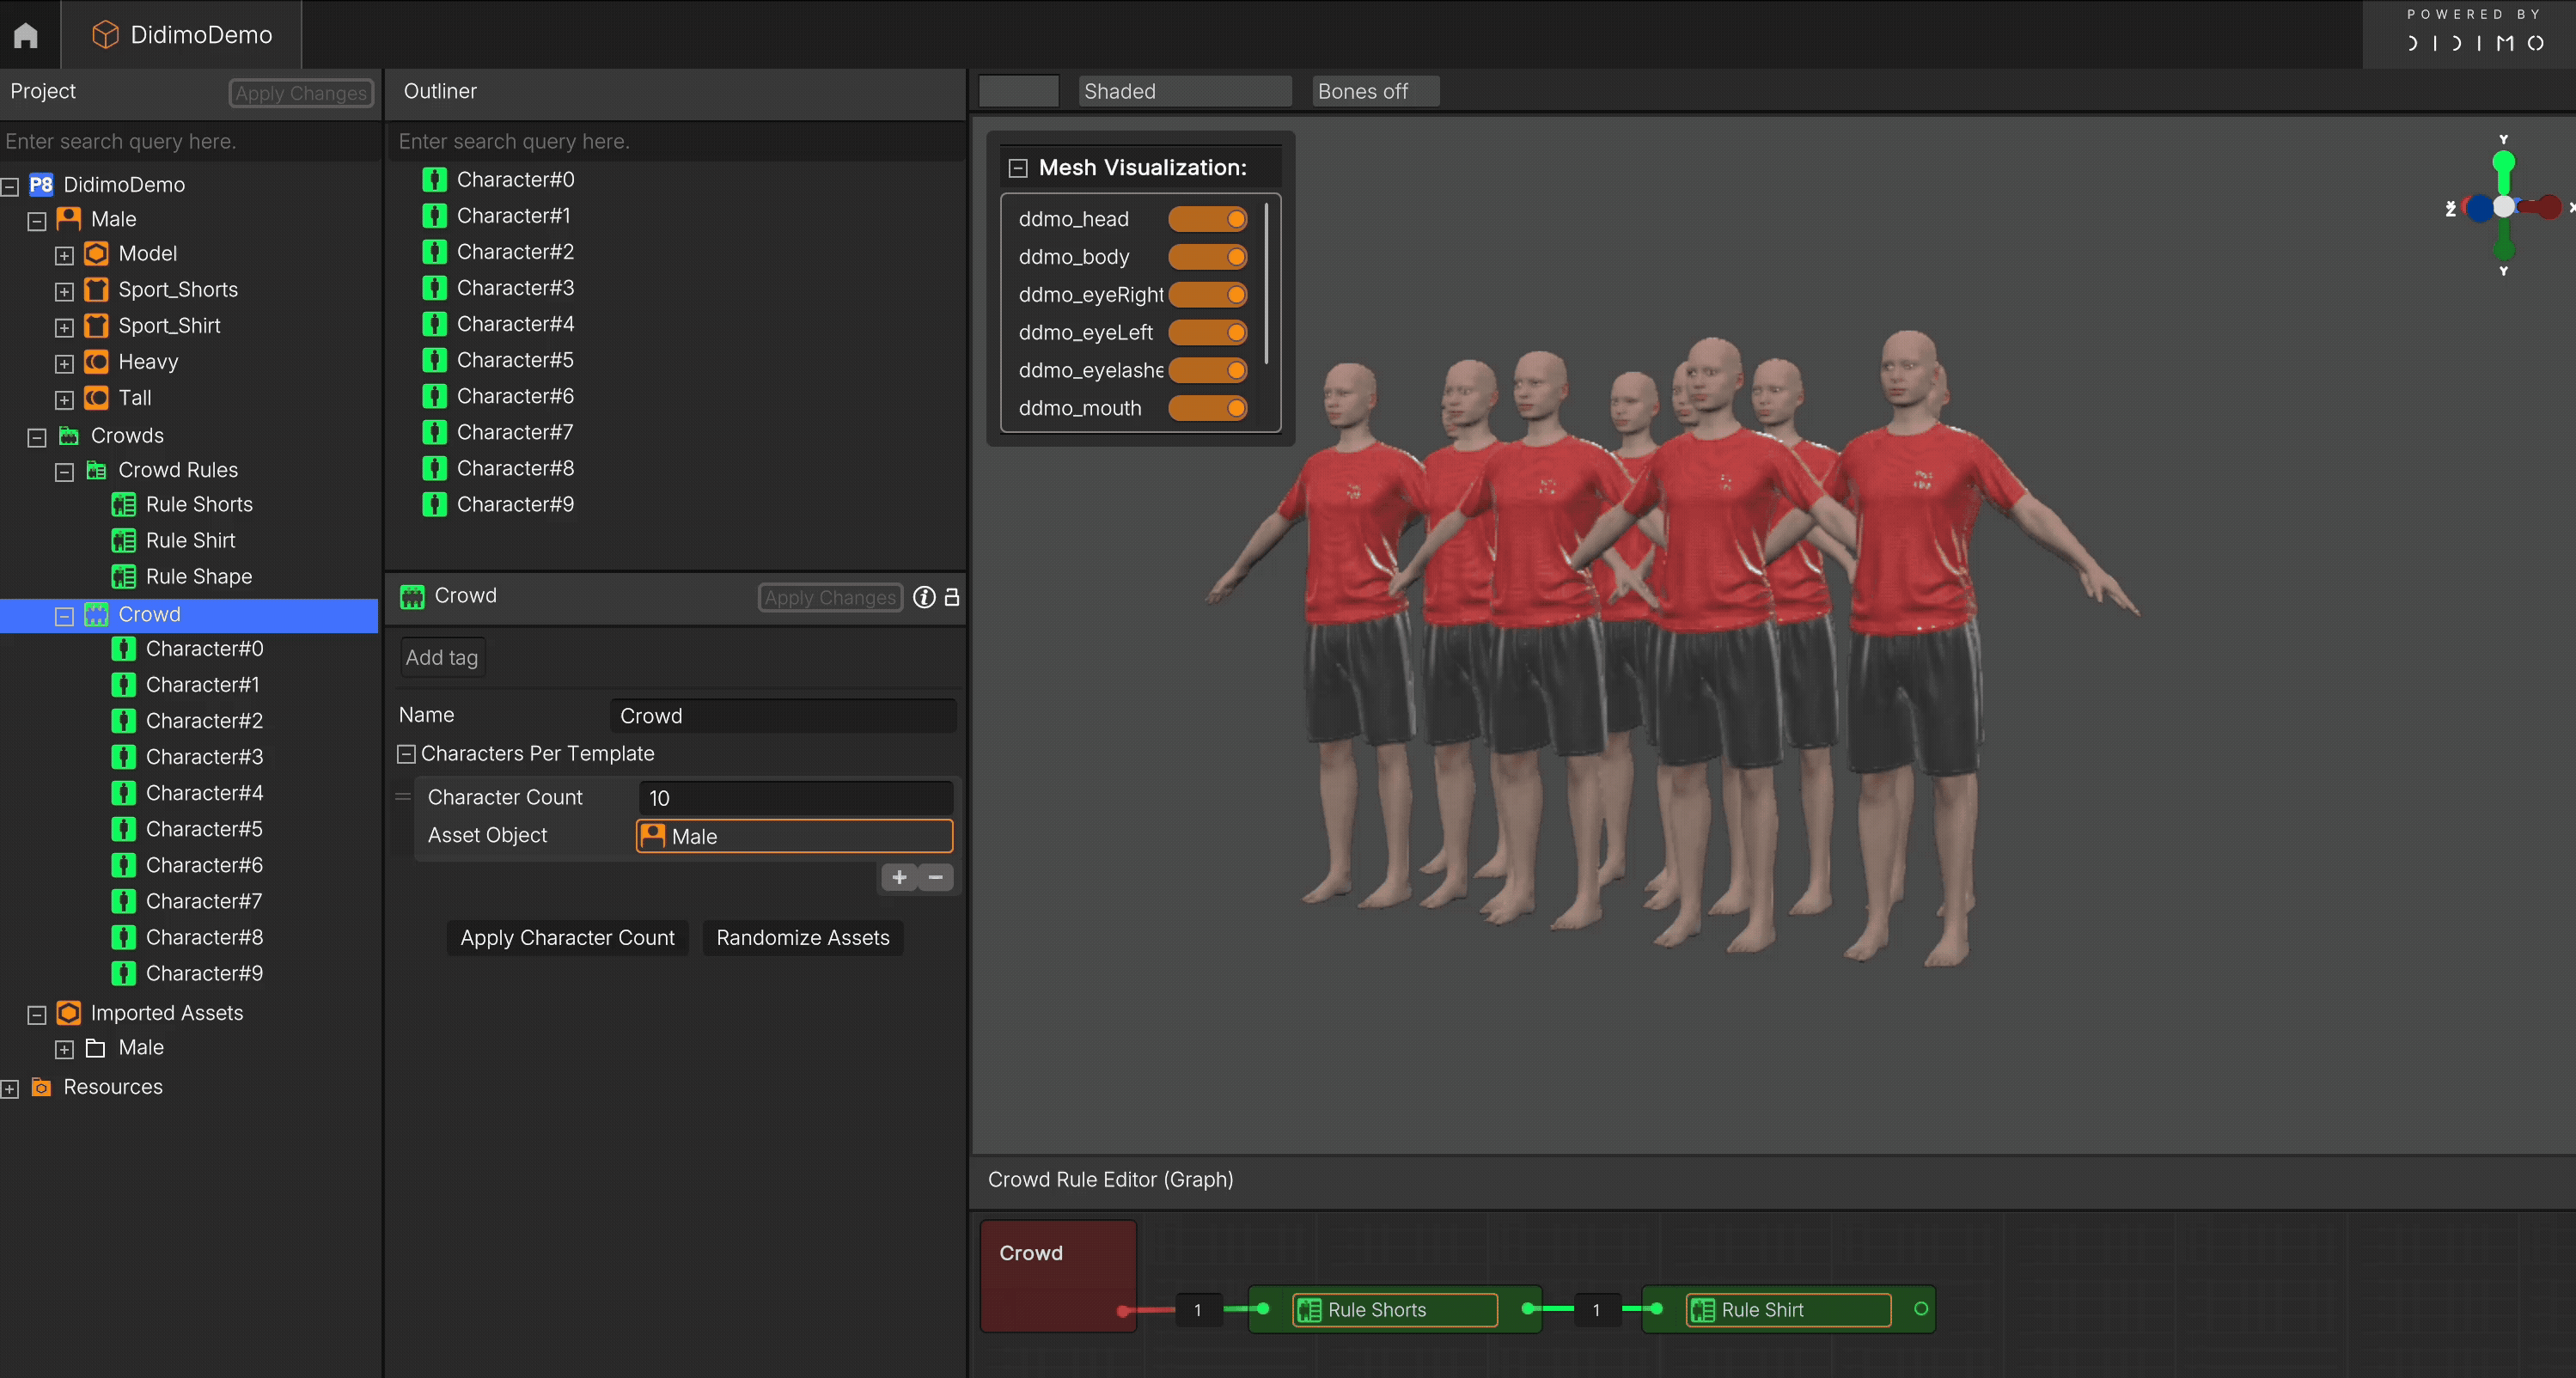
2. Add Characters to the Crowd
- Left-click the newly created Crowd object
- In the panel below the Outliner, find the Characters Per Template section
- Drag in a Template (e.g., Male)
- Enter the number of characters you want (e.g., 10)
- Click Apply Character Count to generate the crowd
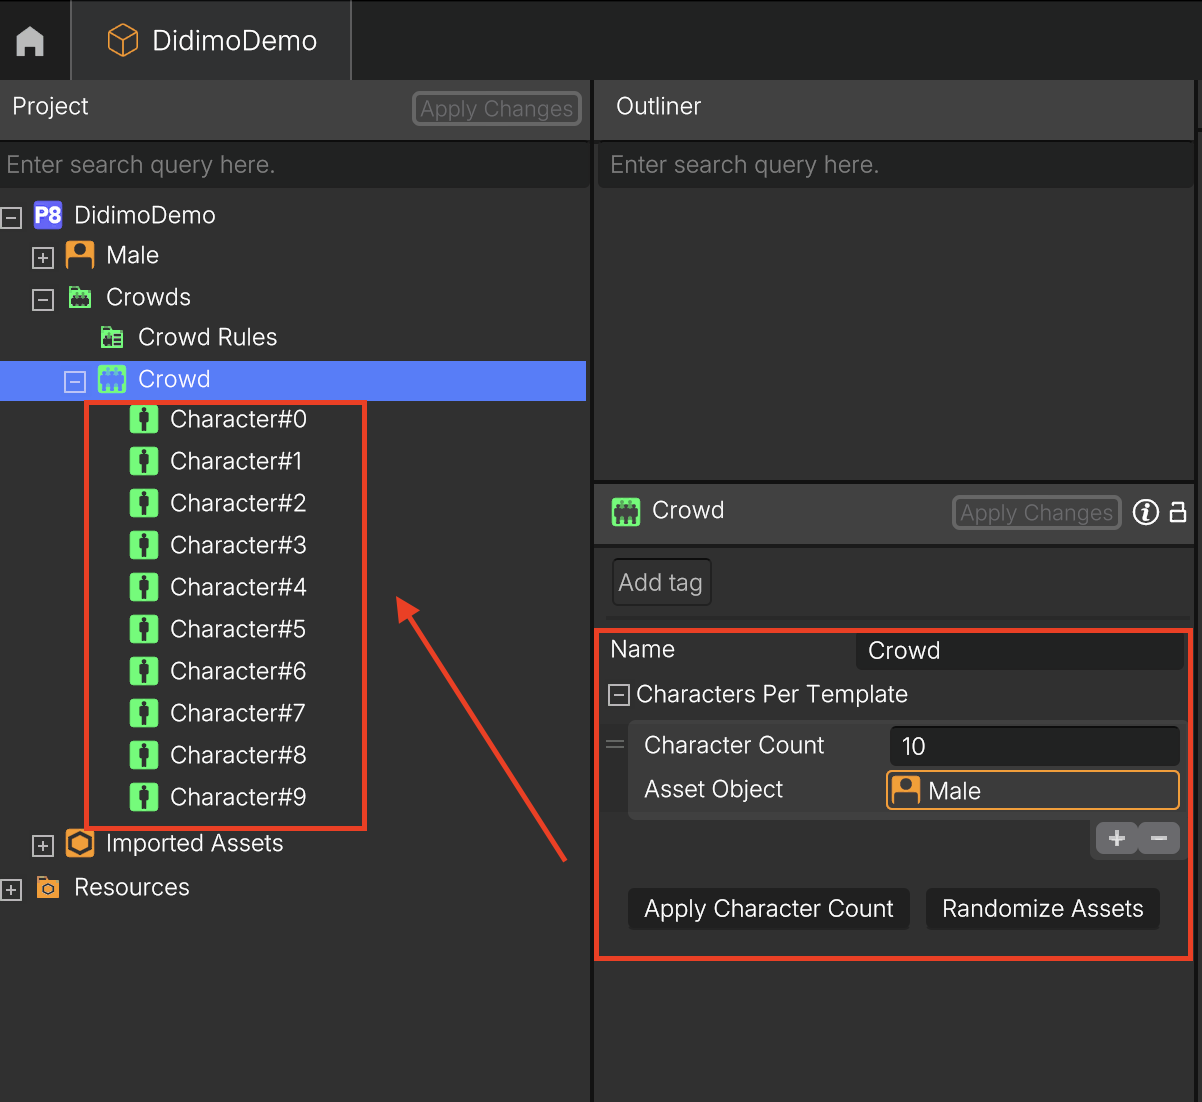
- New characters will appear in the tree under the Crowd object
- Drag the new created Crowd into the Outliner to see a live preview
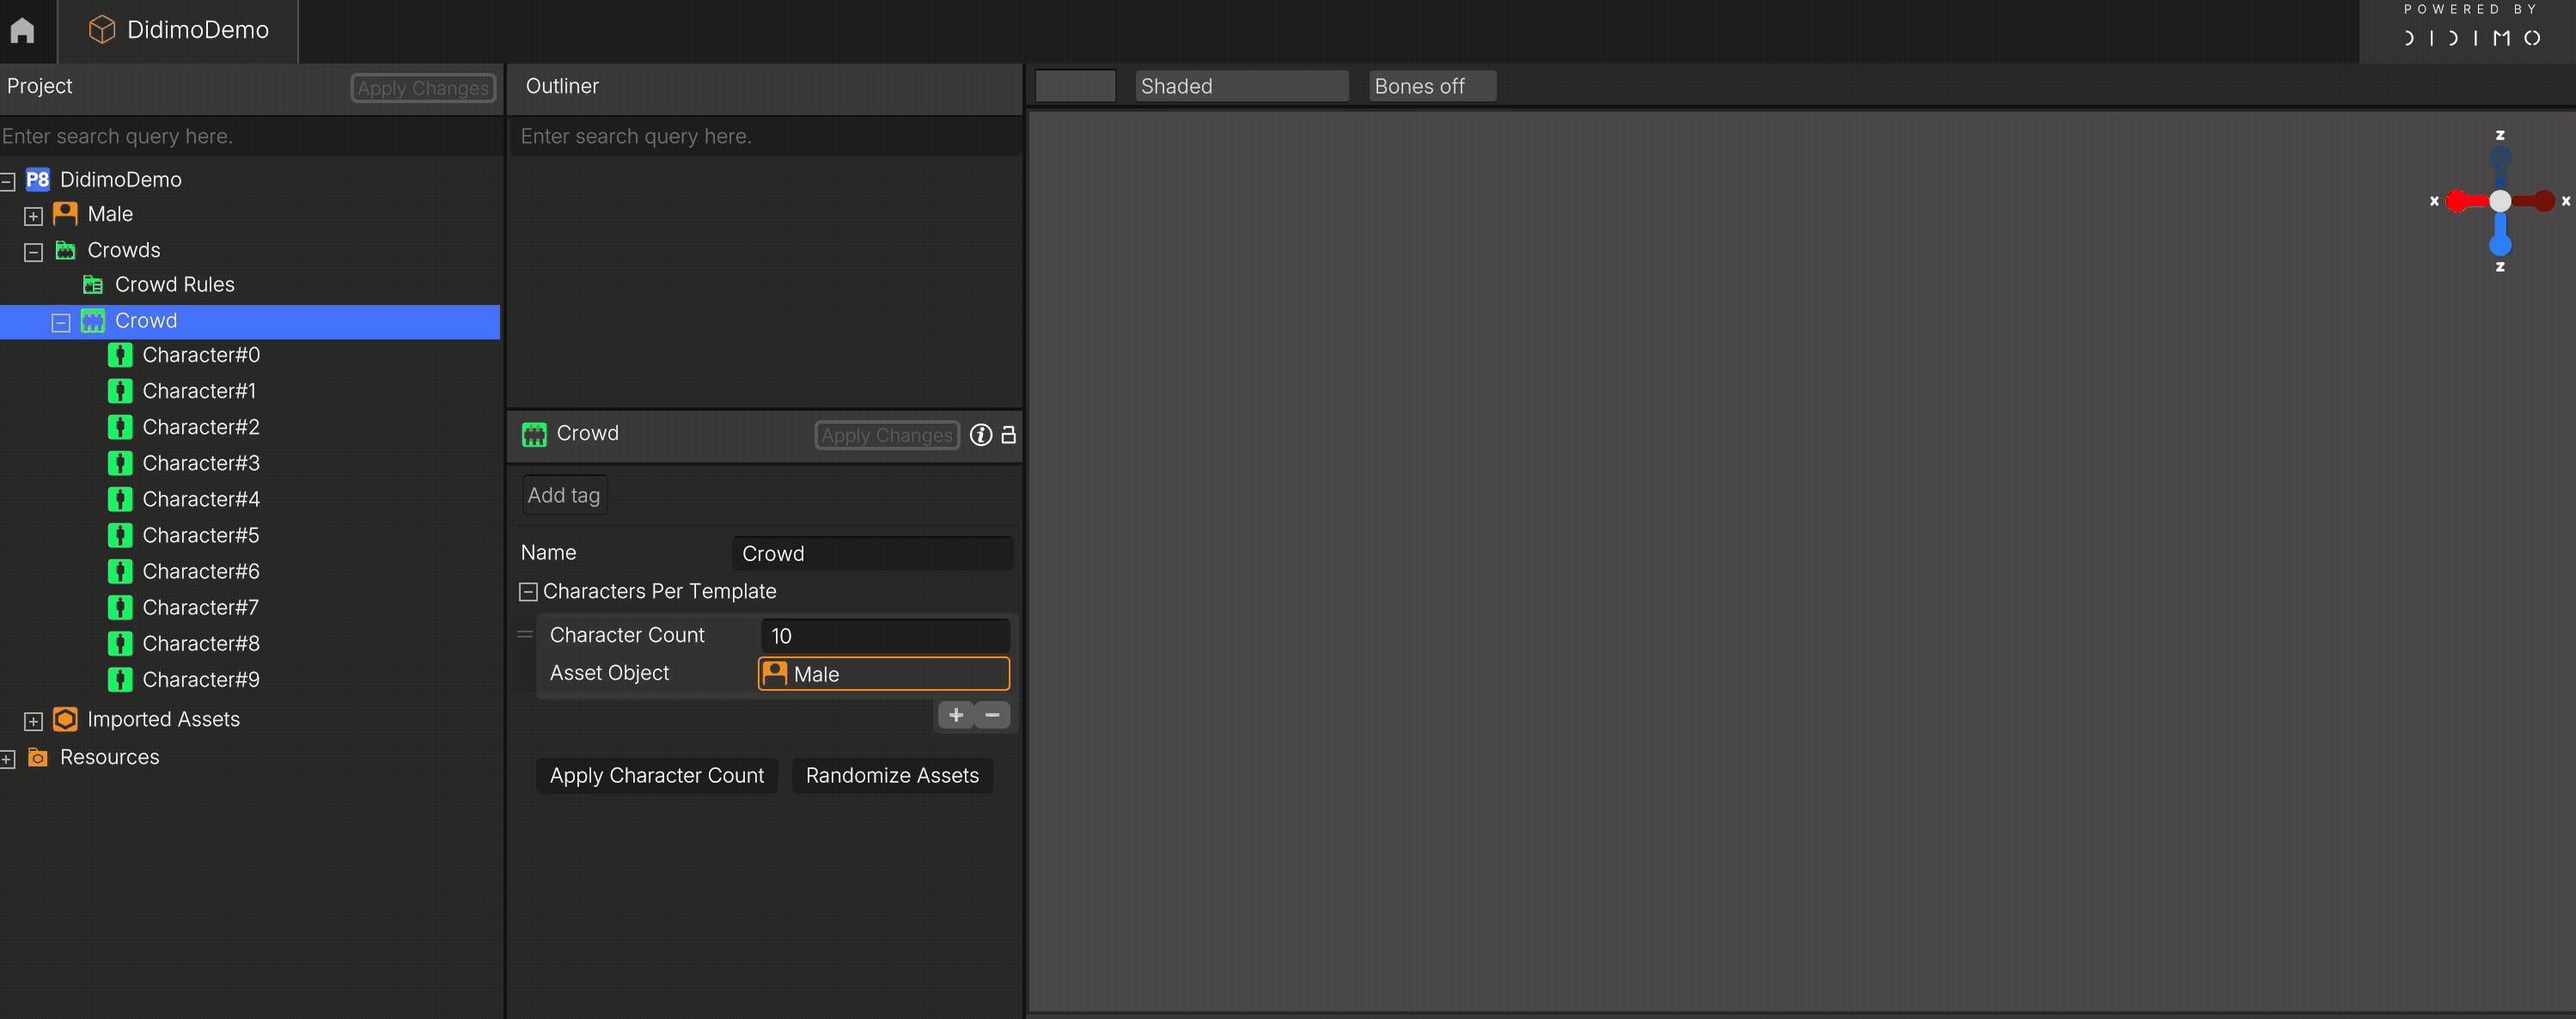
Tip: At this stage, all characters will look the same; you’ll introduce variation in the next steps.
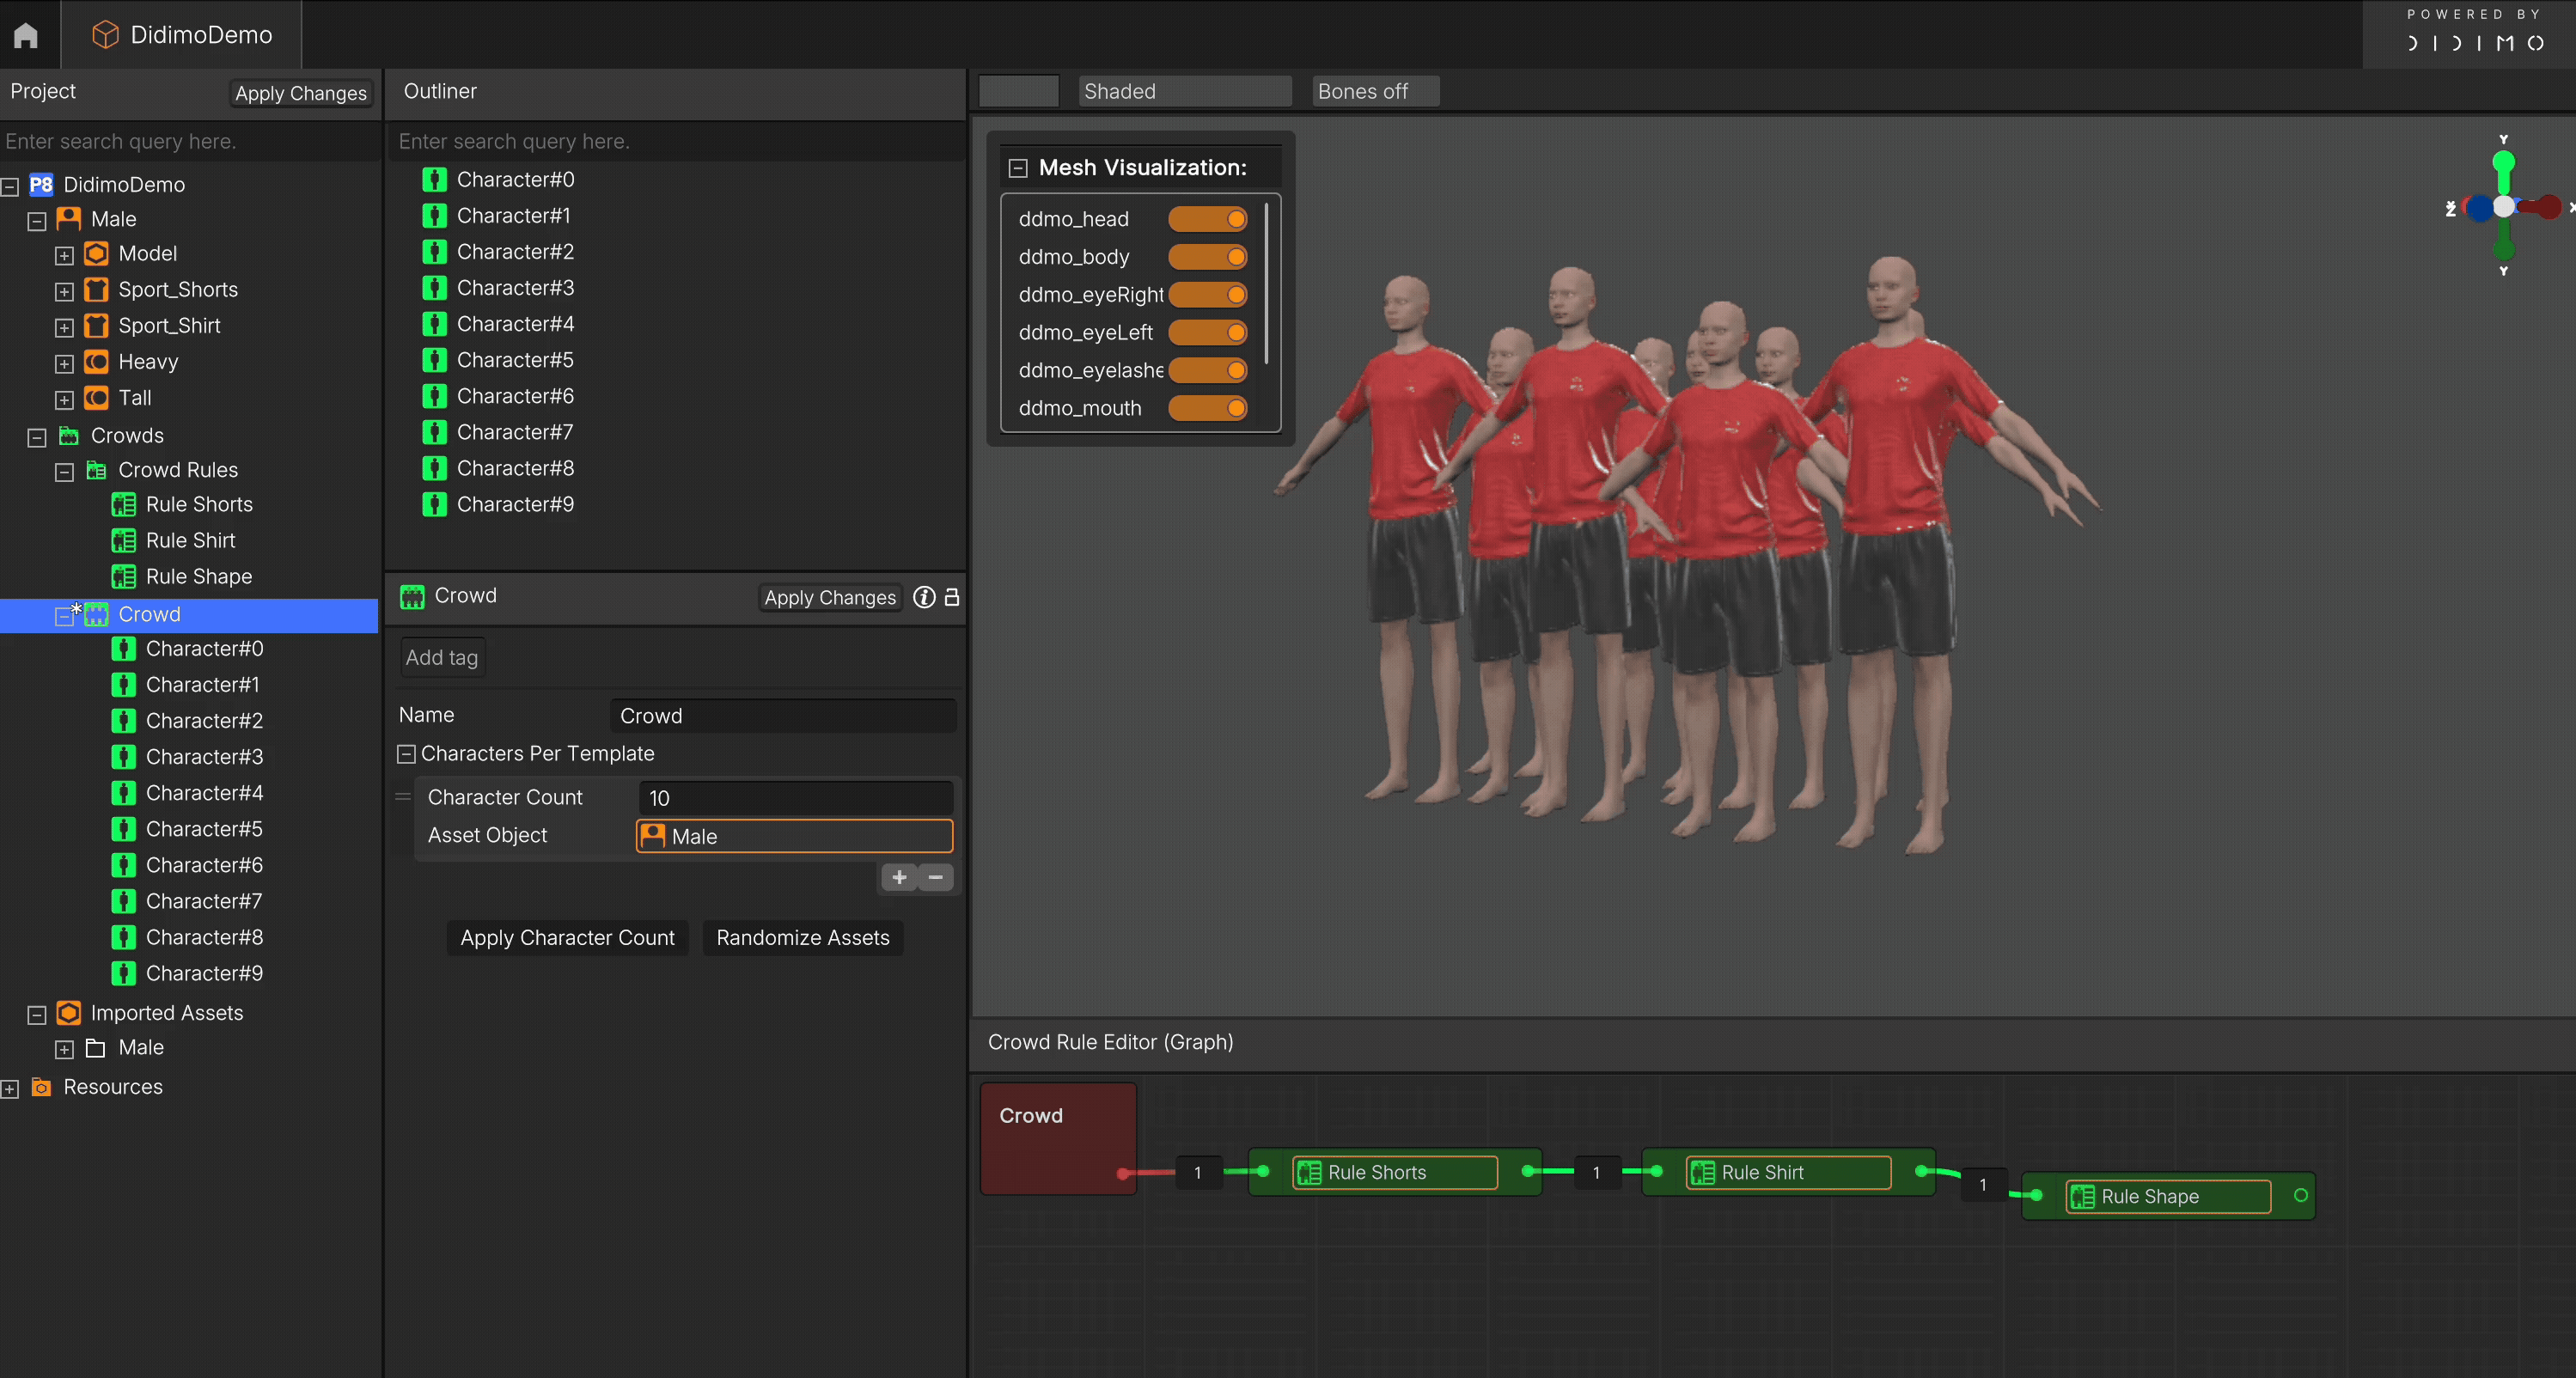
3. Create Your First Crowd Rule
- In the Crowds section of the tree, right-click your Crowd → Create → Crowd Rule
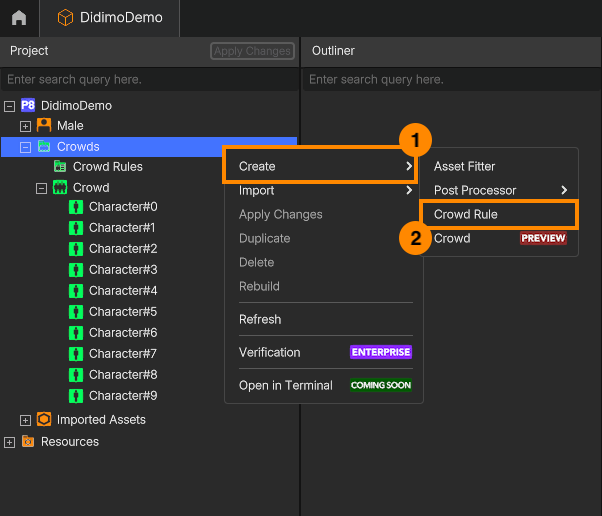
- A new rule will appear under Crowds → Crowd Rules
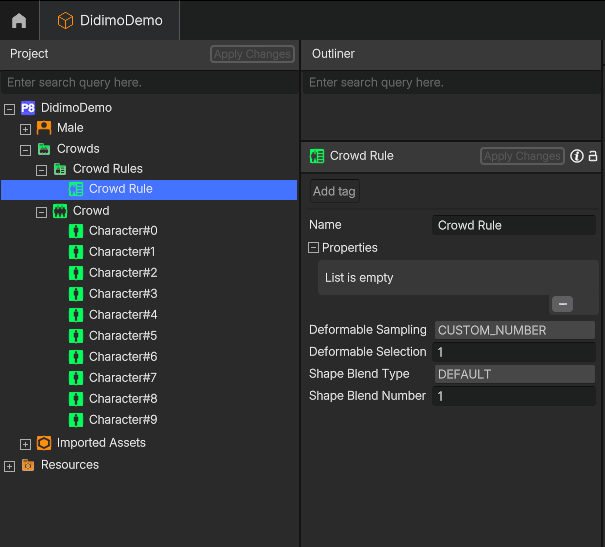
- Below the Outliner, drag a Deformable (e.g., SportShort) or Shape into the Properties panel
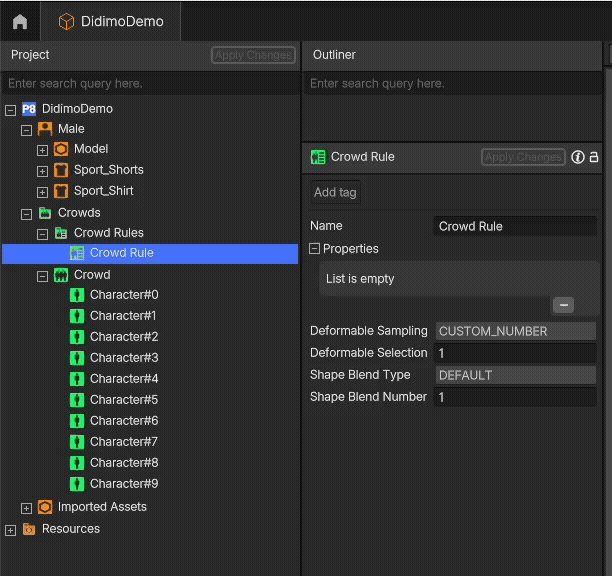
- Rename the rule to something clear, like Crowd Rule Shorts
- Click Apply Changes
- Repeat this step to add more rules e.g., another for a shirt
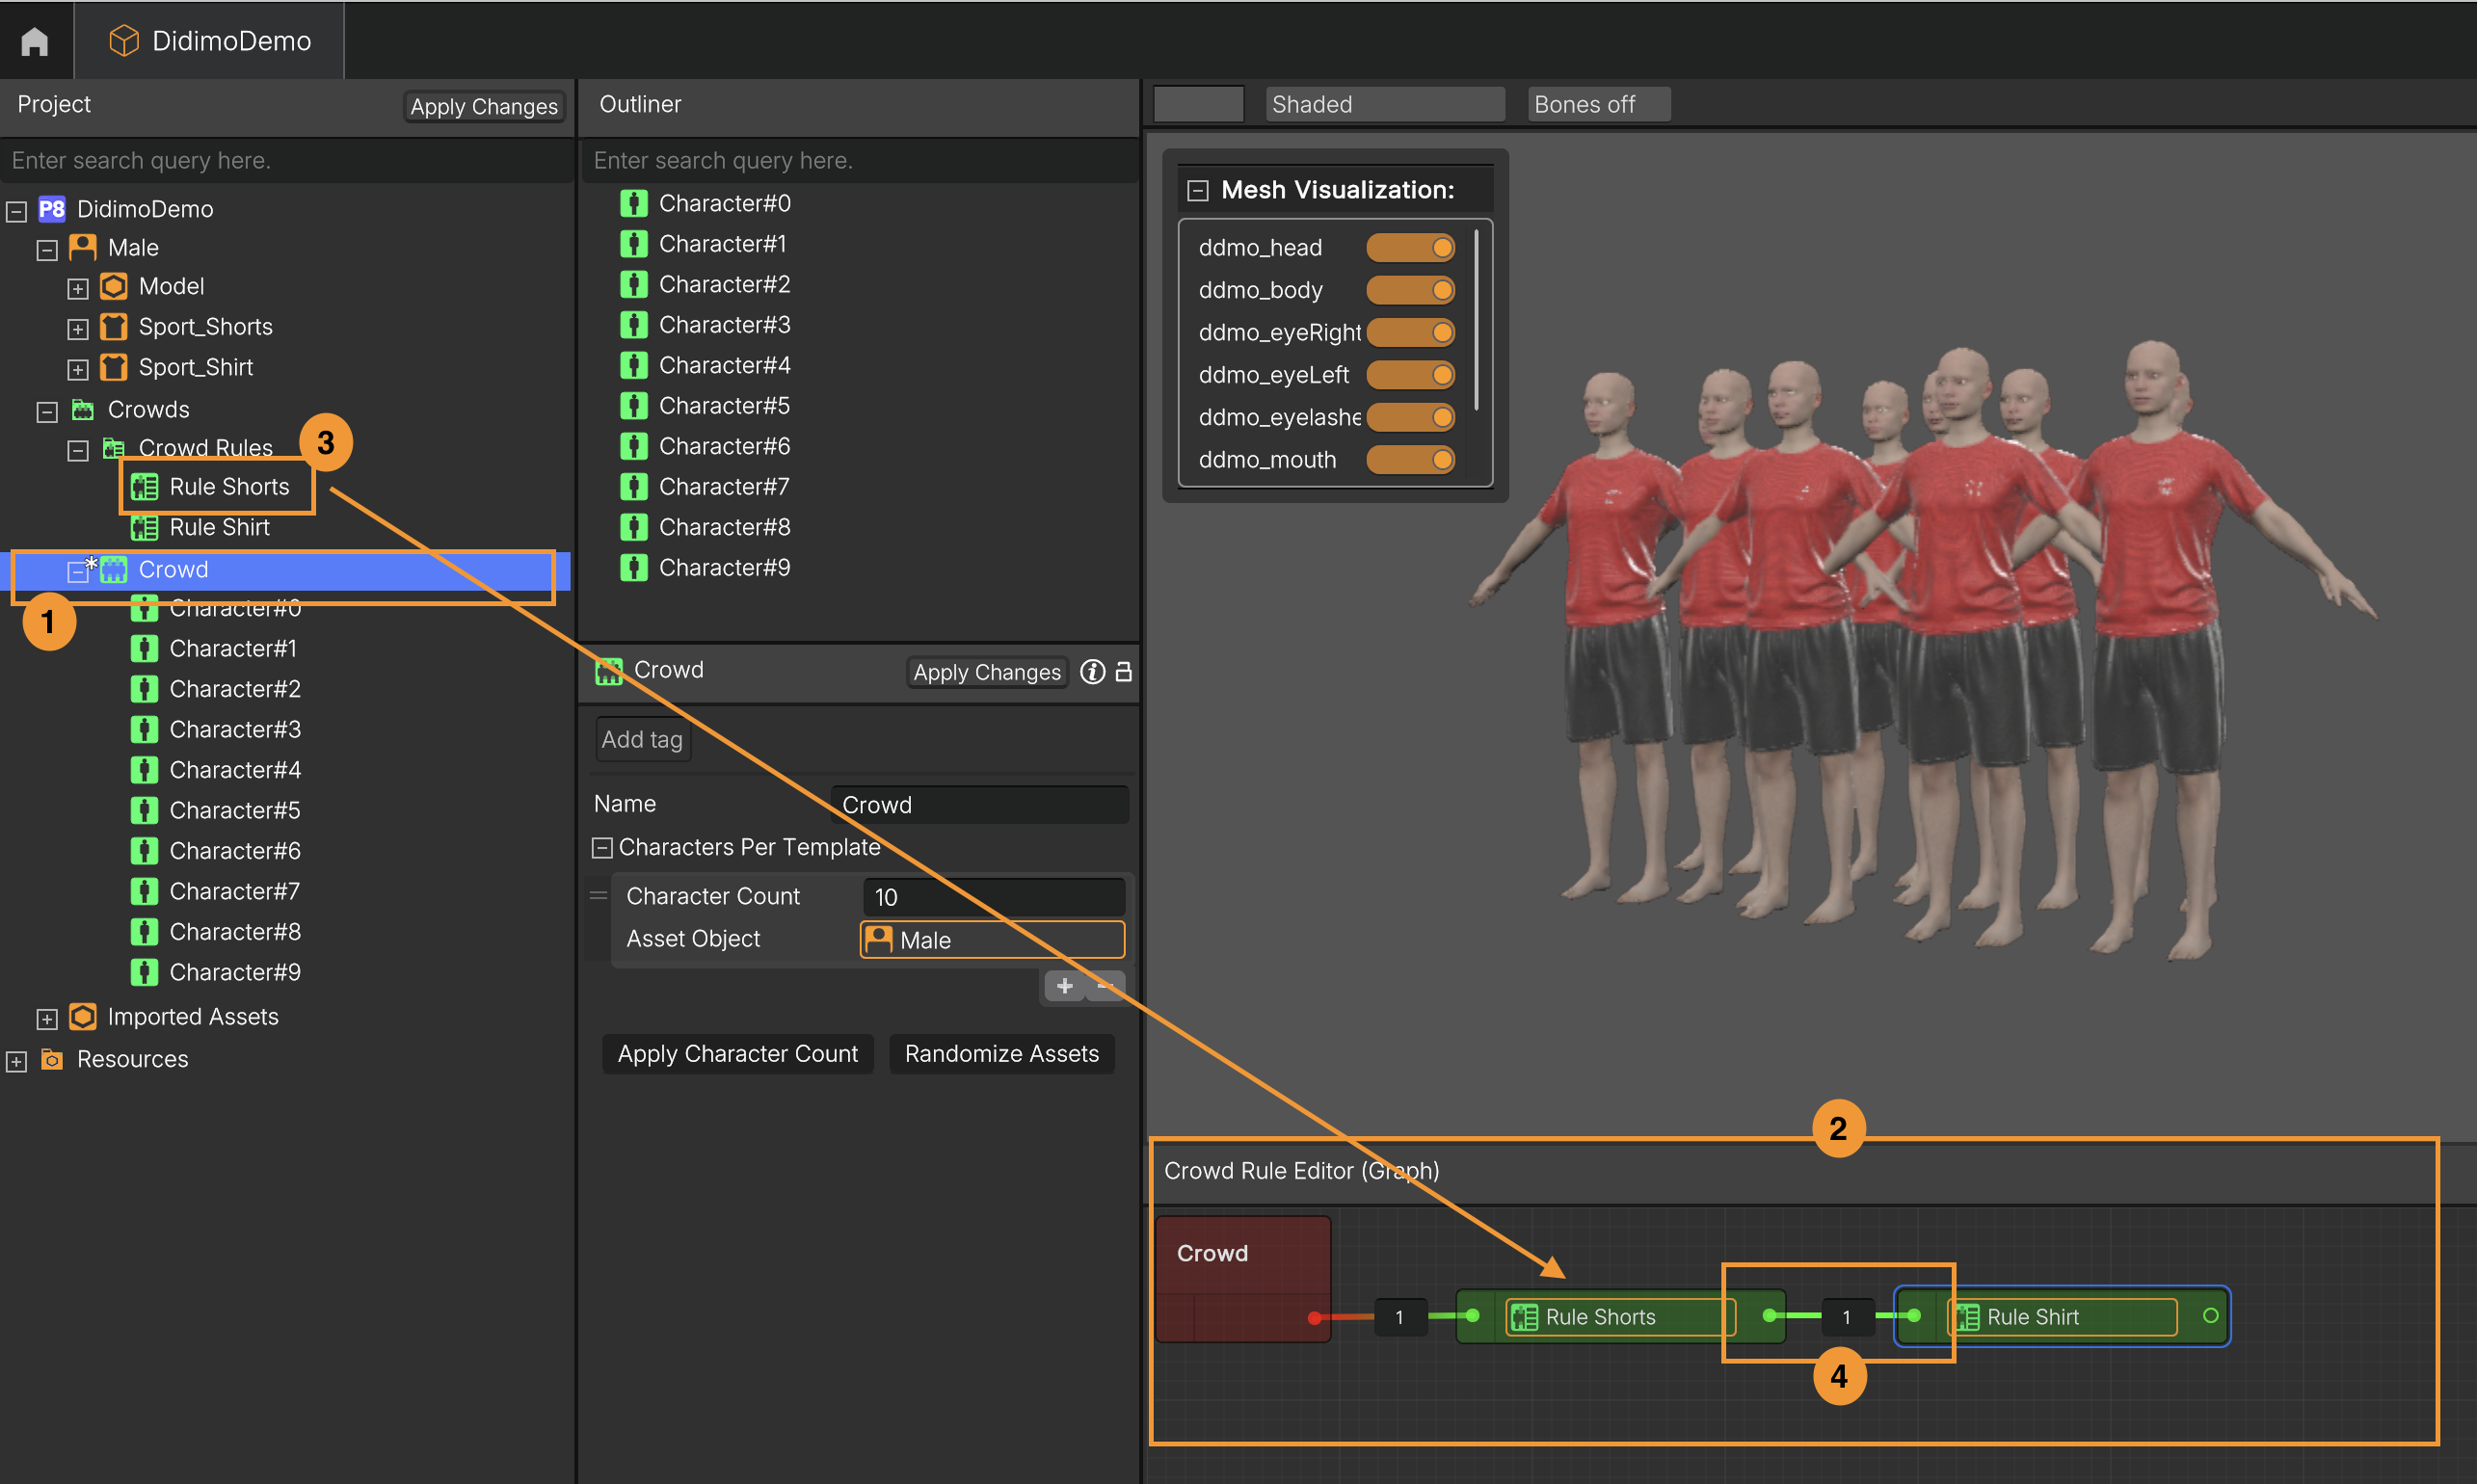
4. Assign Rules Using the Crowd Rule Editor
- Left-click the previously created Crowd object
- Below the crowd preview, you’ll find the Crowd Rule Editor (Graph)
- Drag your Crowd Rules into this editor window
- Connect them in sequence using lines, starting from the Crowd → Rule 1 → Rule 2, etc.
5. Add Shape Variation (Shape Blending)
- Create a new Crowd Rule (right-click on Crowds → Create → Crowd Rule)
- Rename it (e.g., Crowd Rule Shapes)
- Drag previously prepared Shapes (e.g., Tall, TestShape) into the Properties panel

- Add this rule to the Crowd Rule Editor and connect it with the others
6. Randomize the Crowd
- In the editor, click Randomize Asset
- The crowd will regenerate using all the rules you've applied
7. Edit Individual Characters (Optional)
- In Crowds → [Your Crowd], find a specific character
- Left-click to select it and edit its properties
- You can also change its Shape:
- Drag a new Shape (e.g., Tall) into the Weighted Properties field
- Just make sure to remove the previous value first (e.g., TestShape)
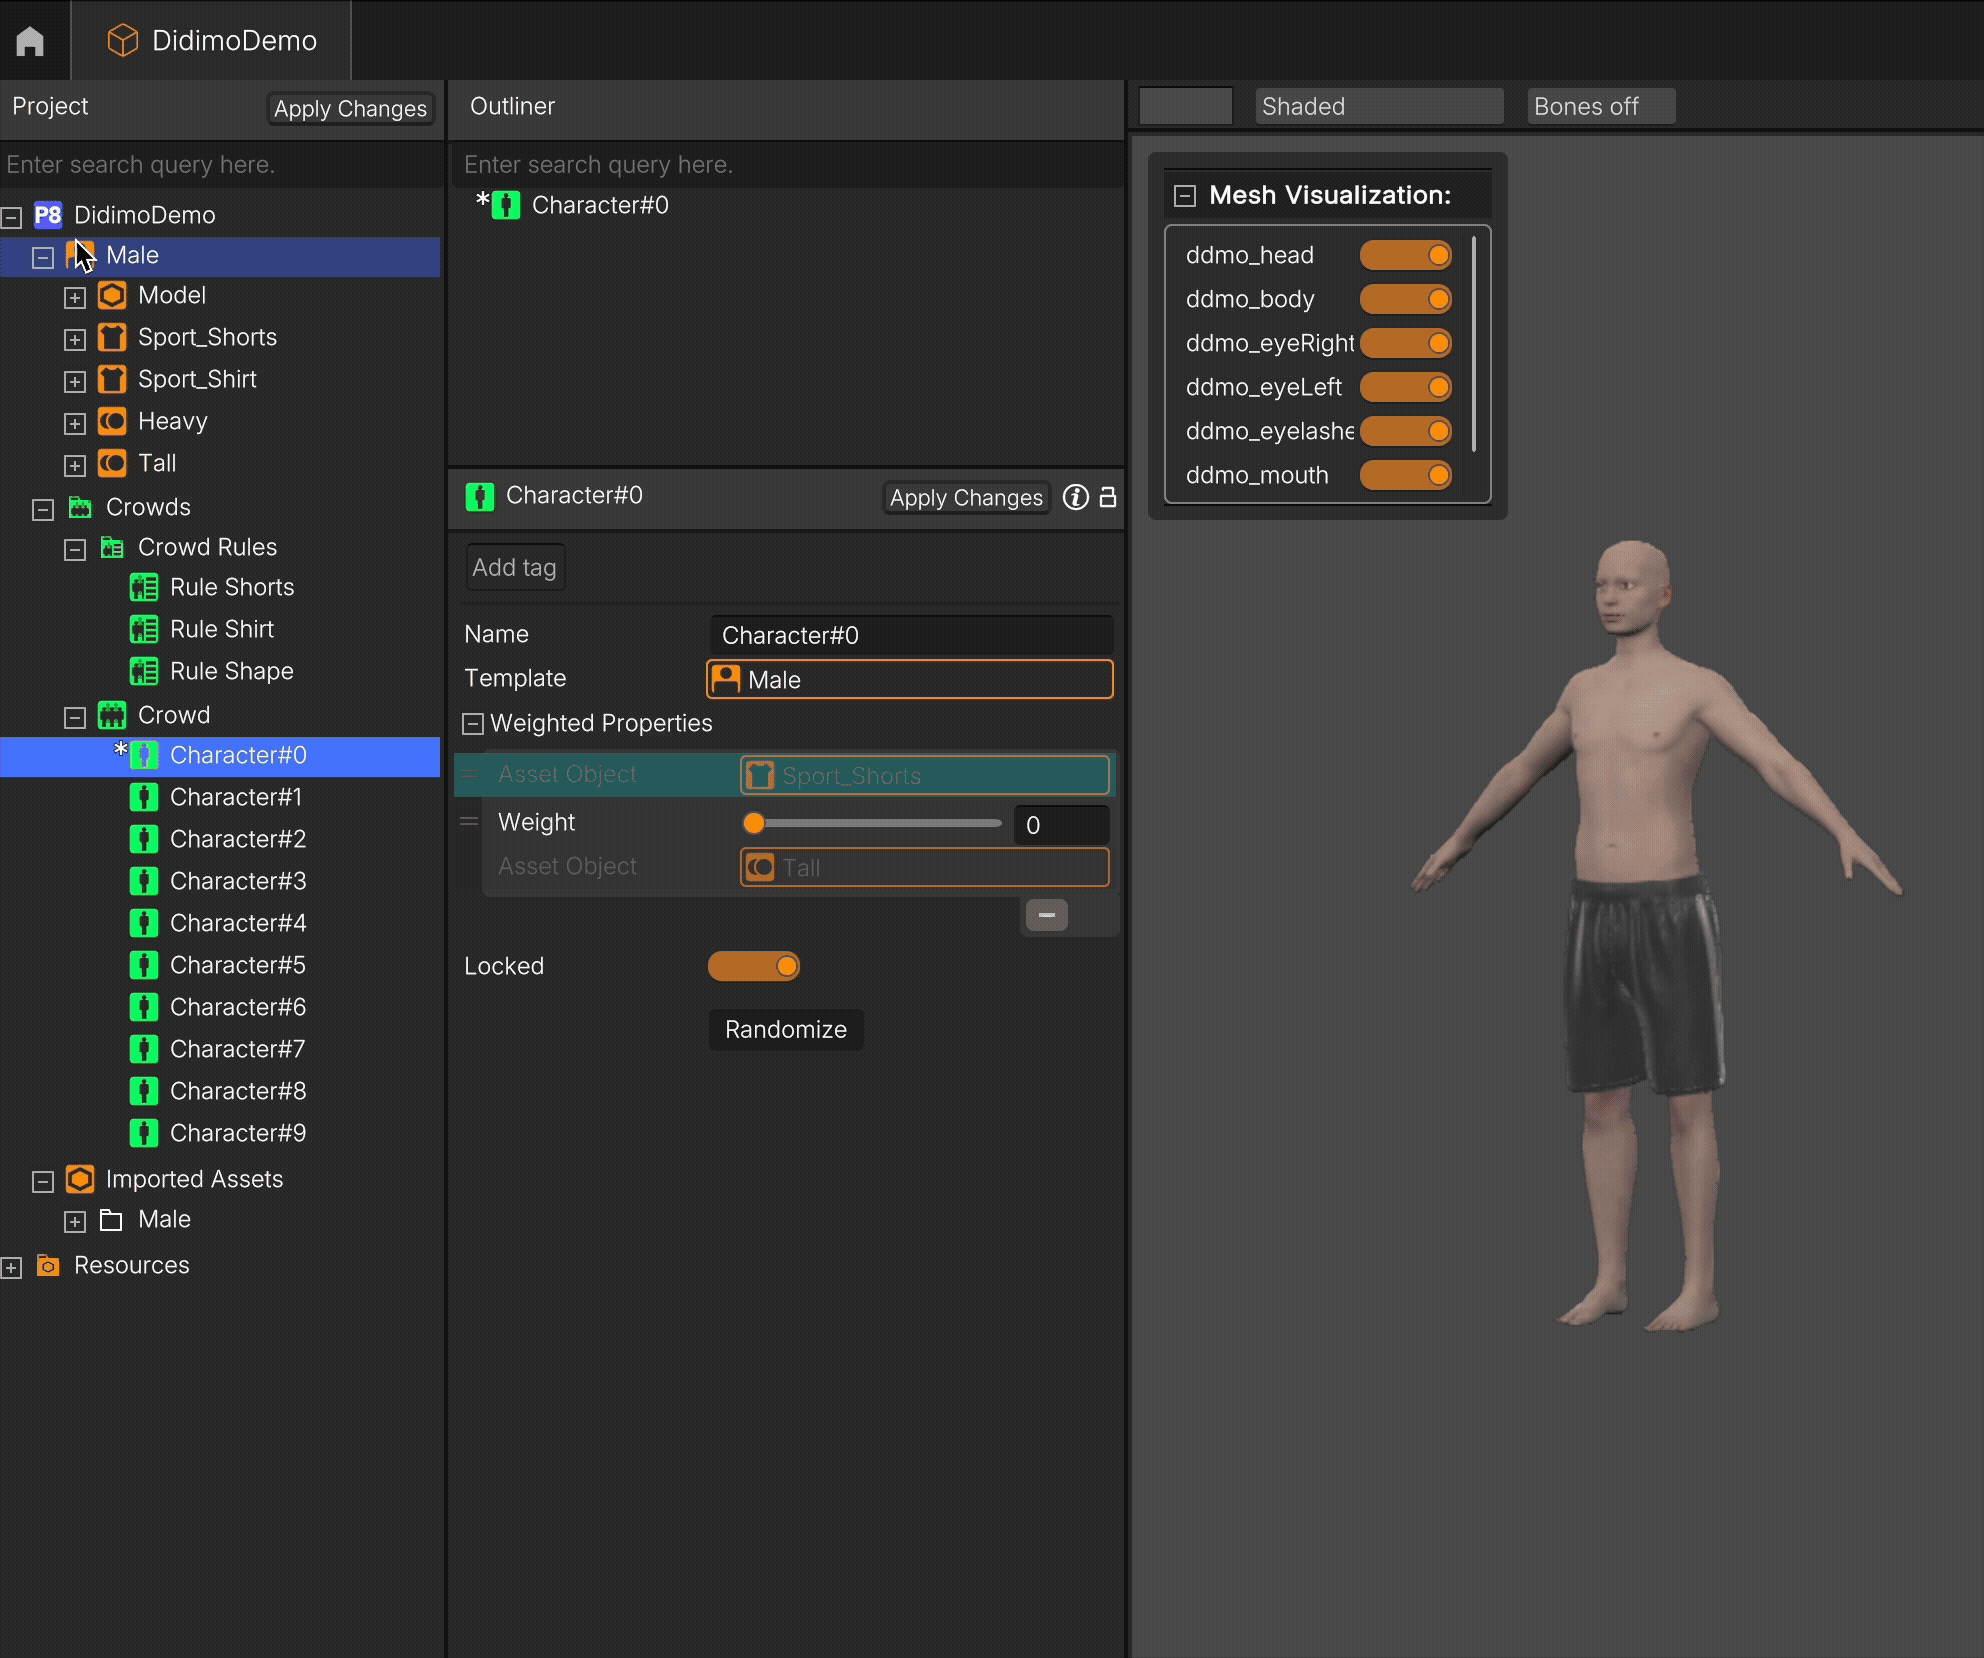
When an individual character is edited, it becomes automatically locked and is excluded from global randomization. To re-include the character, simply disable the Locked toggle.
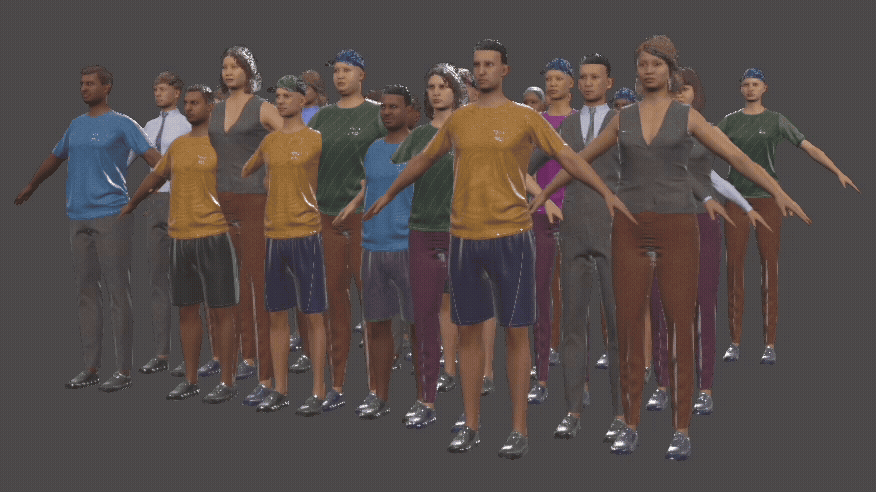
8. Final Result
You now have a fully generated, visually diverse crowd, ready for use in your project.
9. Advanced: Understanding Crowd Rule Editor and Facial Variation Rules
Branching Rules: More Than Just a Chain
In the Crowd Rule Editor Graph, you're not limited to a single linear chain of rules. You can:
- Branch rules out from the Crowd object,
- Assign parallel rule paths to test different configurations,
- Combine rules that affect different parts of the character (e.g., height vs. clothing),
- Use weighting logic to influence how often certain rule branches are applied (coming soon in updates).
This gives you full flexibility to design dynamic, layered character variation logic.
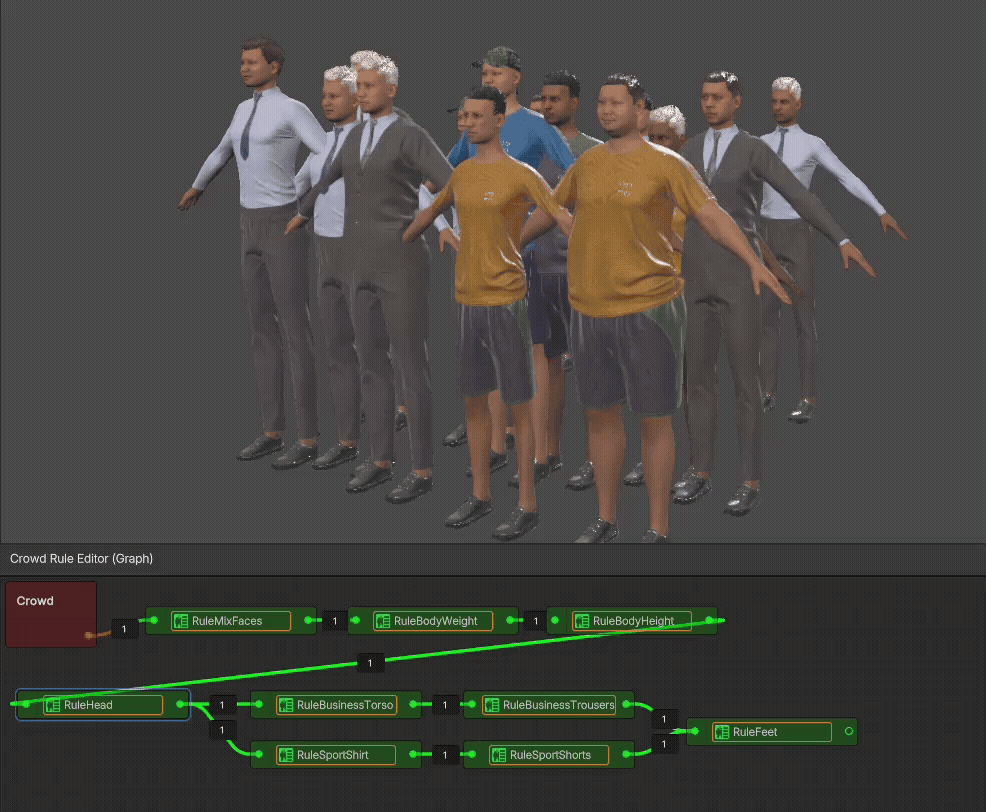
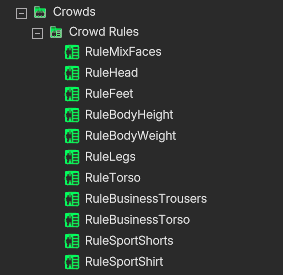
Crowd Rules: Not Just for Clothing
Many users start by using Crowd Rules to assign different garments (Deformables) like shirts or pants. But remember:
- You can also create Crowd Rules using Shapes, such as Tall, Heavy, Short, or custom-made shapes.
- This allows you to control body proportions, head shape, and posture across the Crowd.
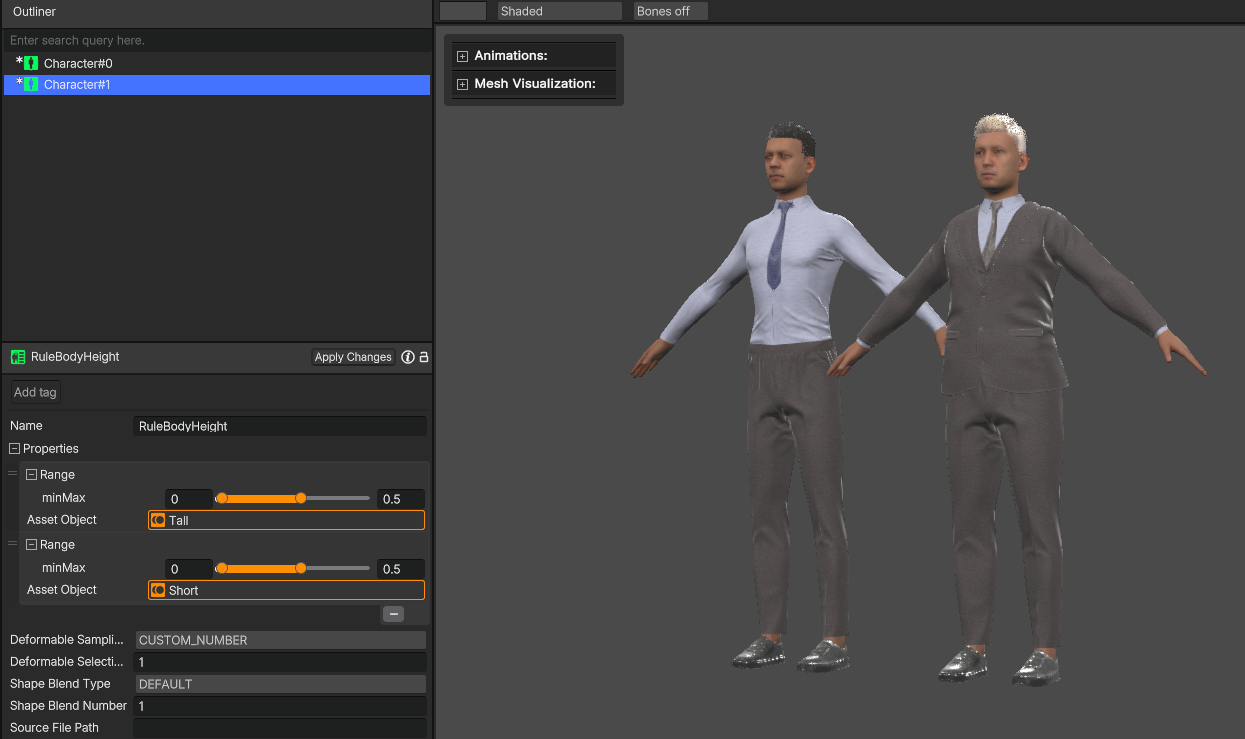
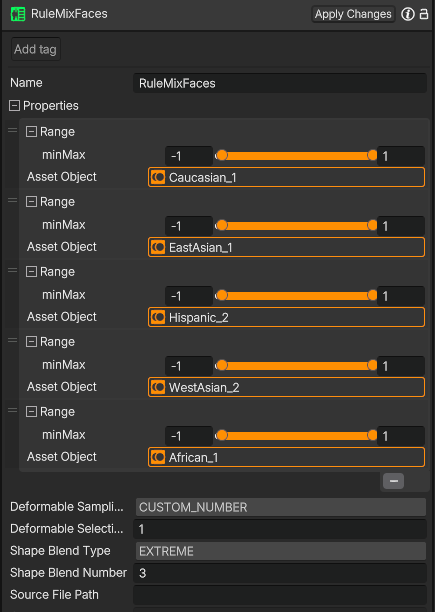
Tip: For basic body shape variations, use the DEFAULT blend type with 1 or 2 shapes. In this mode, each shape is treated as an independent delta blendshape. For more complex blending, like generating facial variations, use the EXTREME blend type: it dynamically combines the selected shapes to generate new deltas on the fly, reducing distortion and avoiding artifacts caused by adding multiple correlated shapes. This mode also enables negative weights, with a default weight range of (–1, 1), allowing for more varied and expressive combinations. In this case, using more shapes and setting the blend number to 3 is usually recommended.
Tip: Combine Rules for Maximum Effect
Want a truly varied crowd?
- Add rules for: Facial Shape, Height, Weight, Garments or others.
- Randomize!
- Tweak individual characters afterward if needed.
Result: A believable, heterogeneous group of characters ready to populate your world.
Updated 9 months ago