How to Export from Popul8 Express
Once your models, characters, or crowds are ready in Popul8 Express, exporting them is easy.
Depending on what you need next, a base model, a fully dressed character, or an entire crowd, there are several export paths available.
Below is a step-by-step guide for the most common export scenarios.
🎬 Check our Tutorial Video:
Exporting a Single Model
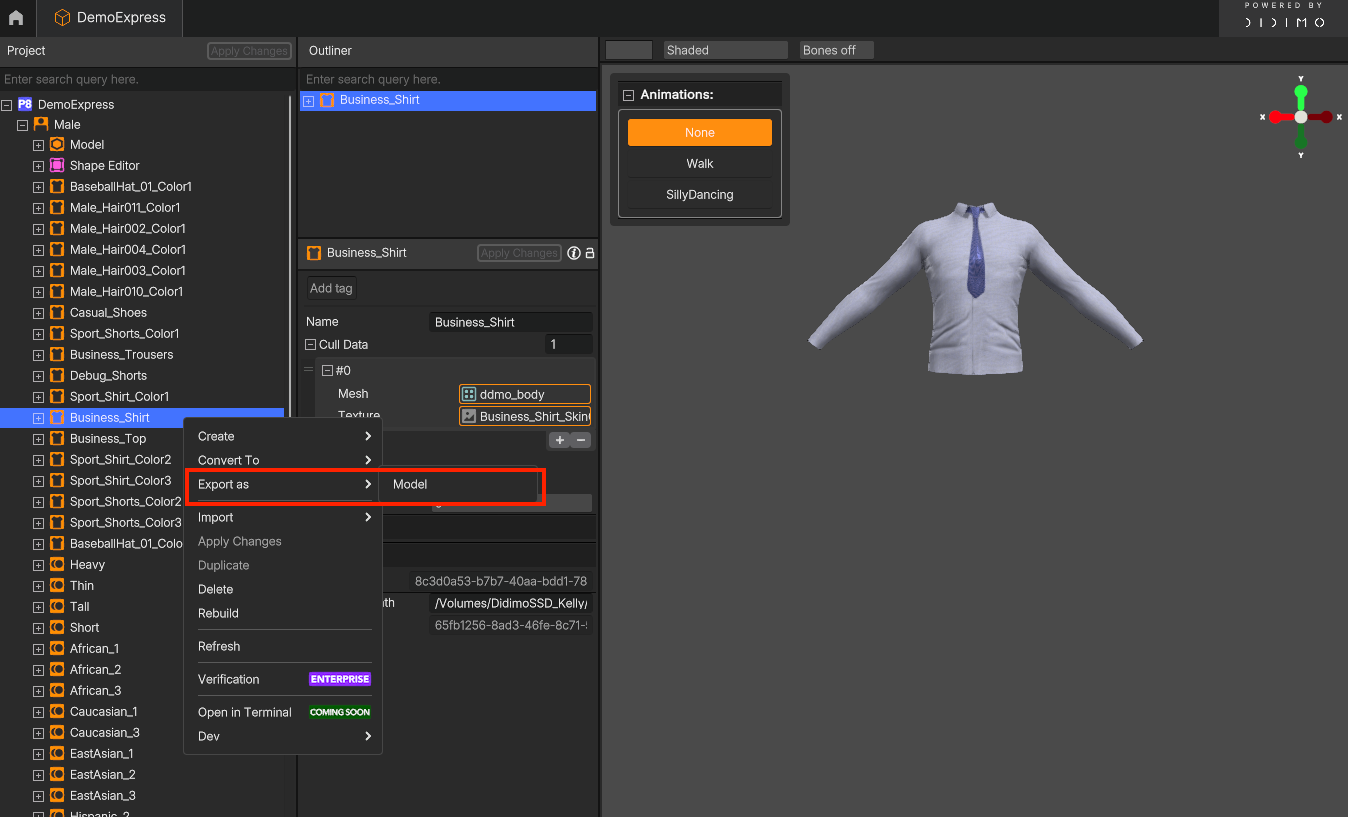
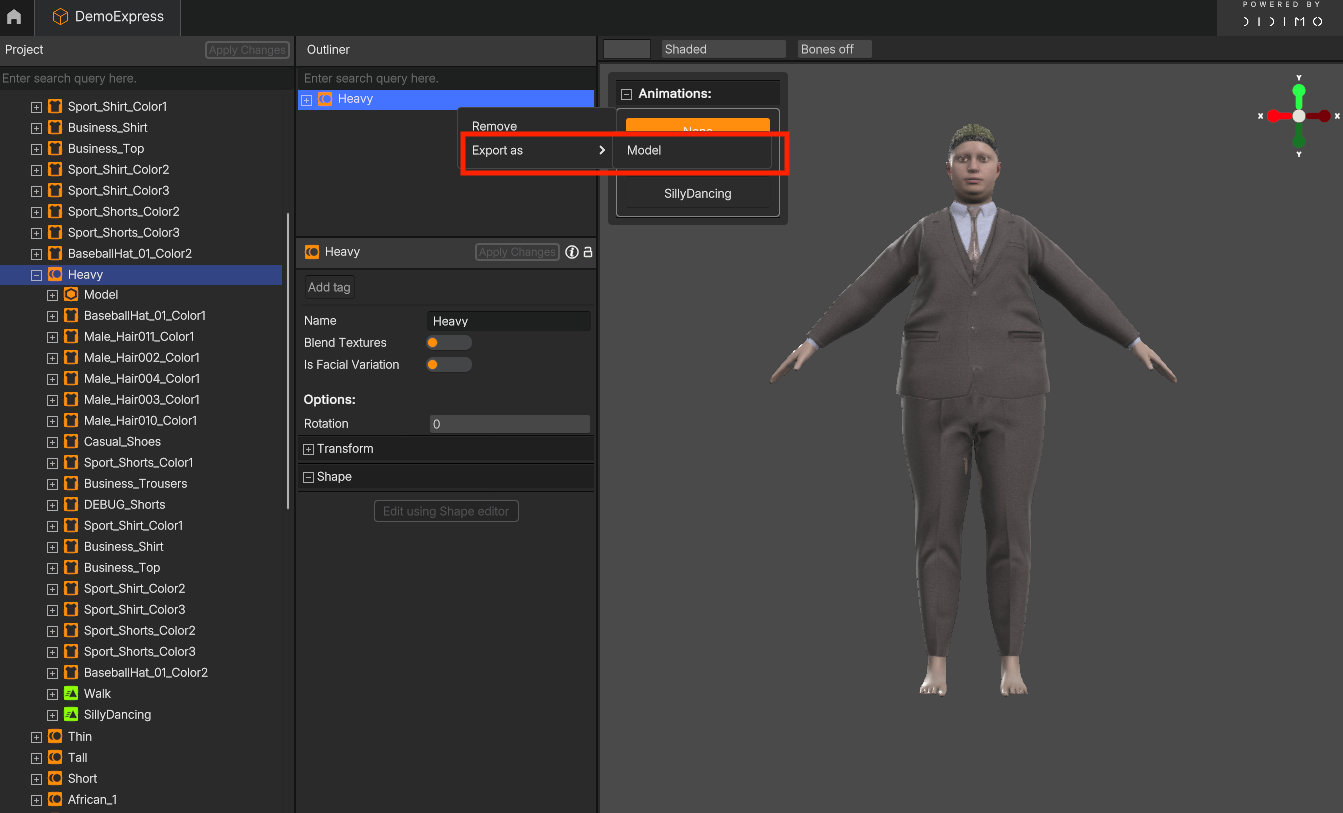
- In the project tree, locate the model you want to export (e.g., a Template, Shape, or Deformable)
- Right-click the item and choose:
Export As → Model
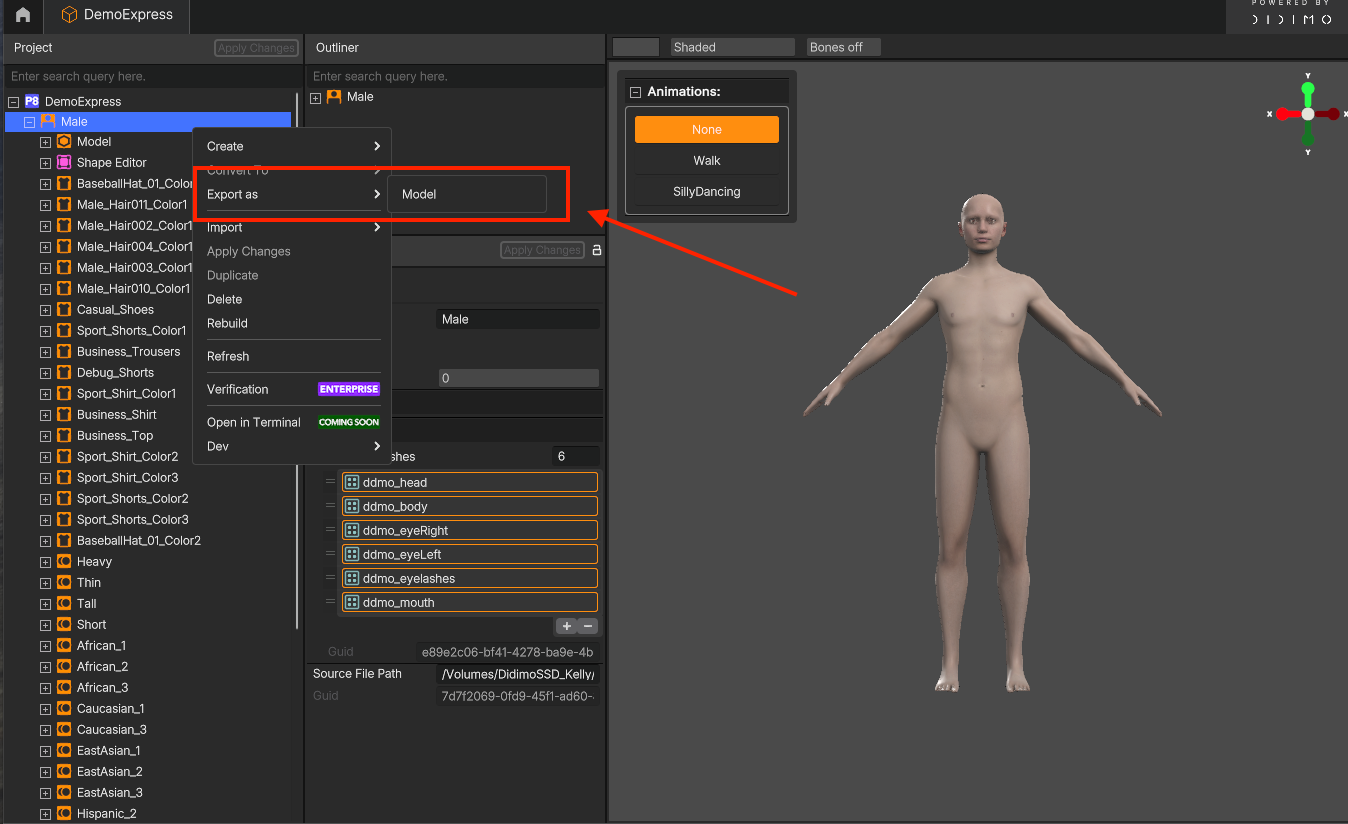
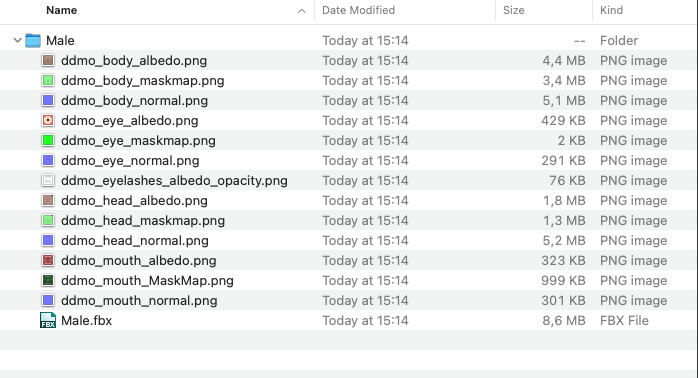
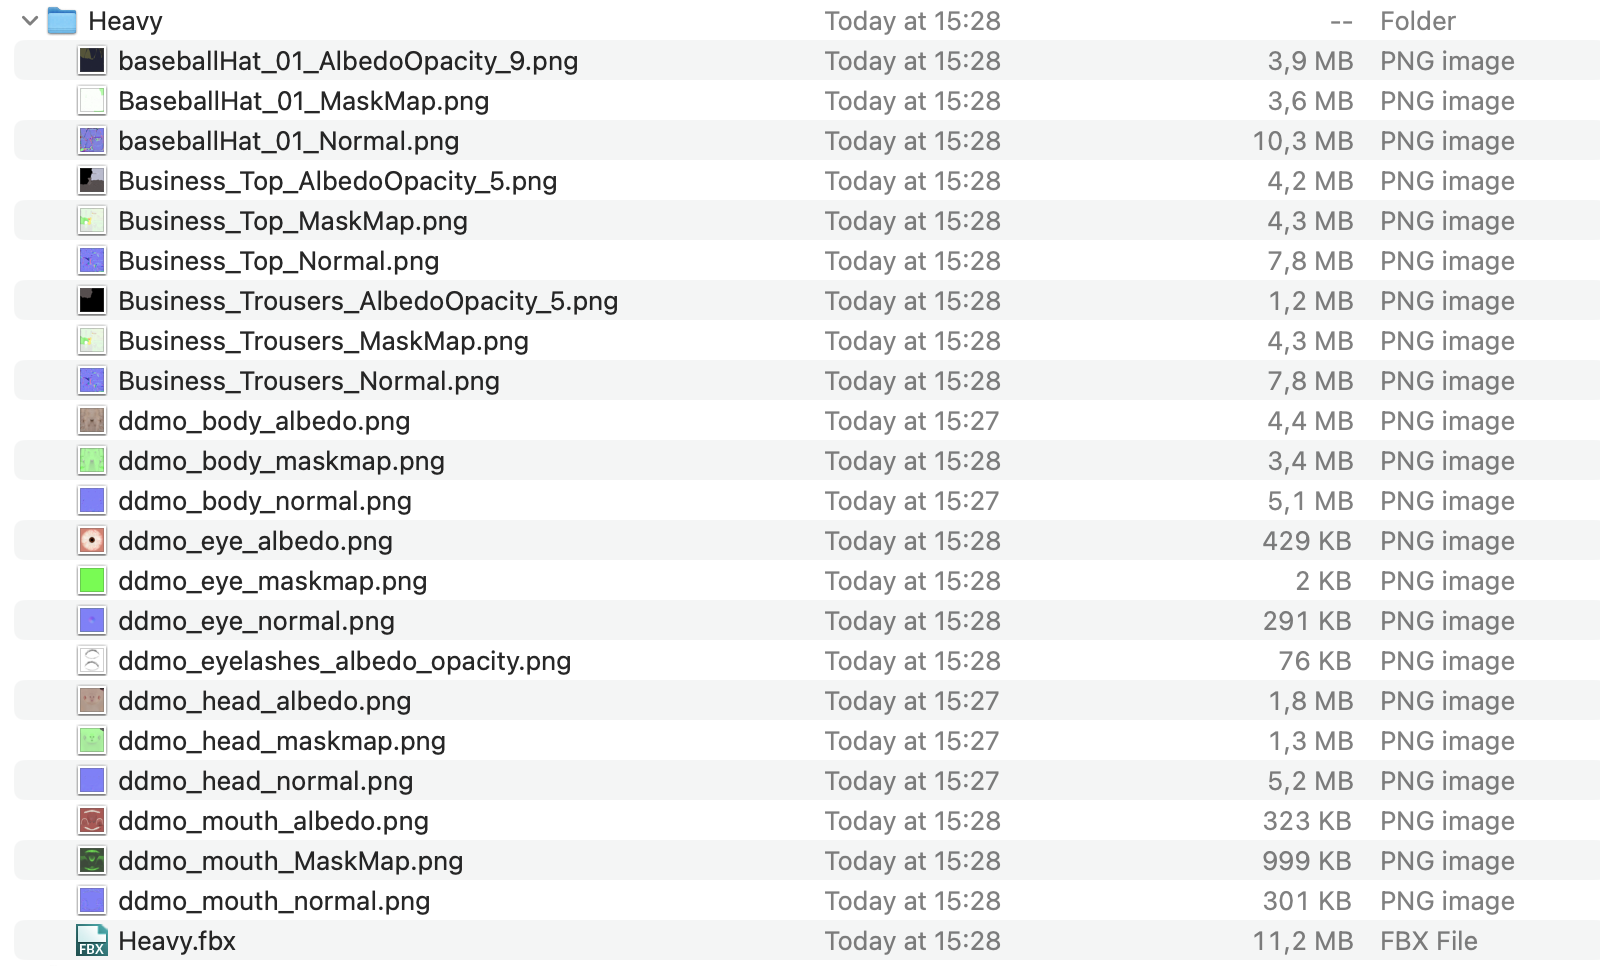
- Select the destination folder where you want to save the files
- Once complete, the folder will contain the model along with any linked texture files
You can use this method to export:
- Templates (Base Character models)
- Shapes (Character Variations)
- Deformables (e.g., clothing, accessories, hairs)

Exporting a Full Character with Deformables
To export a complete character with its assigned Deformables:
- Drag the Shape and all Deformables you want to include, into the Outliner
- In the Outliner, right-click the Shape and choose: Export As → Model
- Choose the destination folder
The export will include:
- The base model
- All visible/active Deformables
- All associated texture maps
Tip: This is ideal when you need a fully dressed, ready-to-use character.
Exporting Individual Textures (e.g., from Imported Assets)
To export a specific texture from a Template:
- Navigate to: Imported Assets → Male → Template
- Locate the texture (e.g., ddmo_head_maskmap)
- Right-click, Export As → Texture
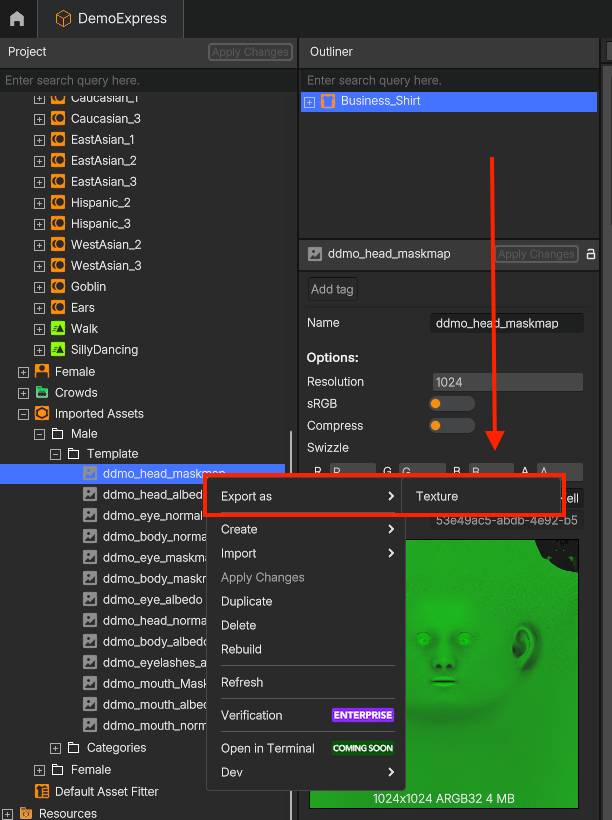
- Choose the export folder
Exporting a Crowd or Individual Characters from a Crowd
You have two options:
Exporting an Entire Crowd:
In the project tree, go to: Crowds → [Your Crowd Name]
- Right-click the Crowd object
- Choose: Export As → Crowd.
- Choose the export folder
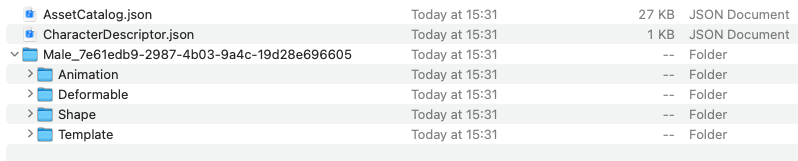
Info: The export will include:
- All generated characters
- Their assigned Shapes, Deformables, and textures
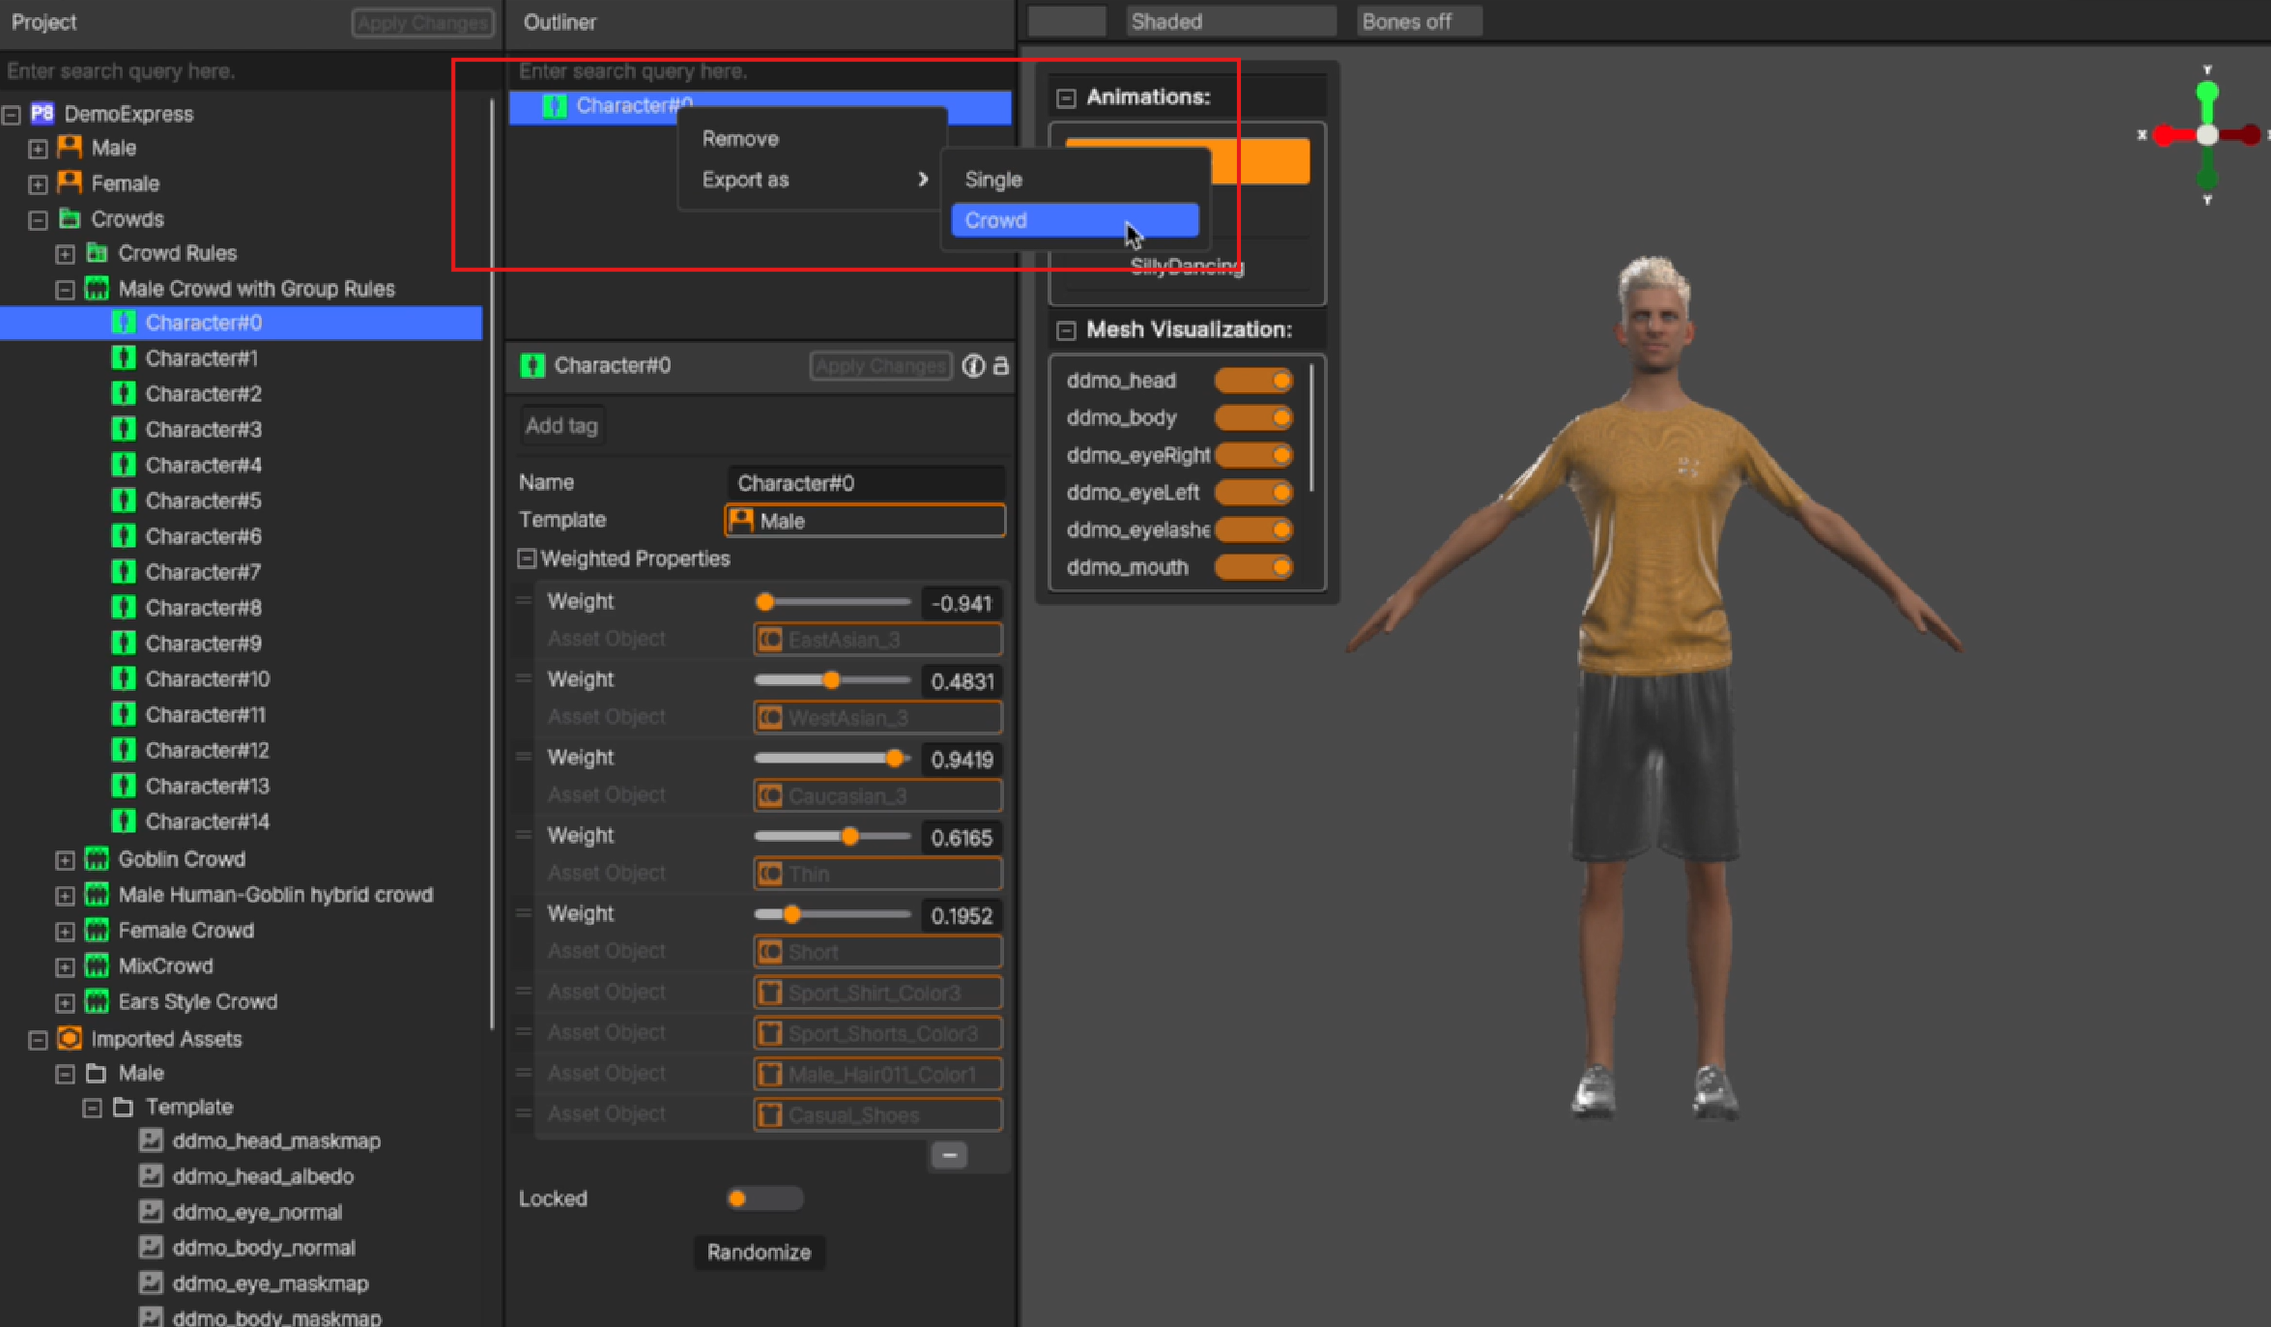
Exporting a Single Character from the Crowd:
In the project tree, go to: Crowds → [Your Crowd Name]
- Find the specific character you want to export (e.g., Character#0)
- Right-click: Export As → Single
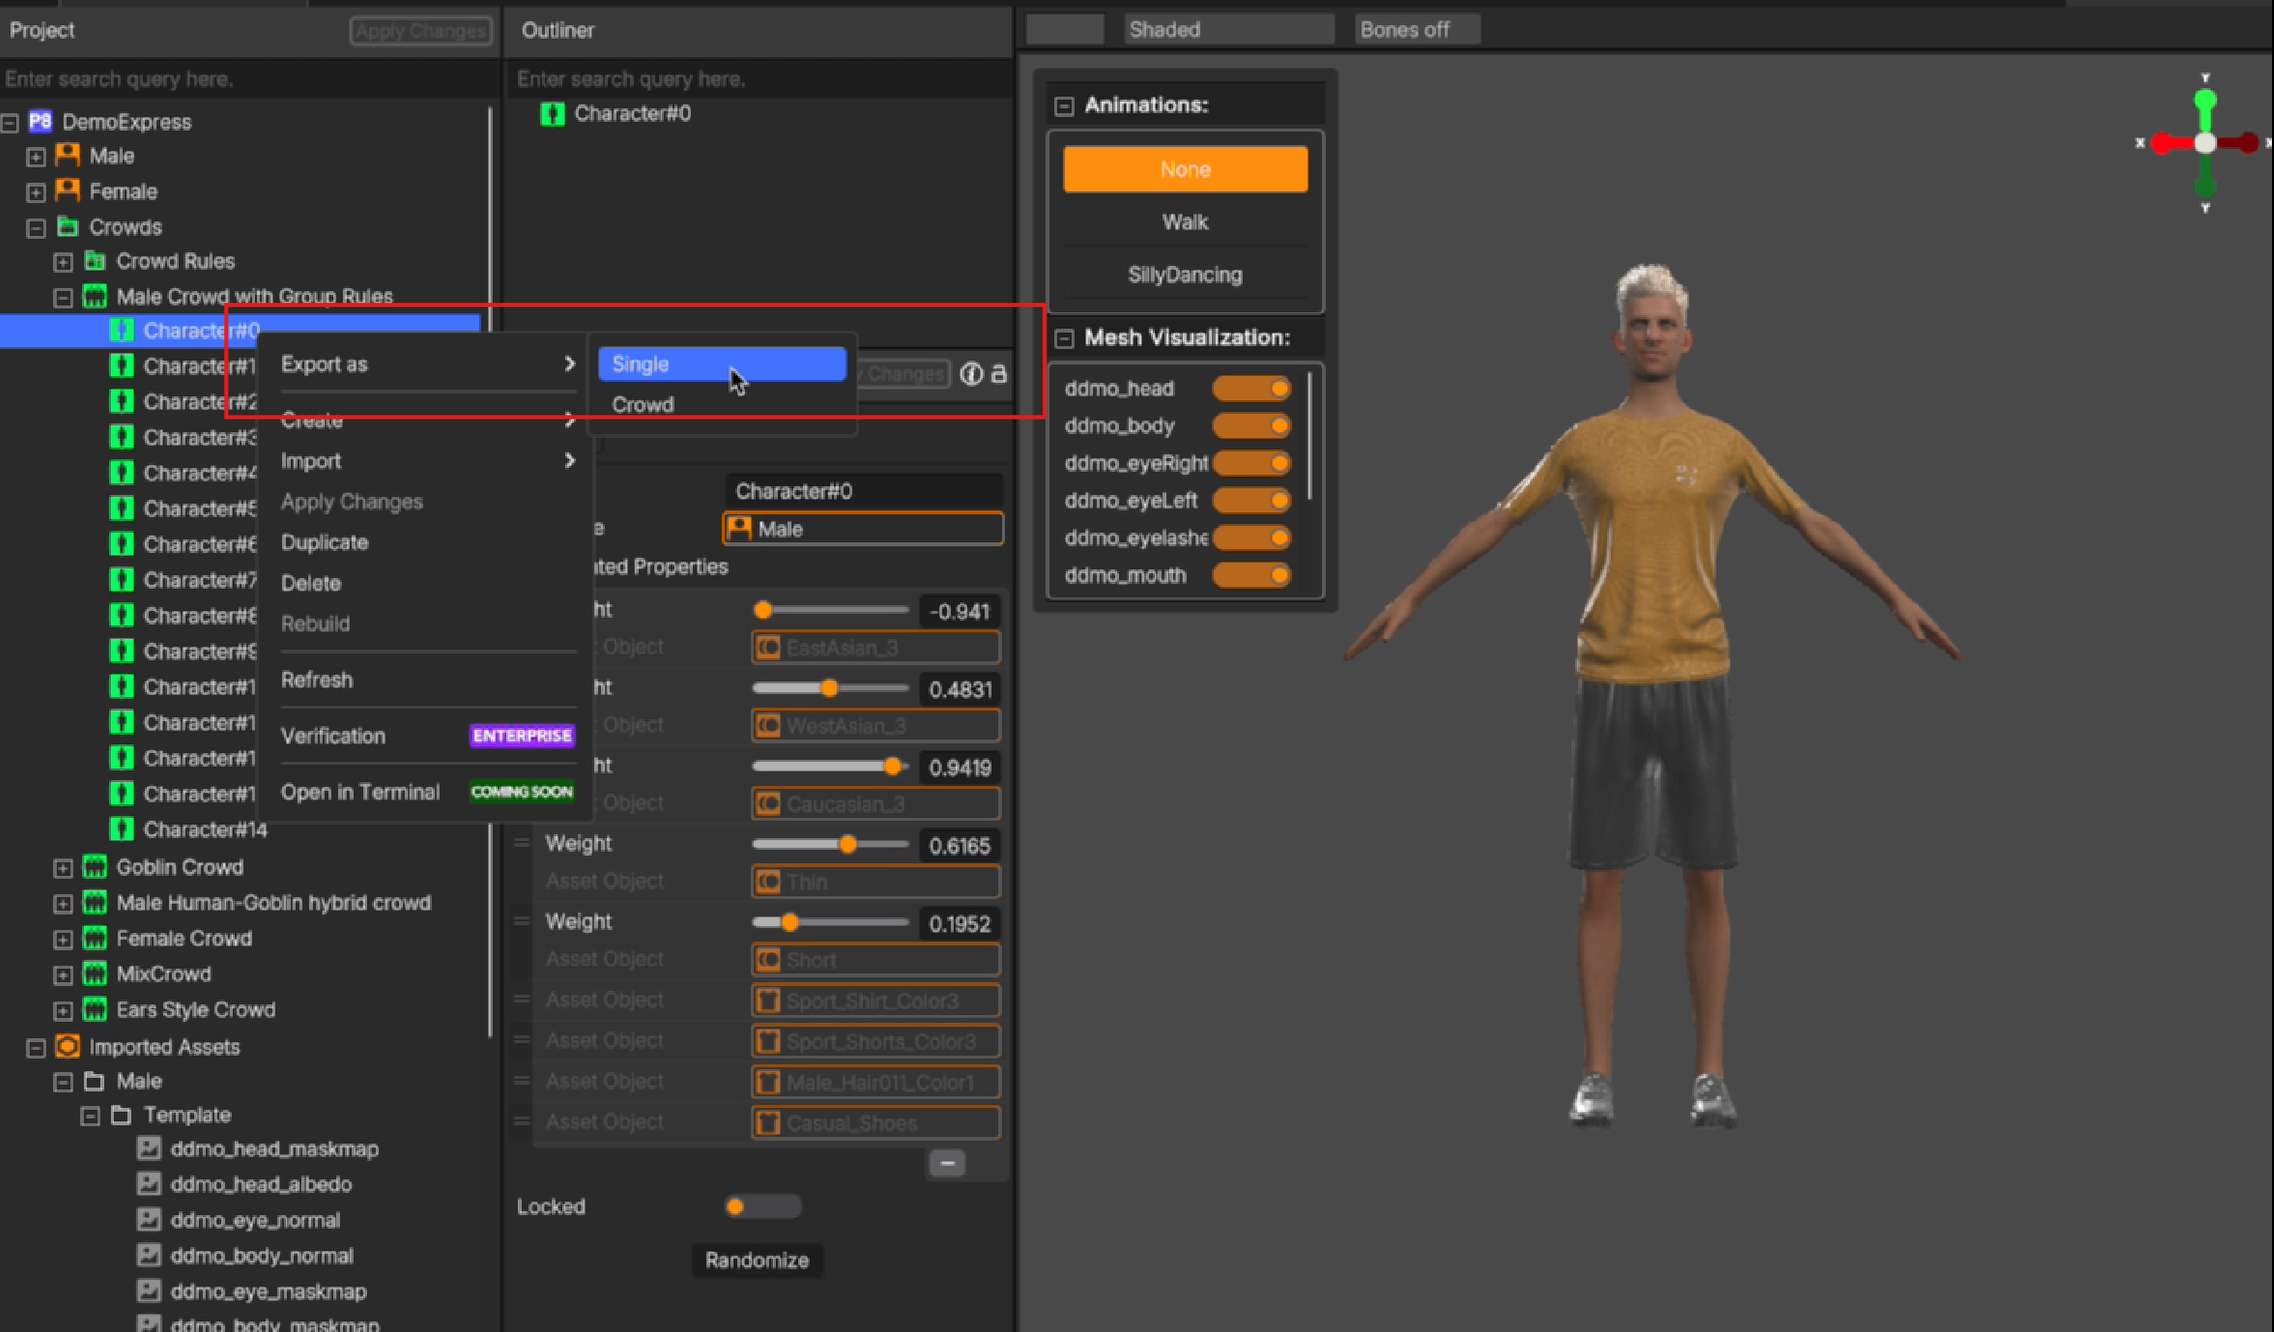
- Choose the export folder
- You can check export folder
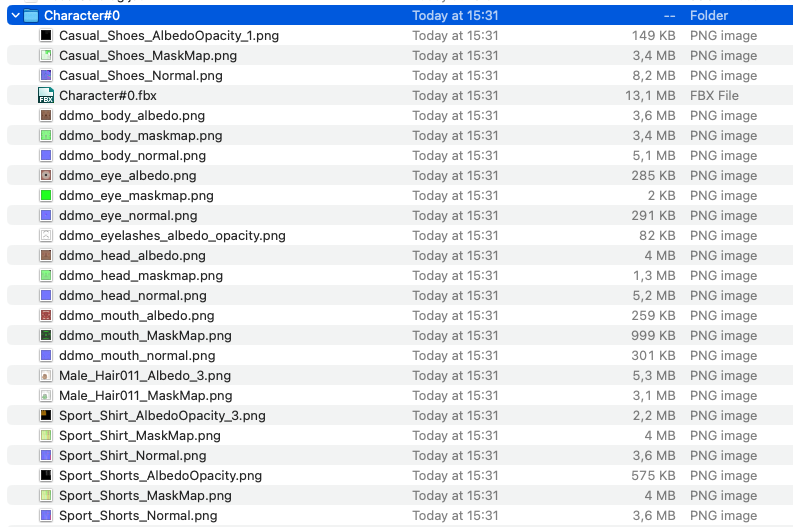
Info: You’ll get a standalone export of that selected character.
Best Practices
- Export everything into a dedicated working folder to stay organized.
- Make sure all Deformables are properly assigned and visible in the Outliner before exporting.
- Exported models can be imported into engines like Unity or Unreal.
Not sure how to export a specific asset?
Just locate the item in the project tree, right-click, and look for the Export As option.
Most components can be saved individually as models or resources.
Updated 9 months ago