Shape Editor: Step by Step Guide
What is the Shape Editor?
The Shape Editor lets you create new character variations (Shapes) based on an existing Template.
You can manually adjust or randomly generate unique silhouettes, faces, and body proportions, all while ensuring full technical compatibility with the original character setup.
🎬 Check our Tutorial Video:
1. Download Shape Editor Package
Popul8 offers downloadable resources to assist in building your Shape Editor. These include predefined shapes and settings designed to simplify and accelerate the creation process.
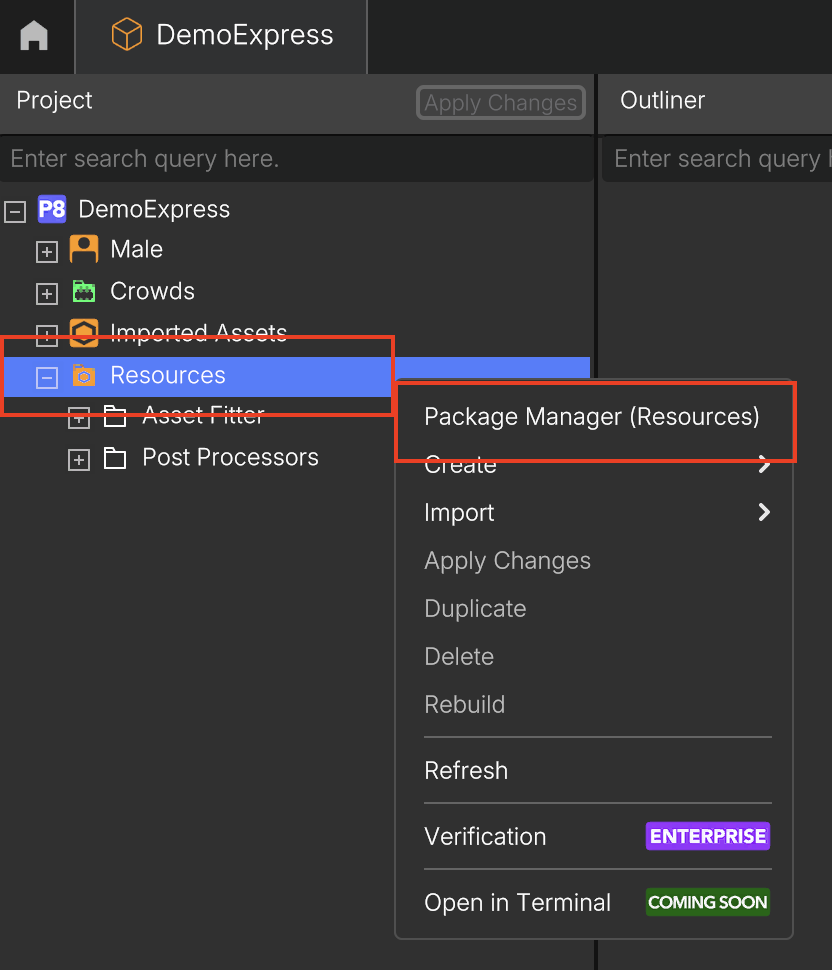
- Right-click on Resource folder → select Package Manager (Resources)
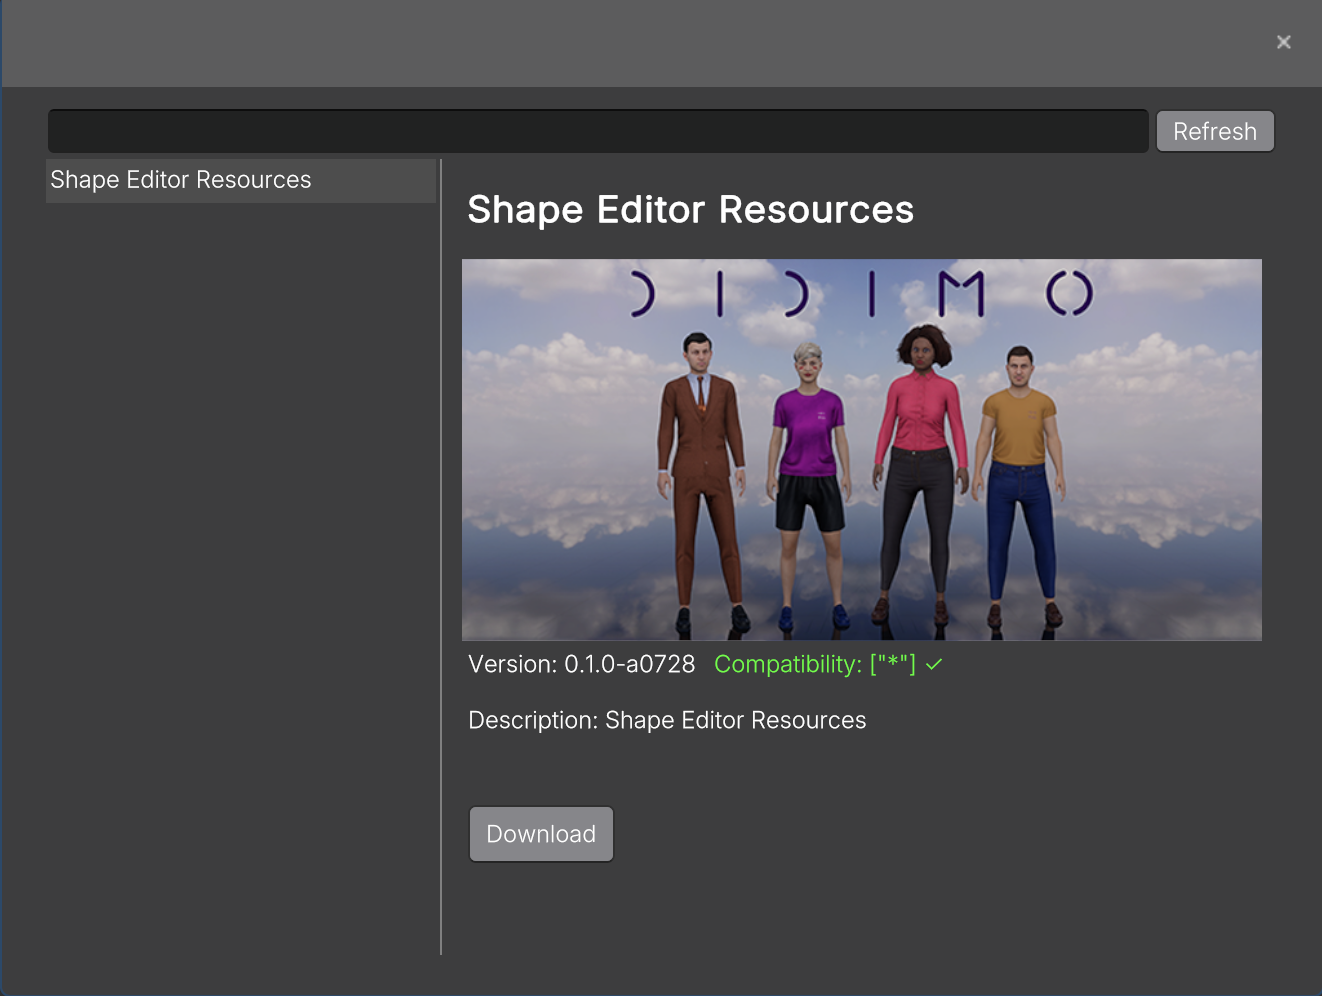
- A new window will be displayed with all the available downloadable resources. Select _Shape Editor Resources _and Press Download
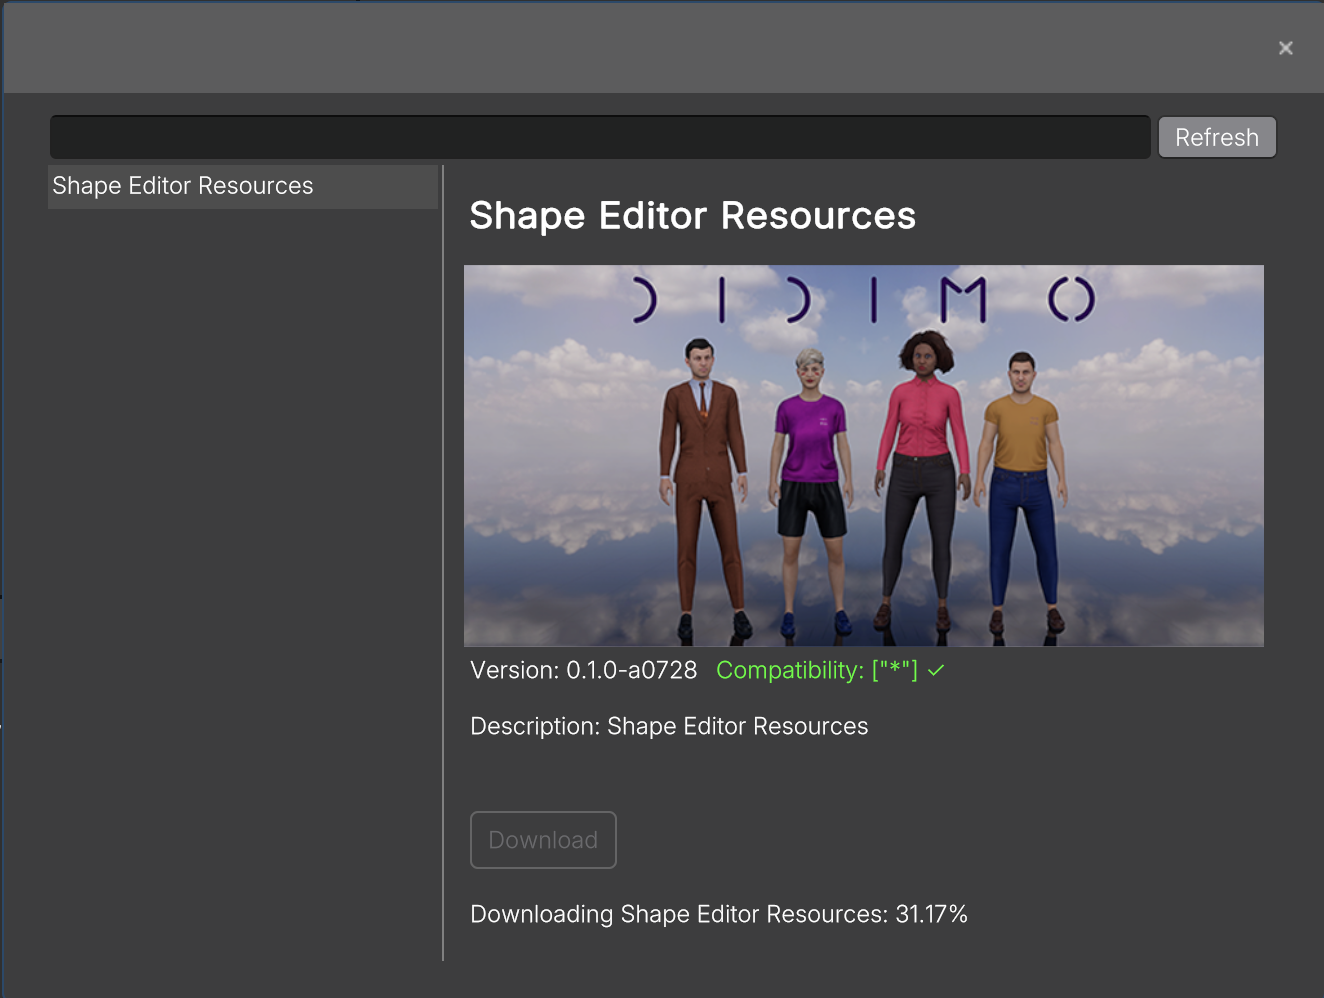
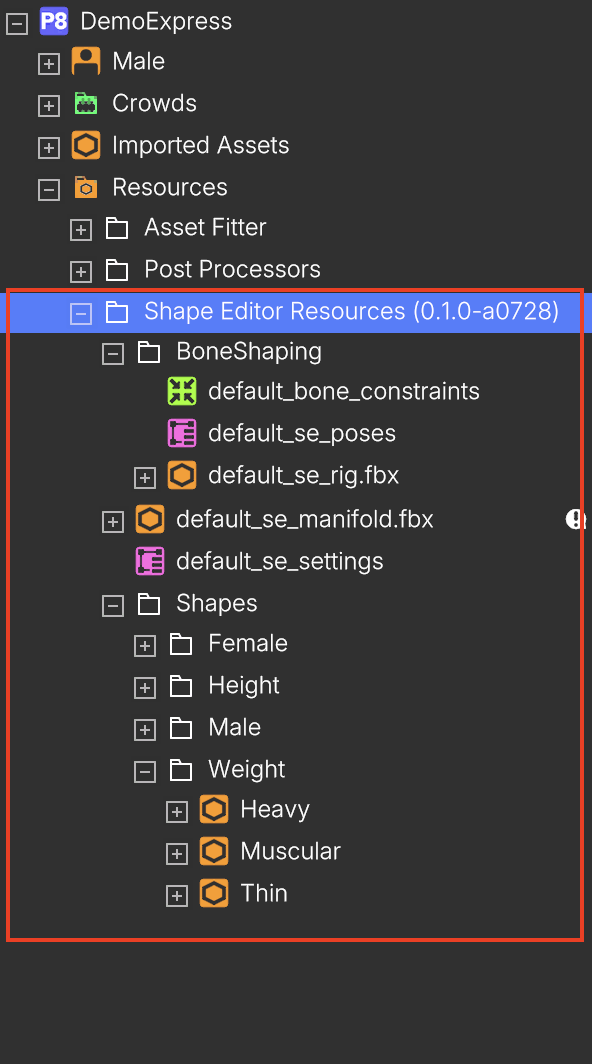
Once the process is complete. A new folder will be displayed under the Resources
2. How to Create a Shape Editor and Your First Shape
2.1. Create the Shape Editor
- Right-click on your Template (e.g., Male) → select Create → Shape Editor
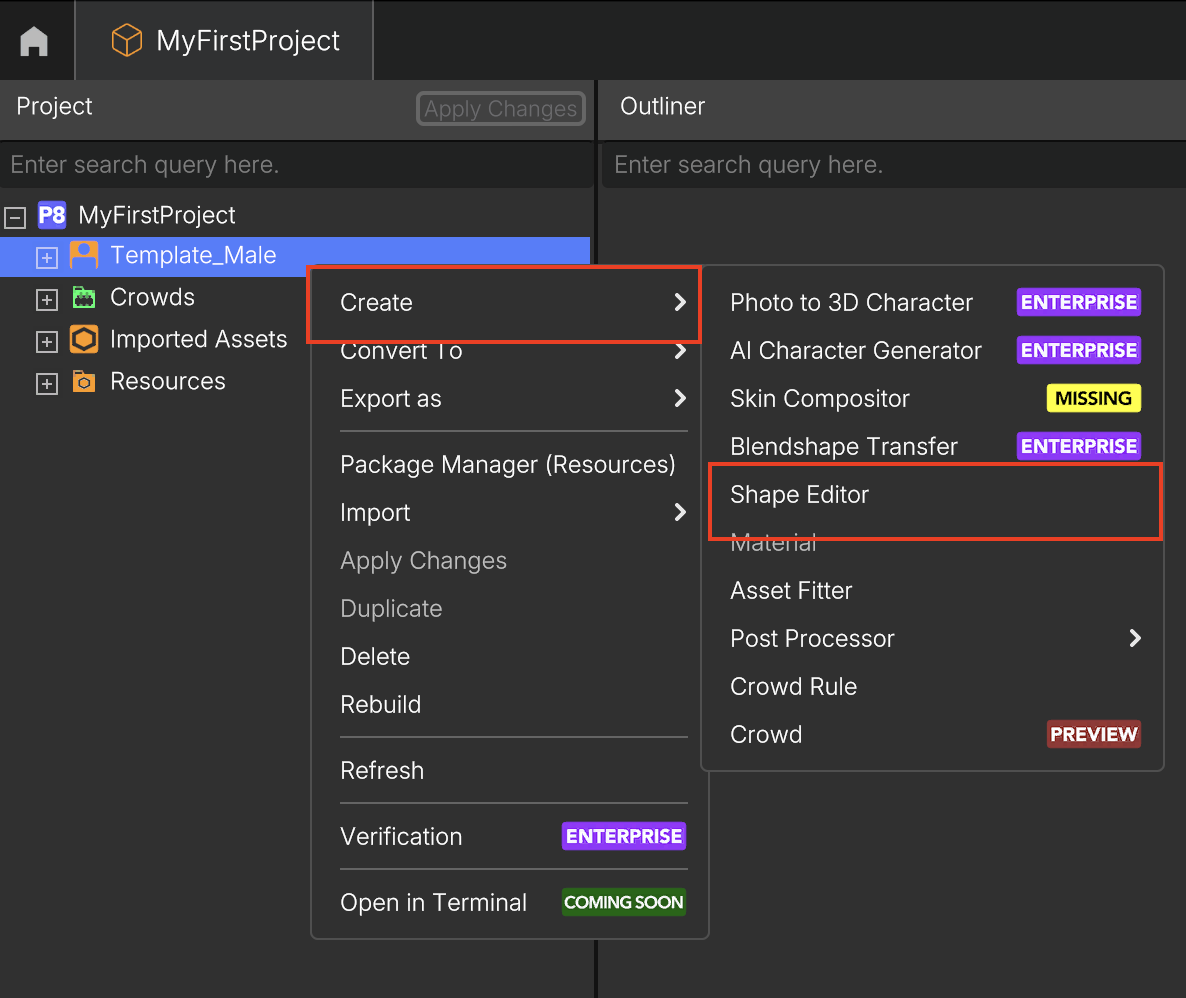
- A new Shape Editor node will appear in the project tree, nested under the associated Template
2.2. Add a Manifold
Meshes used when source and target Templates don't share topology.
Popul8 Express provides a Default Manifold that can be exported in order to be wrapped around the target template via a third party software, thus creating a Target Manifold.
Here You can find tutorial How to Create a Manifold for your Base Character
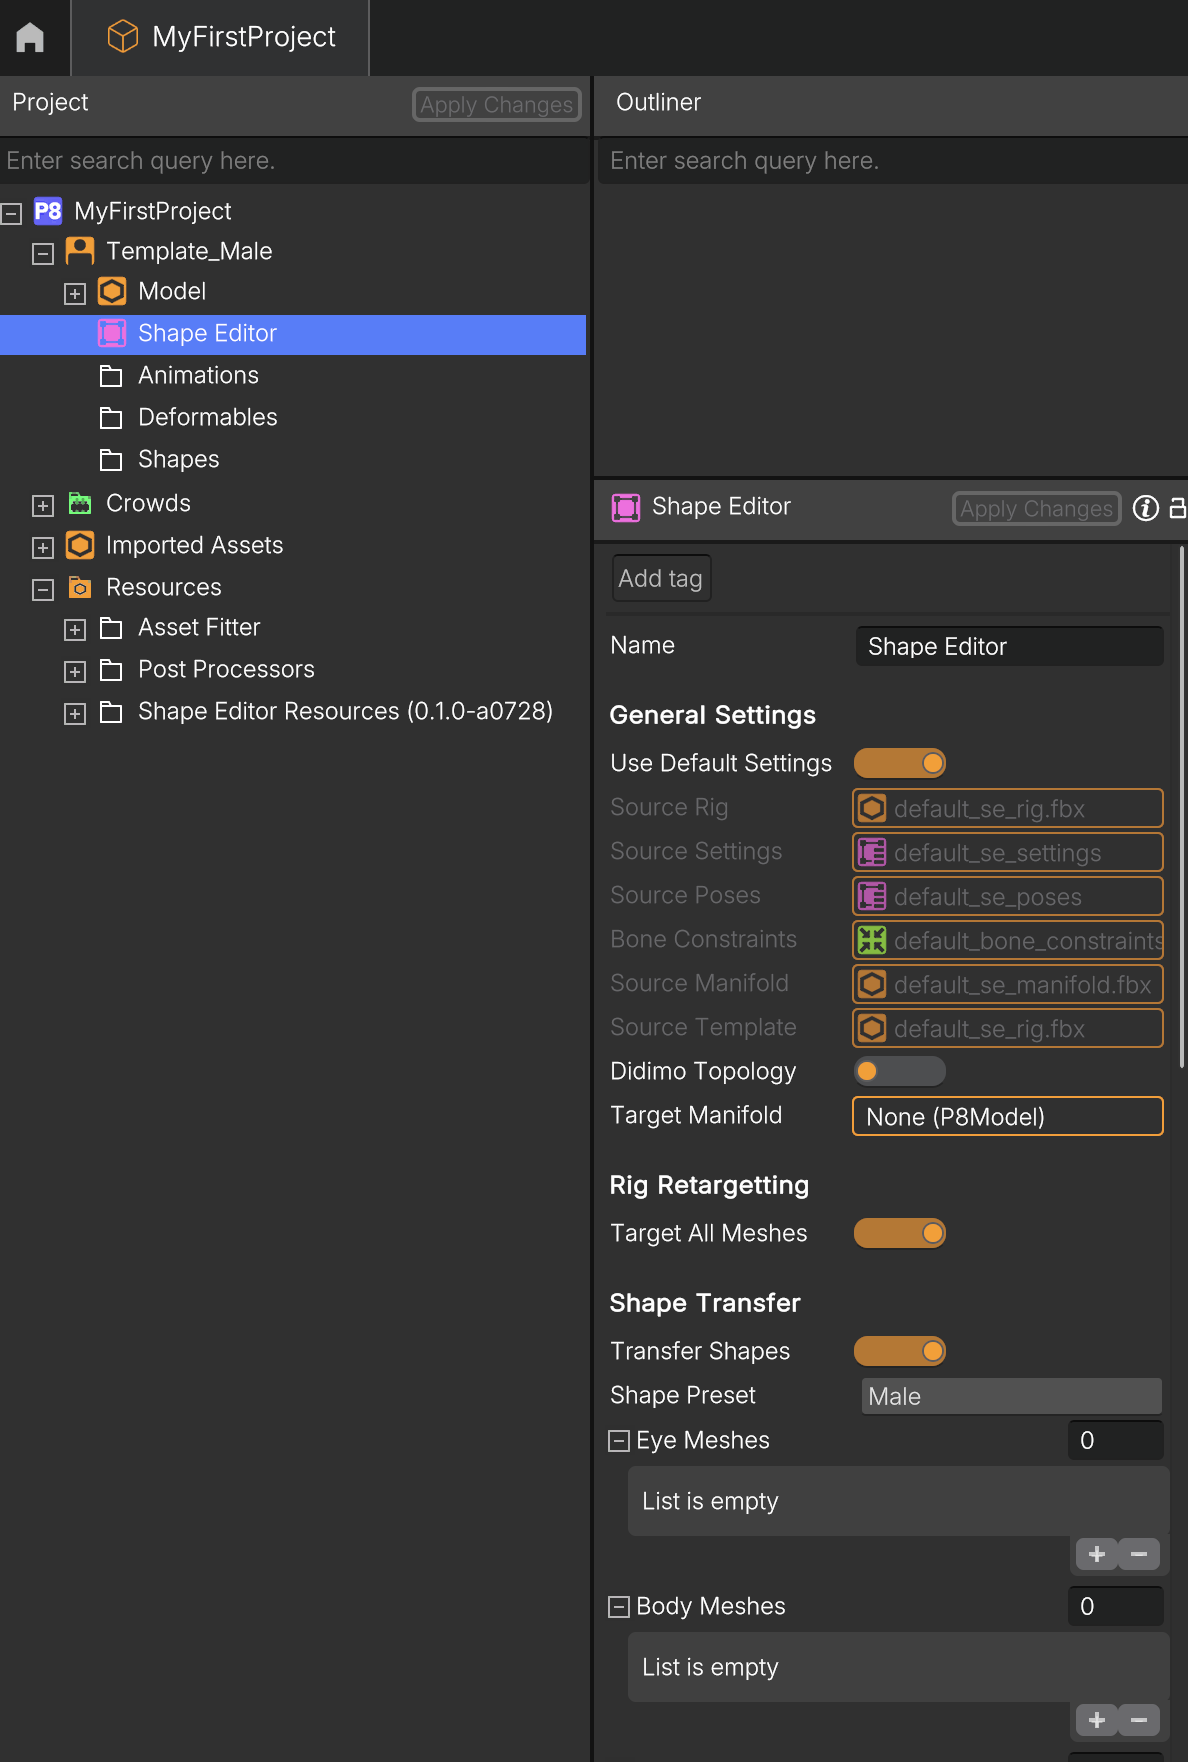
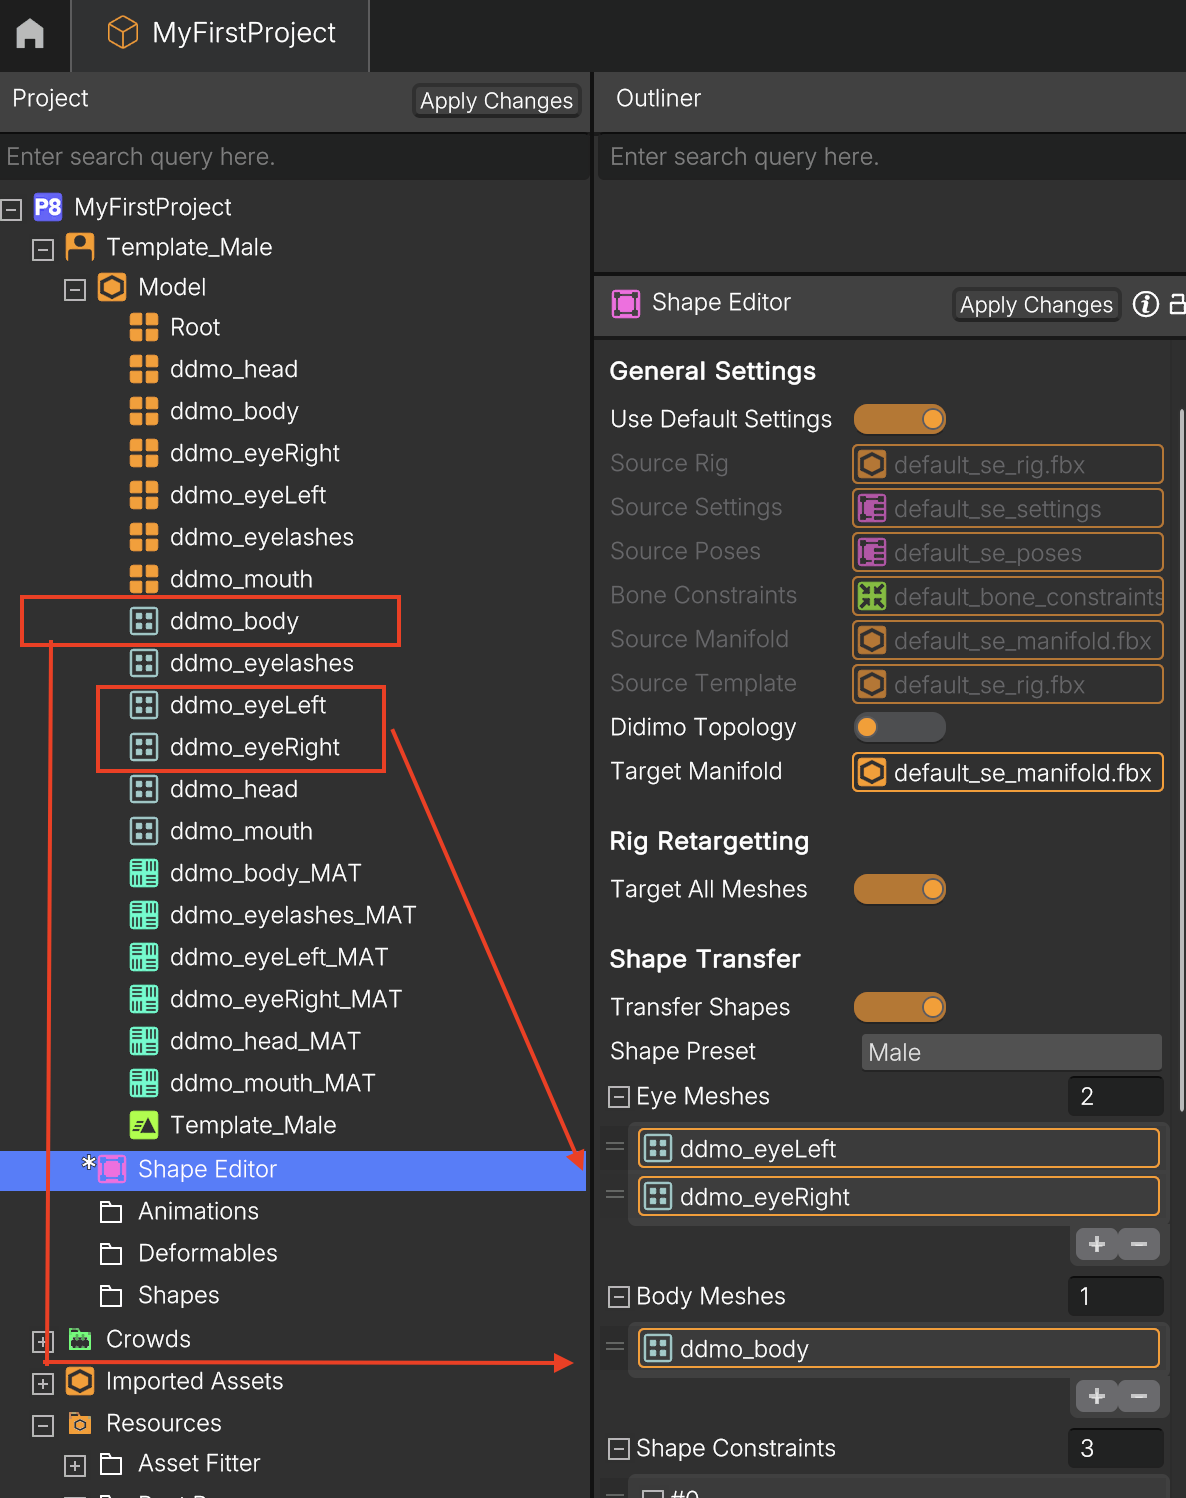
- Click the Shape Editor node in the project tree to select it
- Go to the Resources
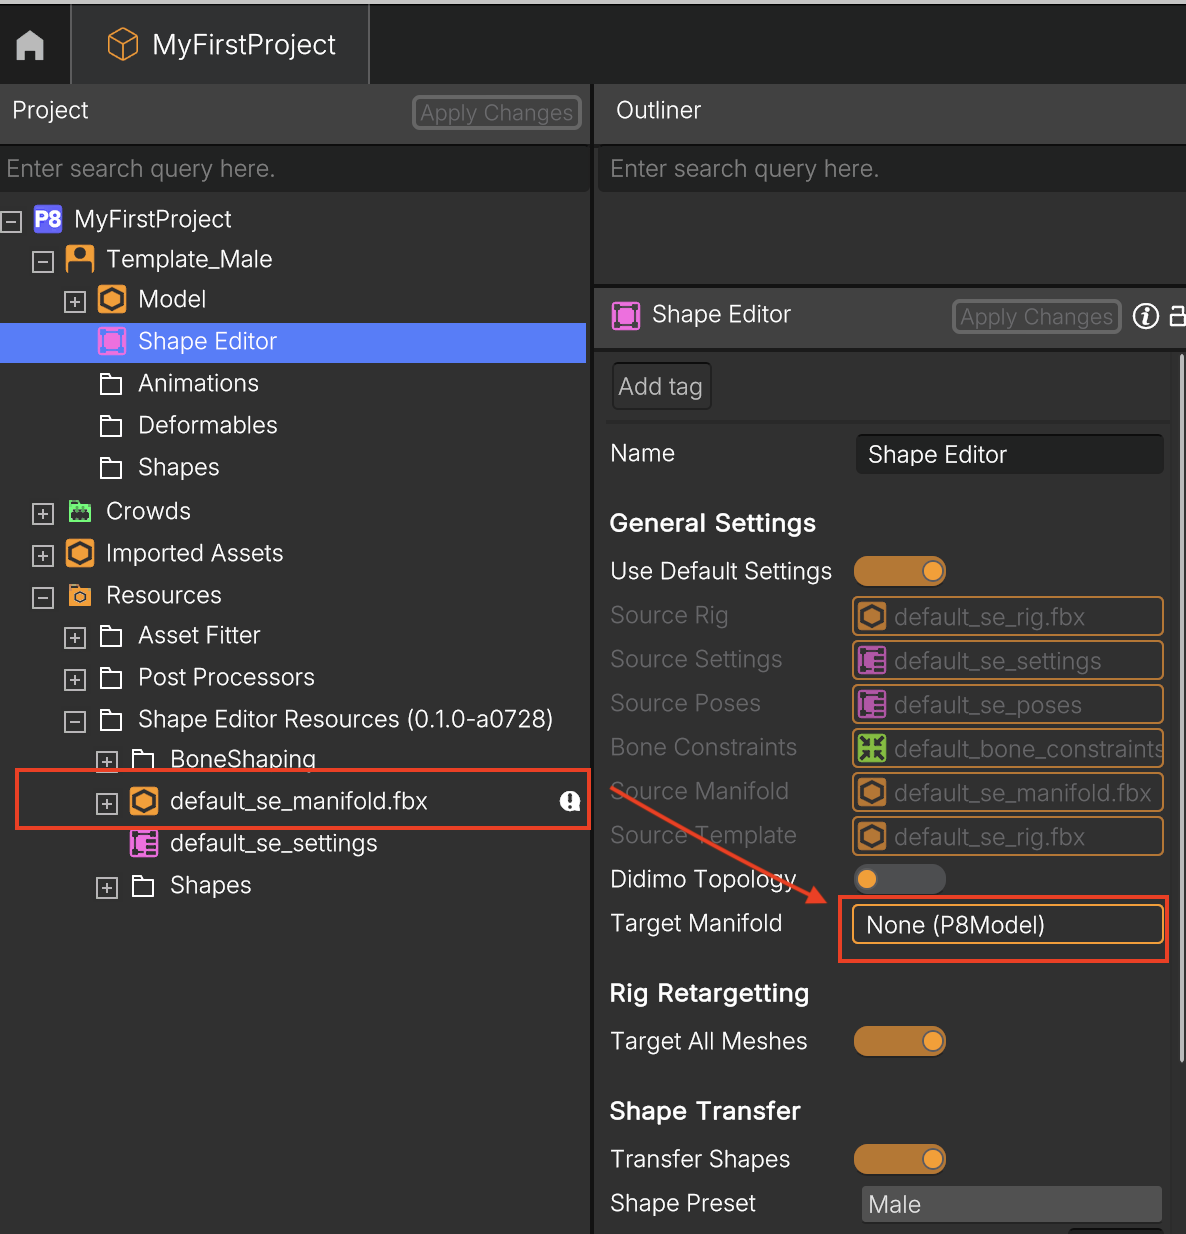
- Locate the file named default_se_manifold
→ Resources → Shape Editor → default_se_manifold - Drag and drop default_se_manifold into the Target Manifold field inside the Shape Editor panel.
If you are using a different template with a different topology, make sure that a manifold version of your template is properly imported.
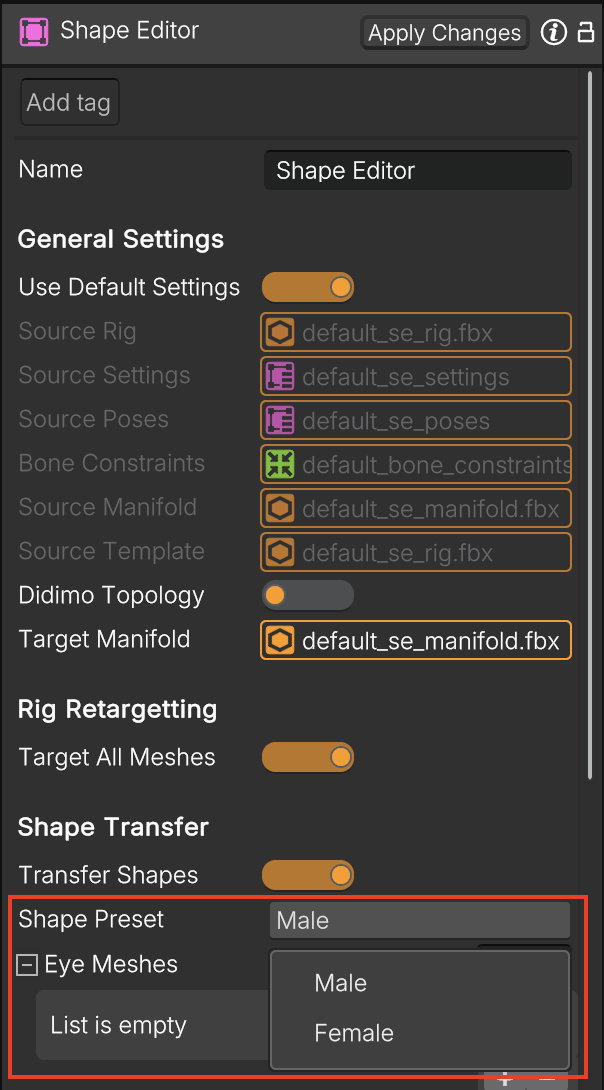
- Optionally, select one of the available Shape Presets (Male or Female)
- If applicable, drag and drop the eyes and body meshes. Adding these meshes will help ensure better results and maintain the alignment of the eyes and body mesh according to your template
- Click Apply Changes
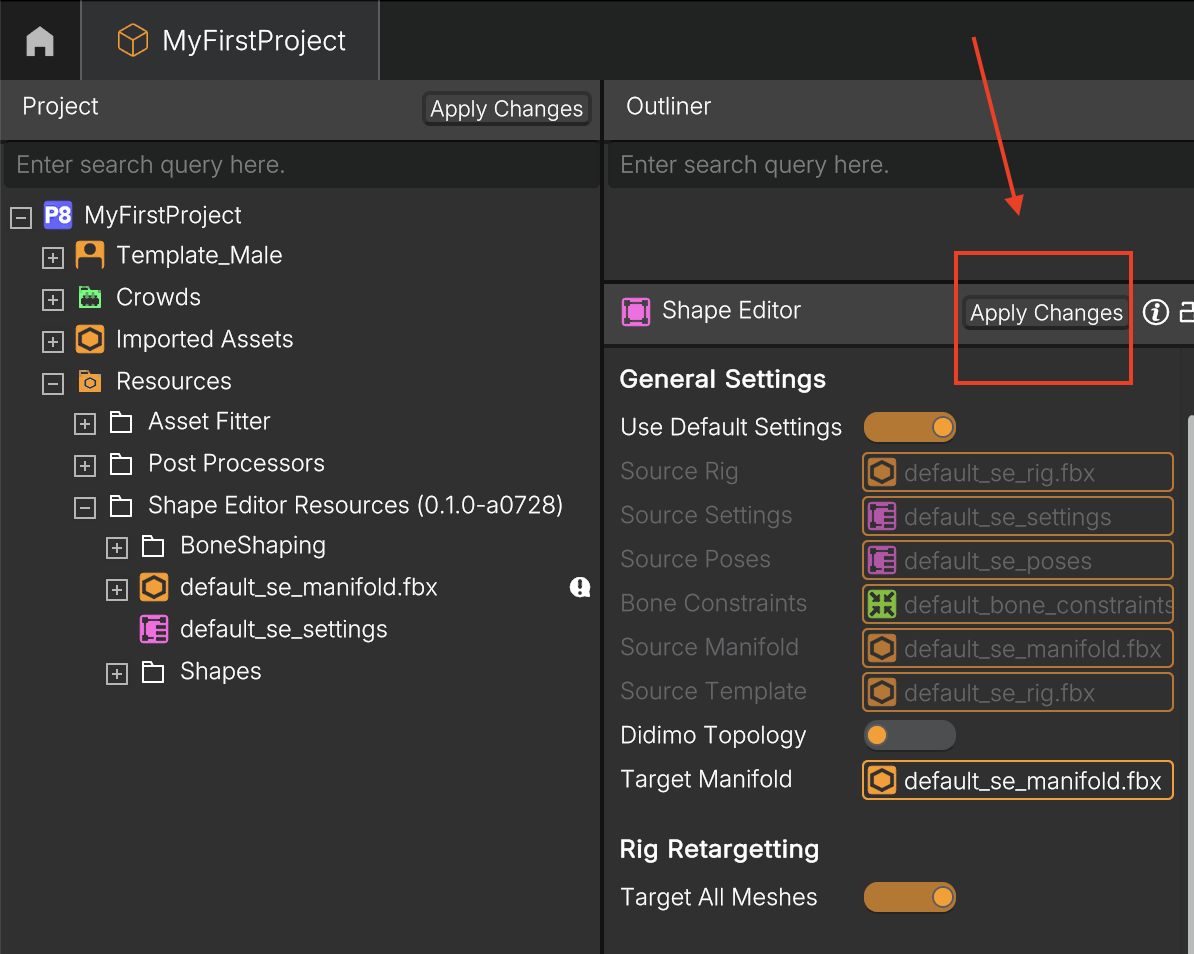
Info: Popul8 will generate a new Shape Editor Rig. This may take a few moments.
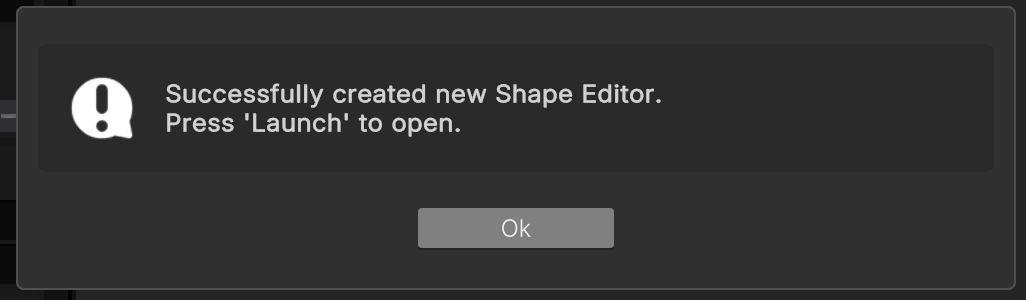
Once the process is complete, you’ll receive confirmation, and additional options will appear under the Shape Editor node.
2.3. Preview
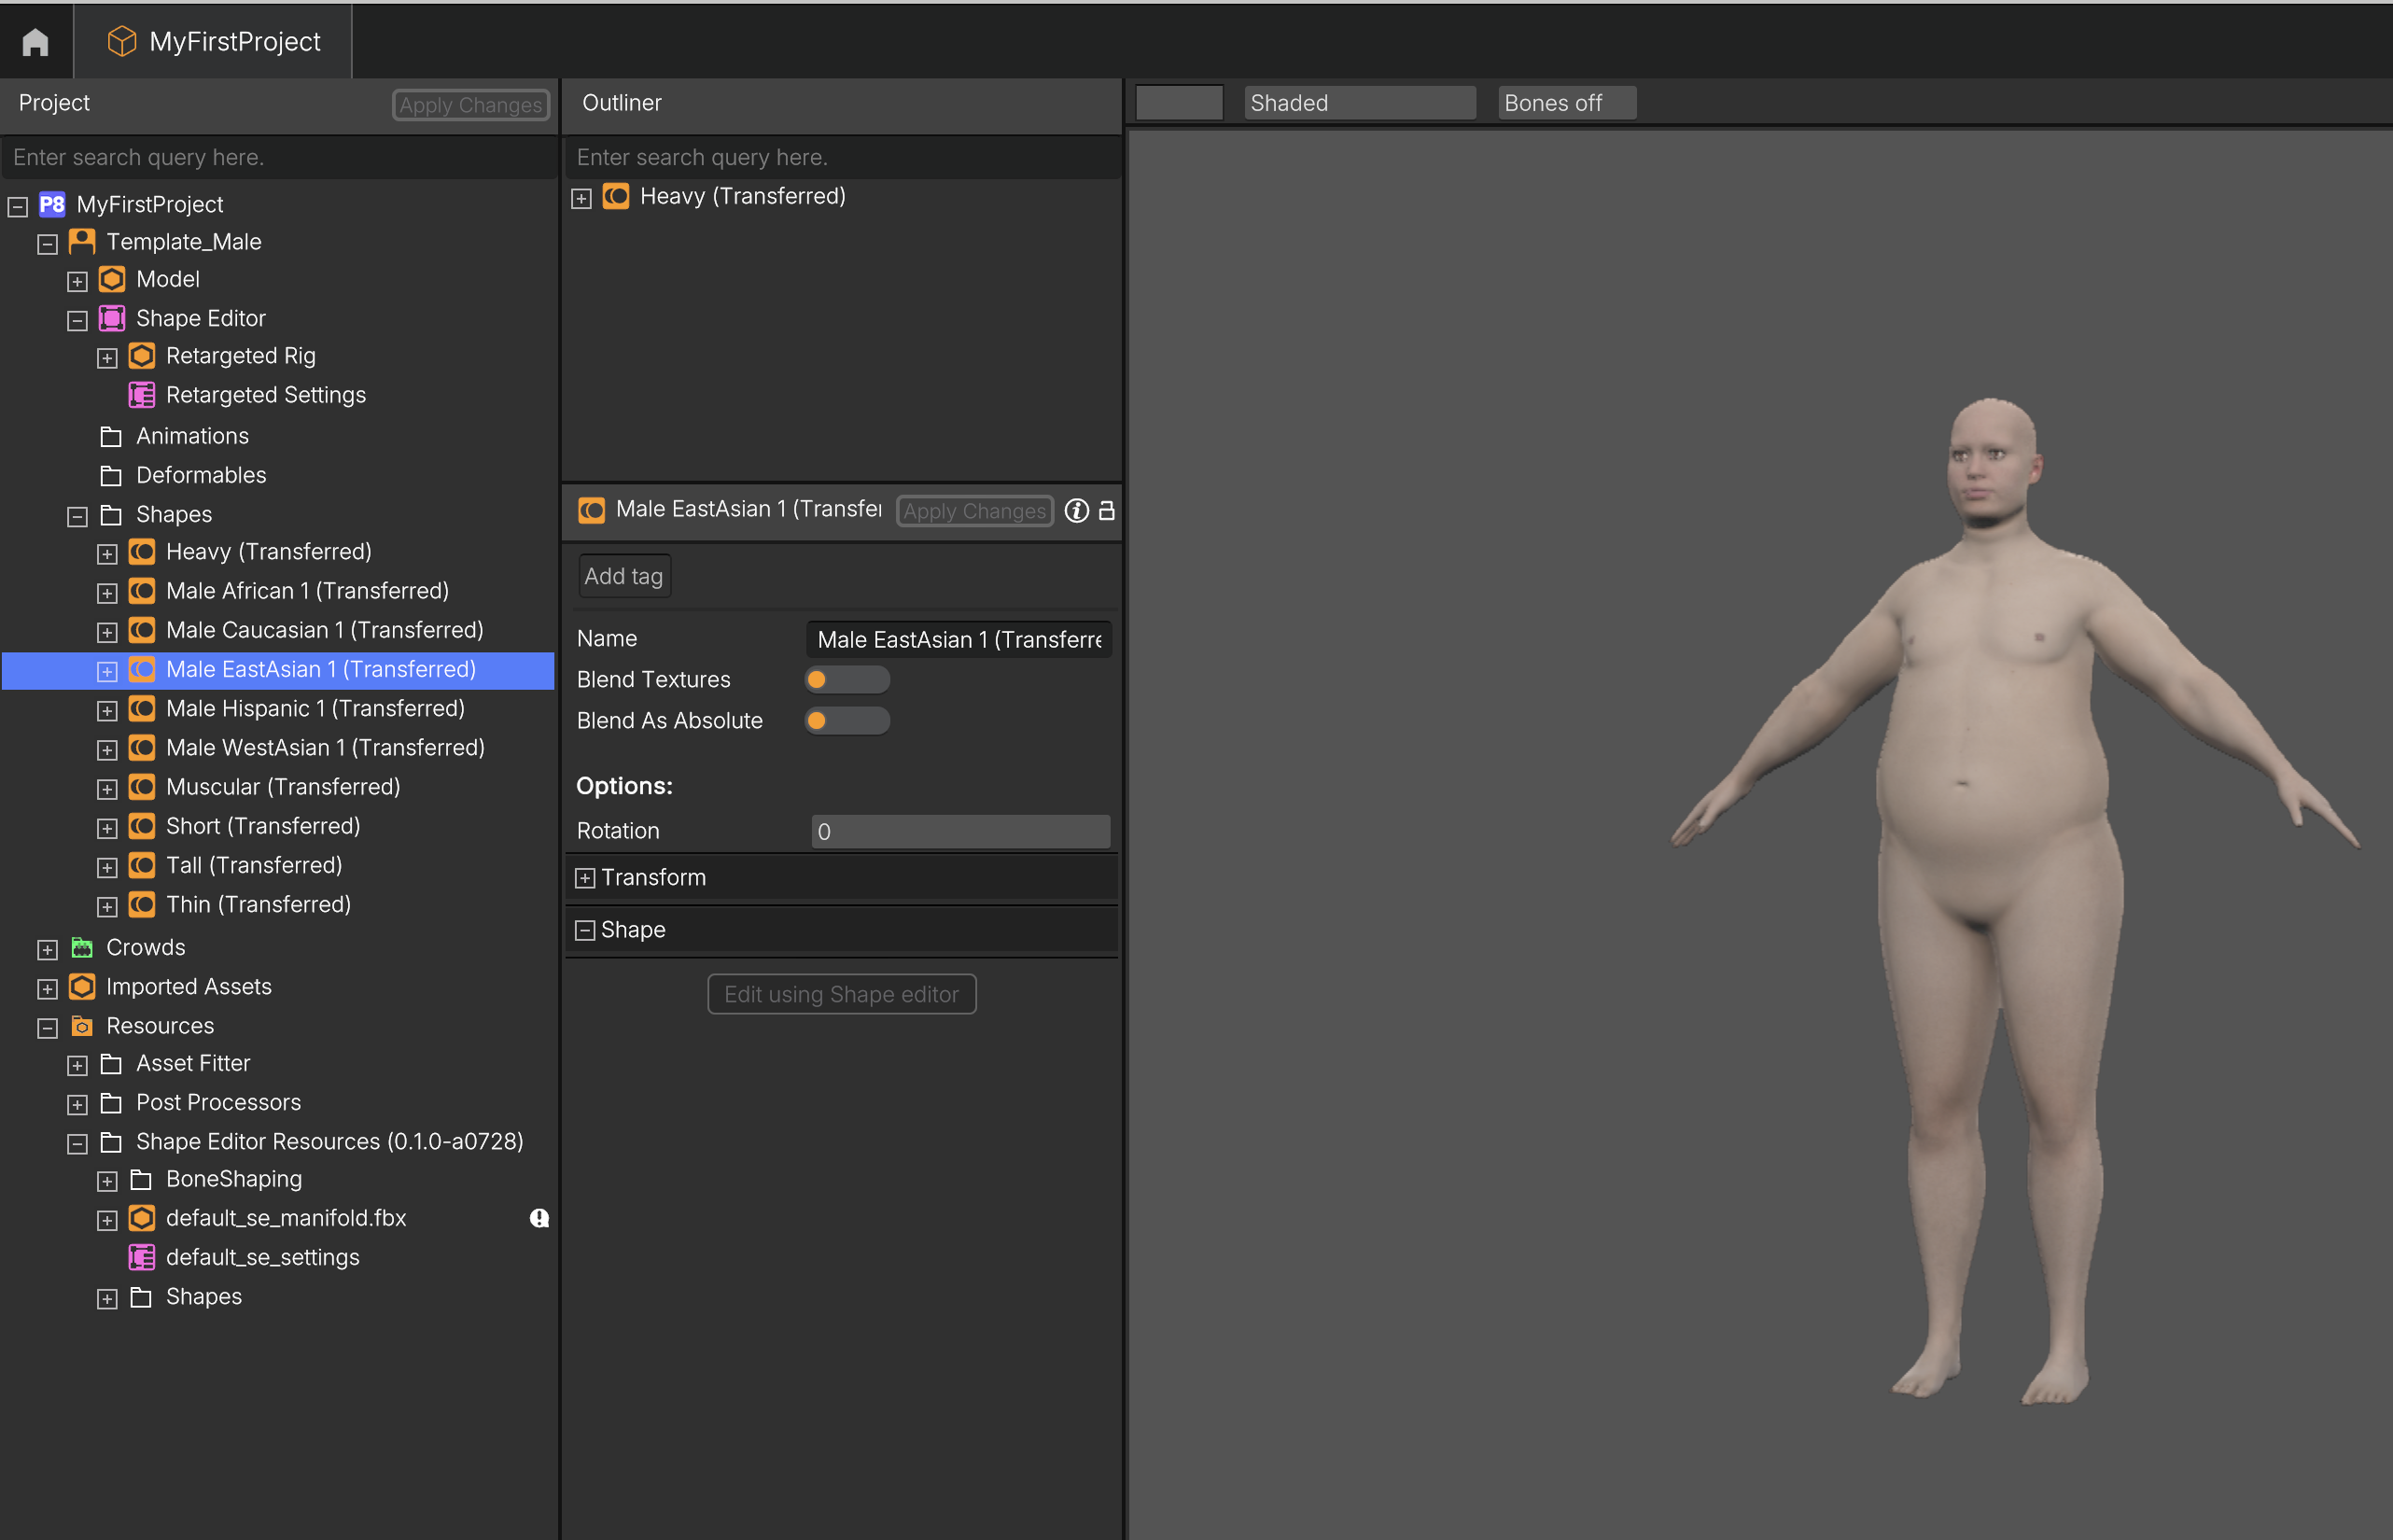
- Drag & drop the Shape into the Outliner to preview.
2.4. Launch the Shape Editor
- Click the purple Shape Editor icon in the project tree
- In the Shape Editor panel, click Launch at the bottom of the window
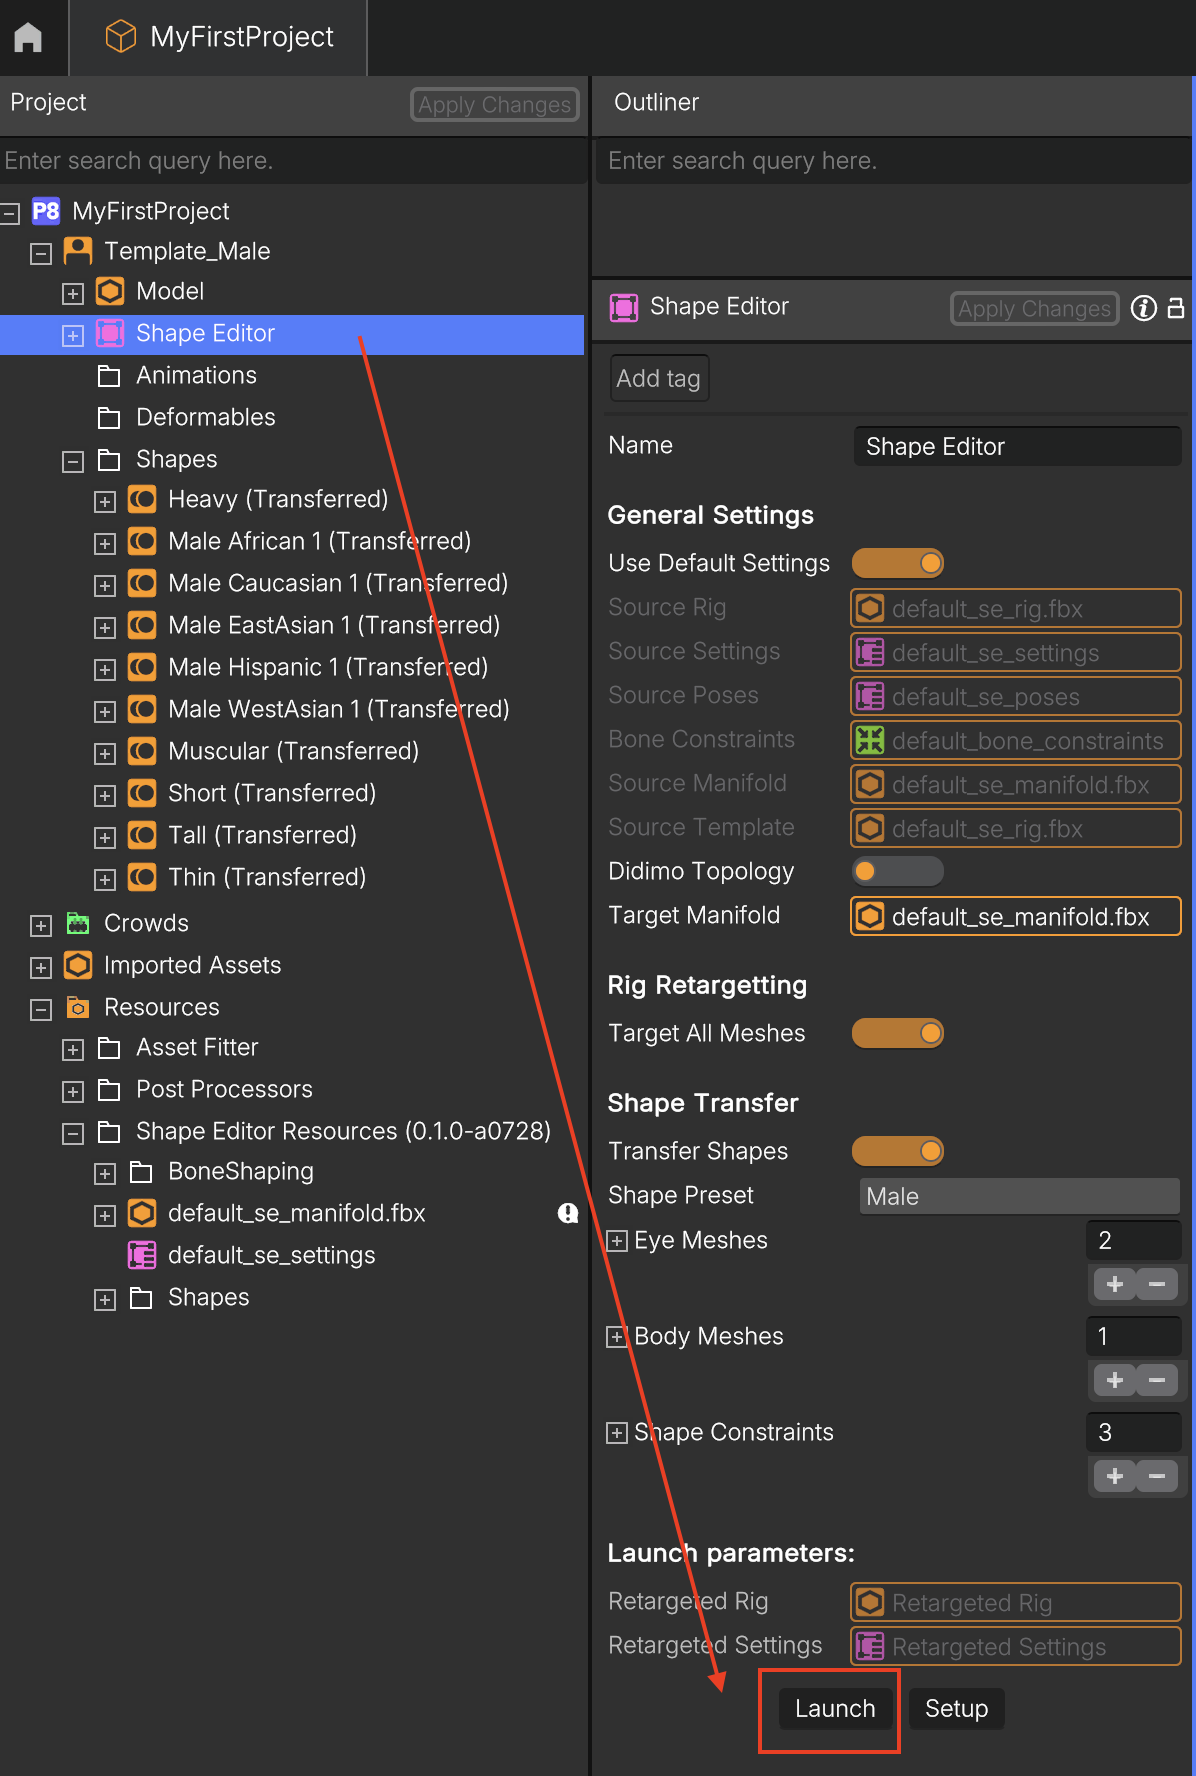
- The Shape Editor interface will open in a new window
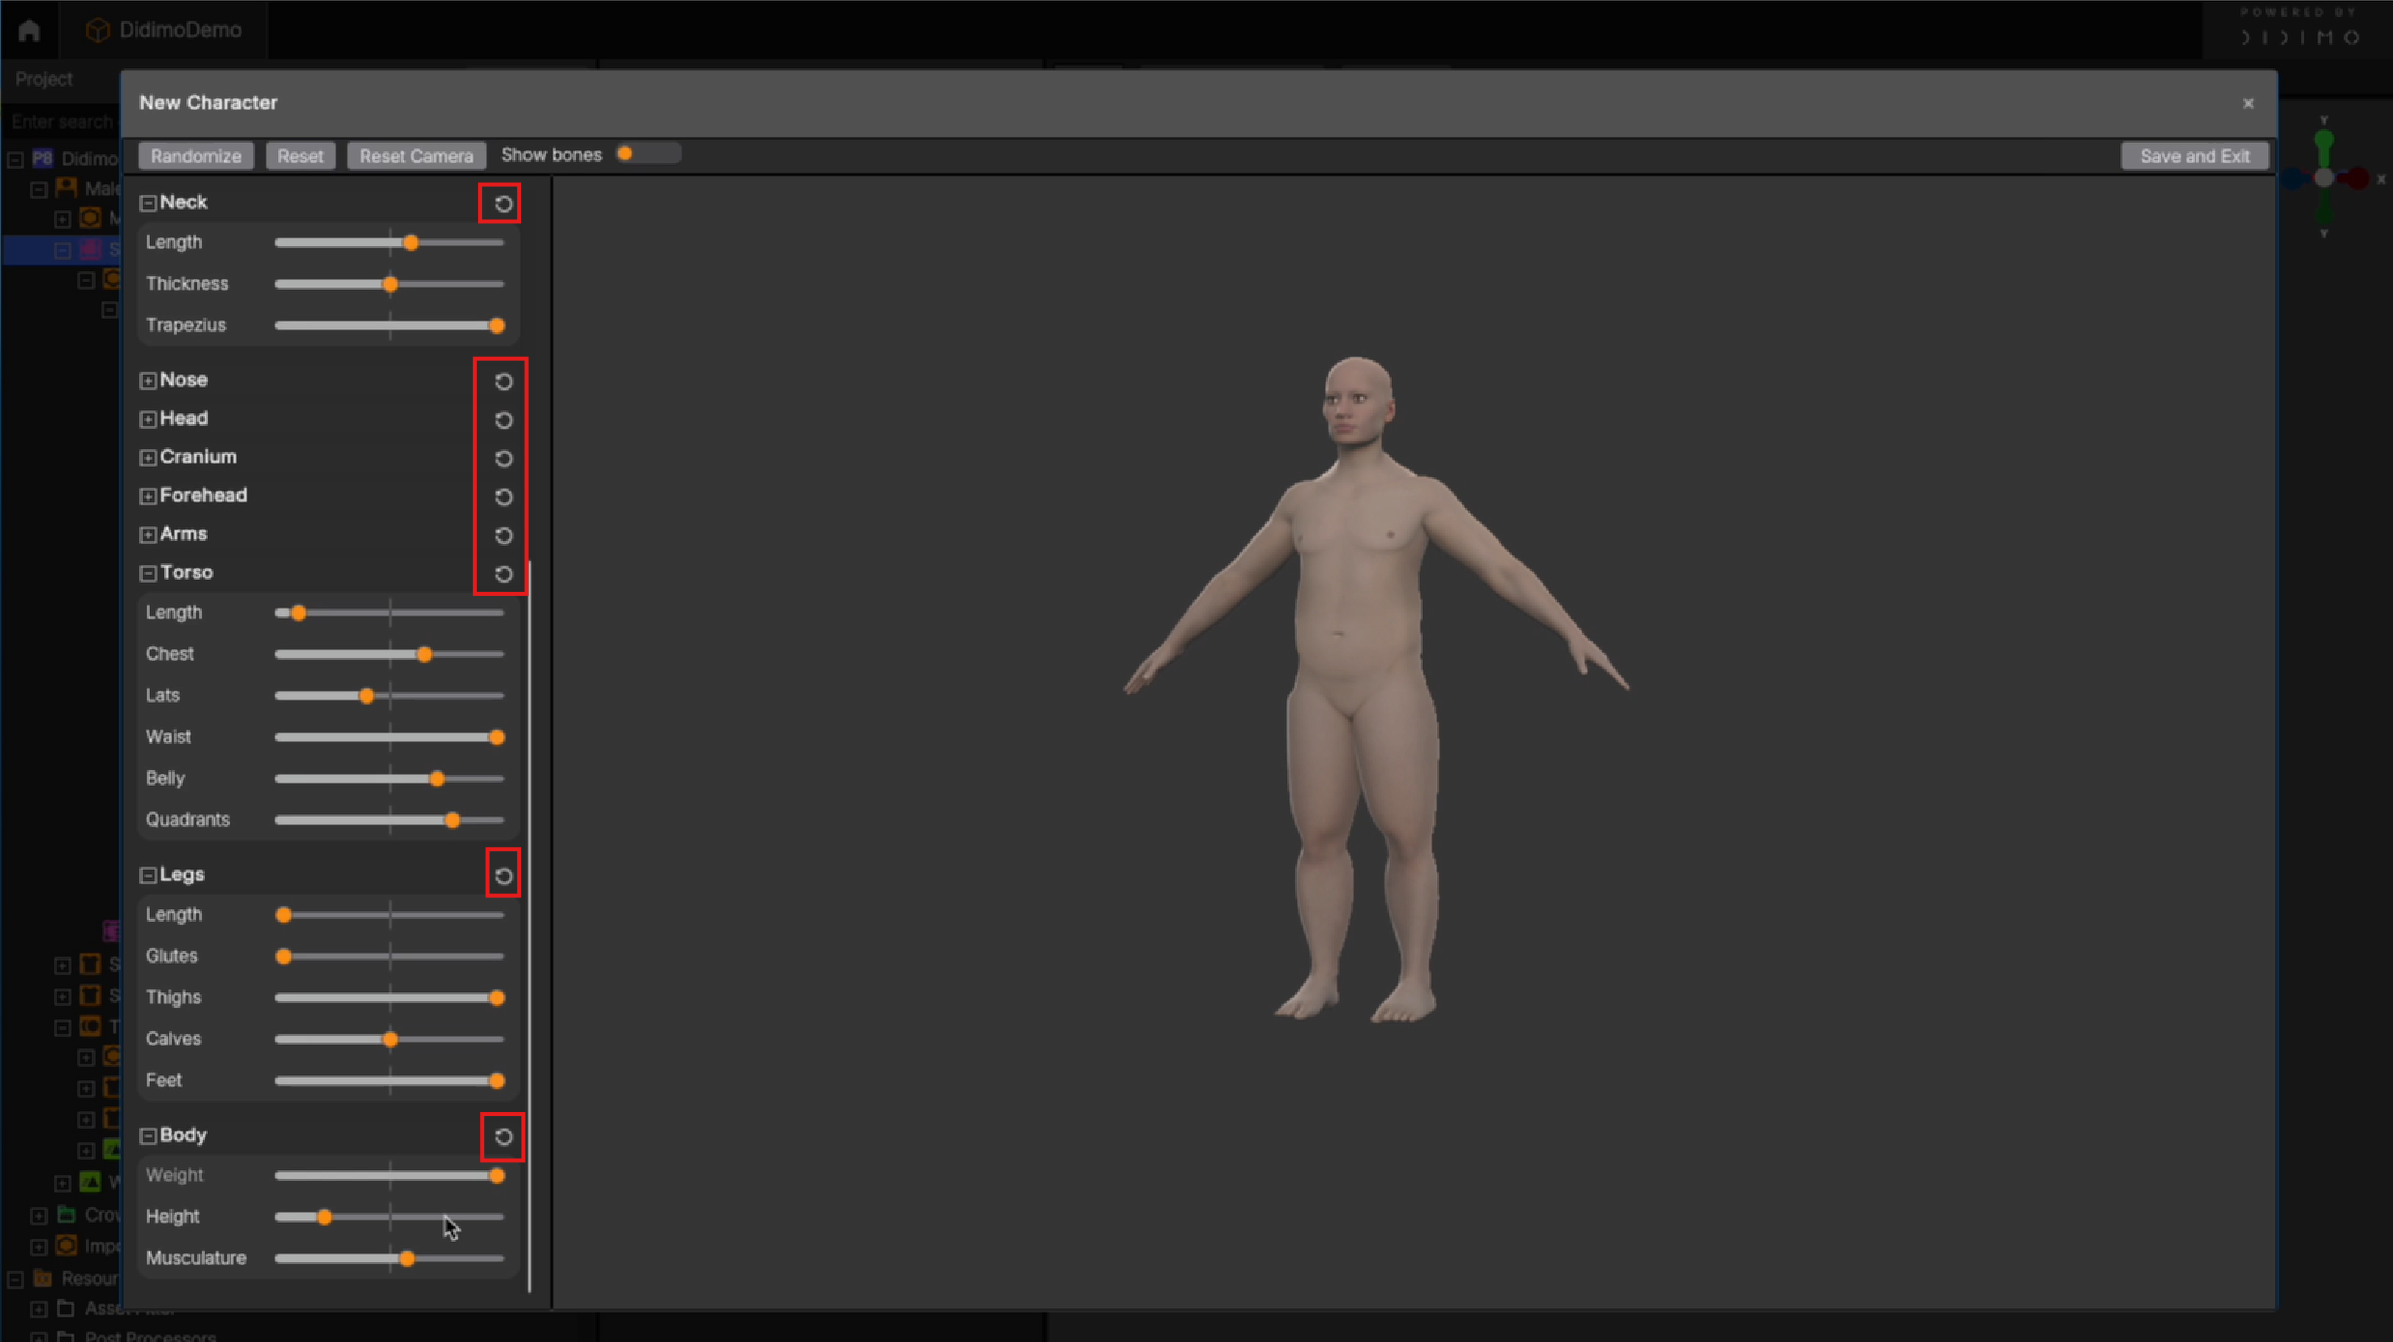
3. Creating and Editing Shapes
Recommendation on Creating an Optimized Set of ShapesIt’s usually recommended to create shapes that modify either the Face (e.g., bigger ears and nose) or the Body (e.g., muscular upper body with short legs), but not both at once.
This will allow you to better control your variations when creating Crowd Rules and configuring Crowds.
If you create a shape that modifies both the Body (e.g., making it heavier) and the Face (e.g., enlarging the eyes), any crowd of characters generated with big eyes will also carry the influence of the heavier body.
3.1. Create a Shape
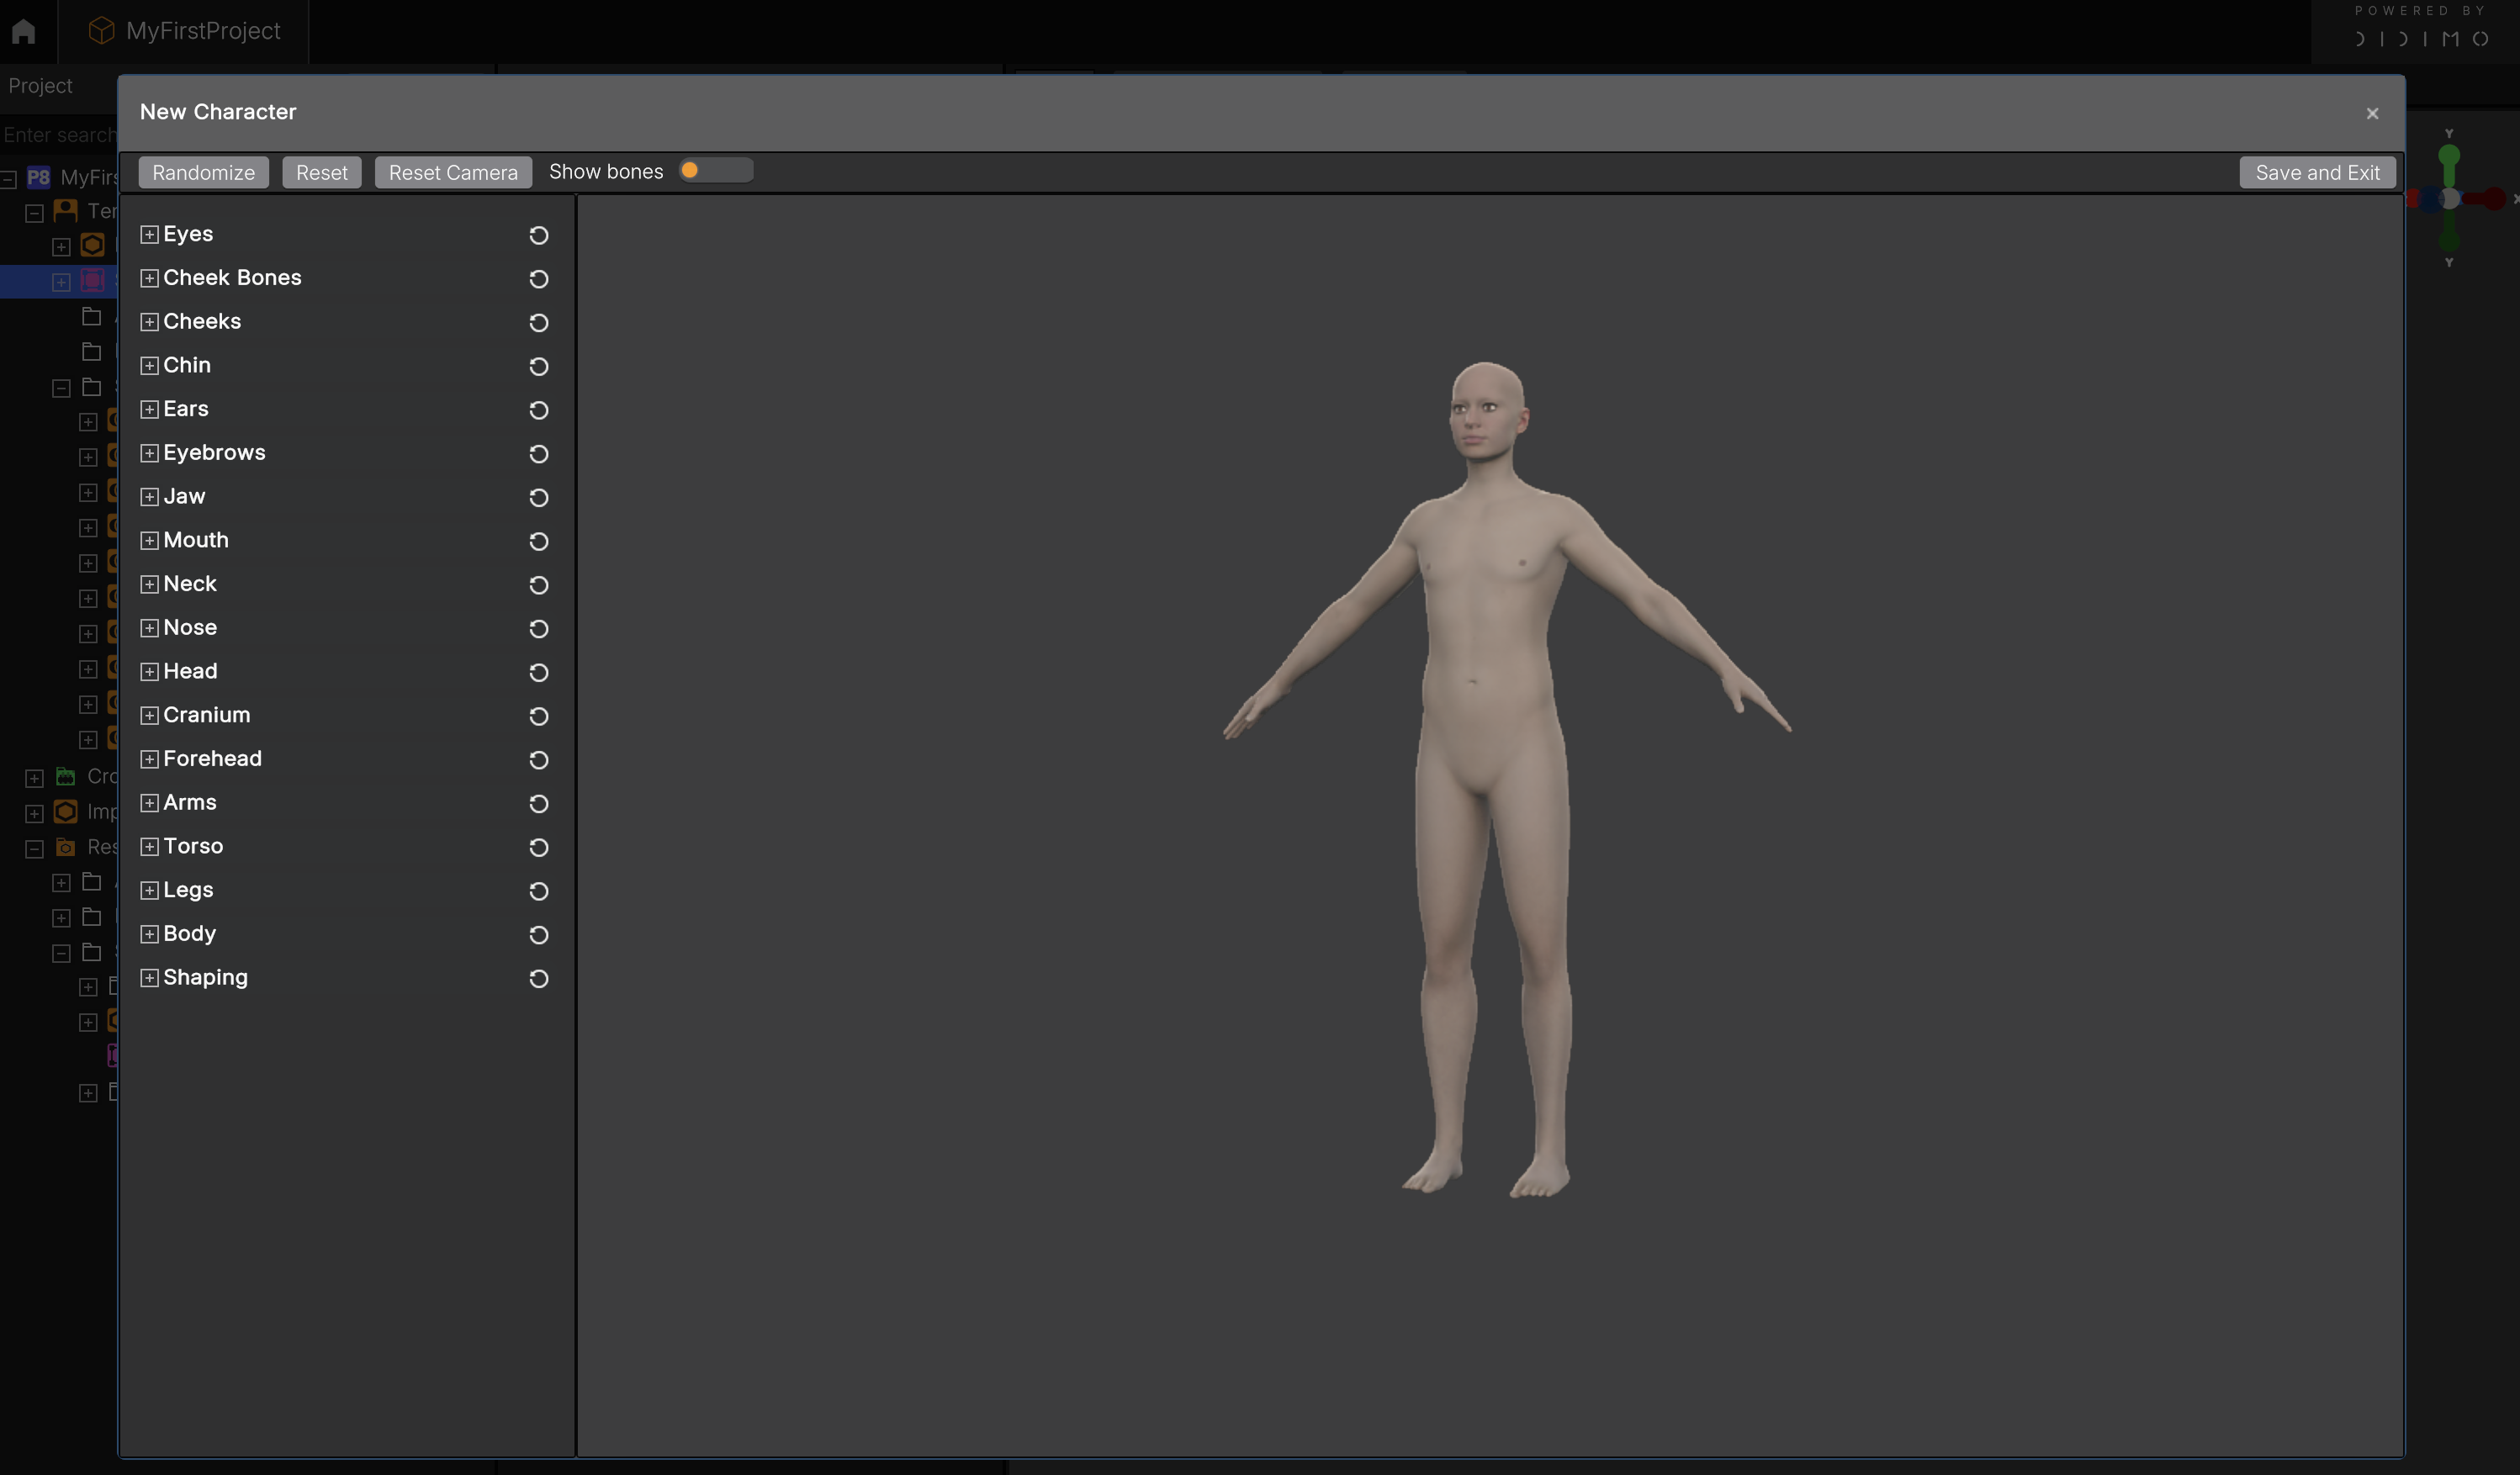
Inside the Shape Editor, you can:
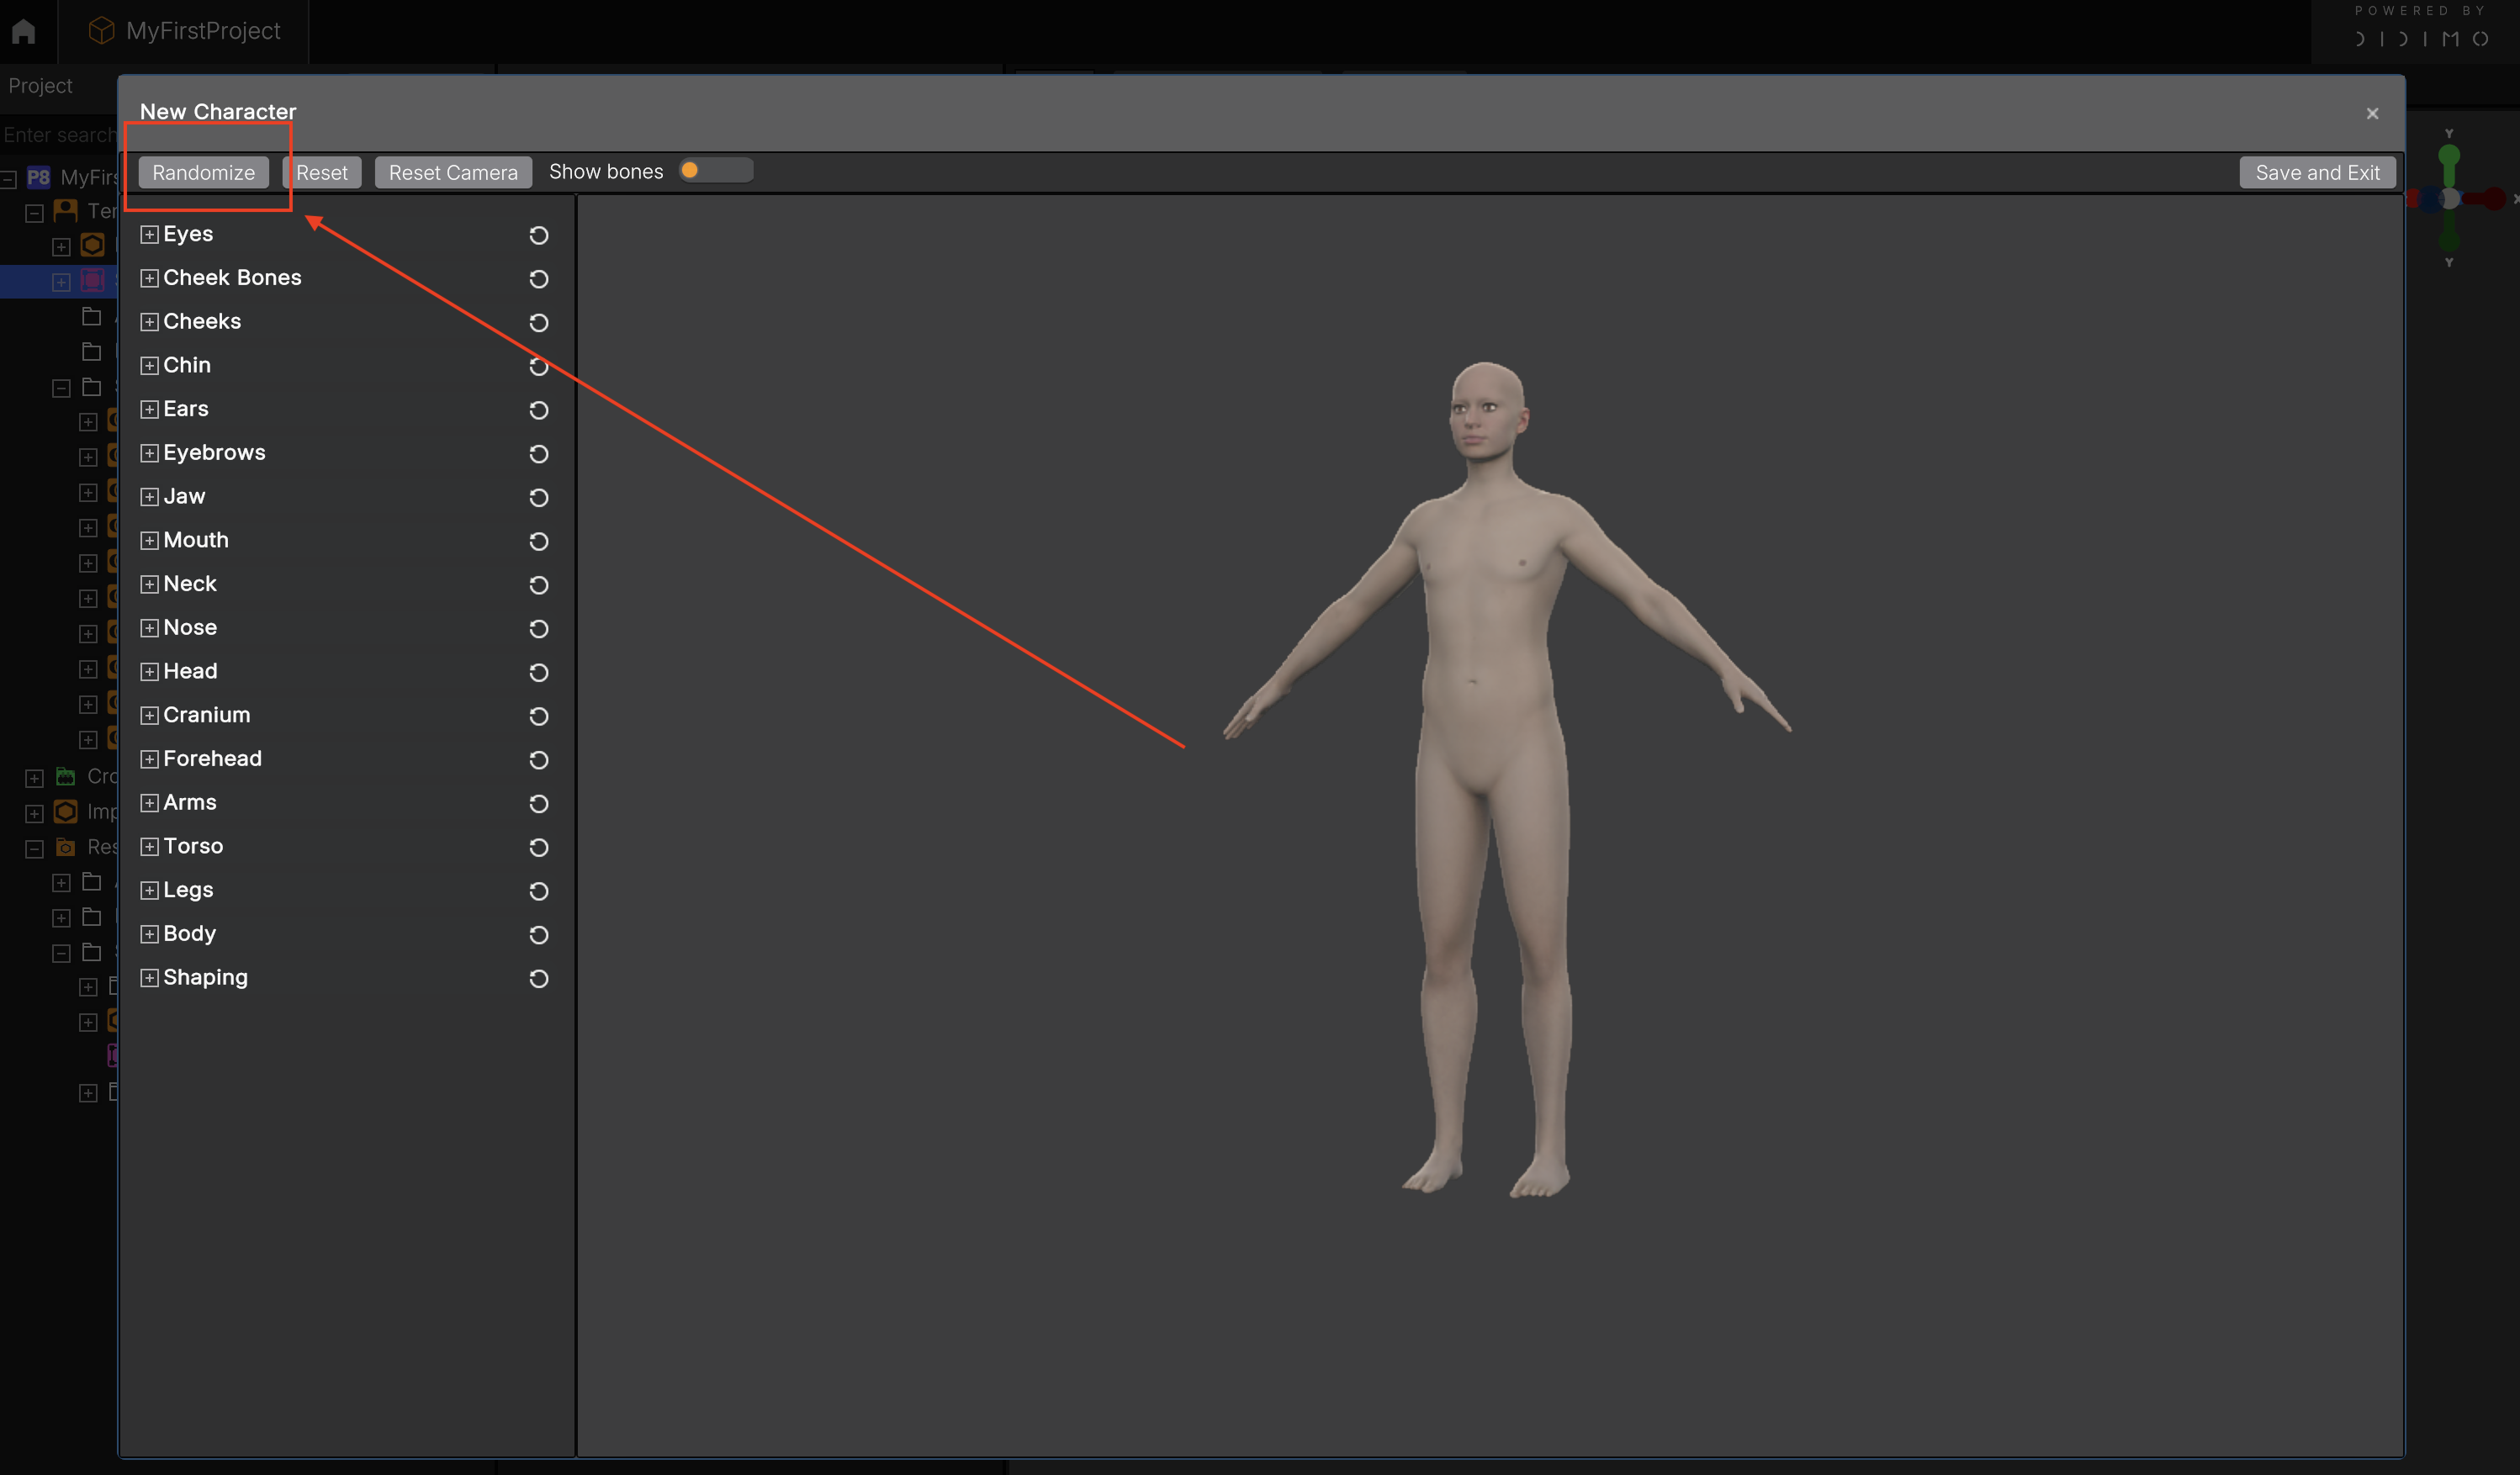
- Click Randomize (top-left) to generate a random character variant
- For more complex editing expand editable sections using the + icon (e.g., Eyes, Jaw, Legs, Torso)
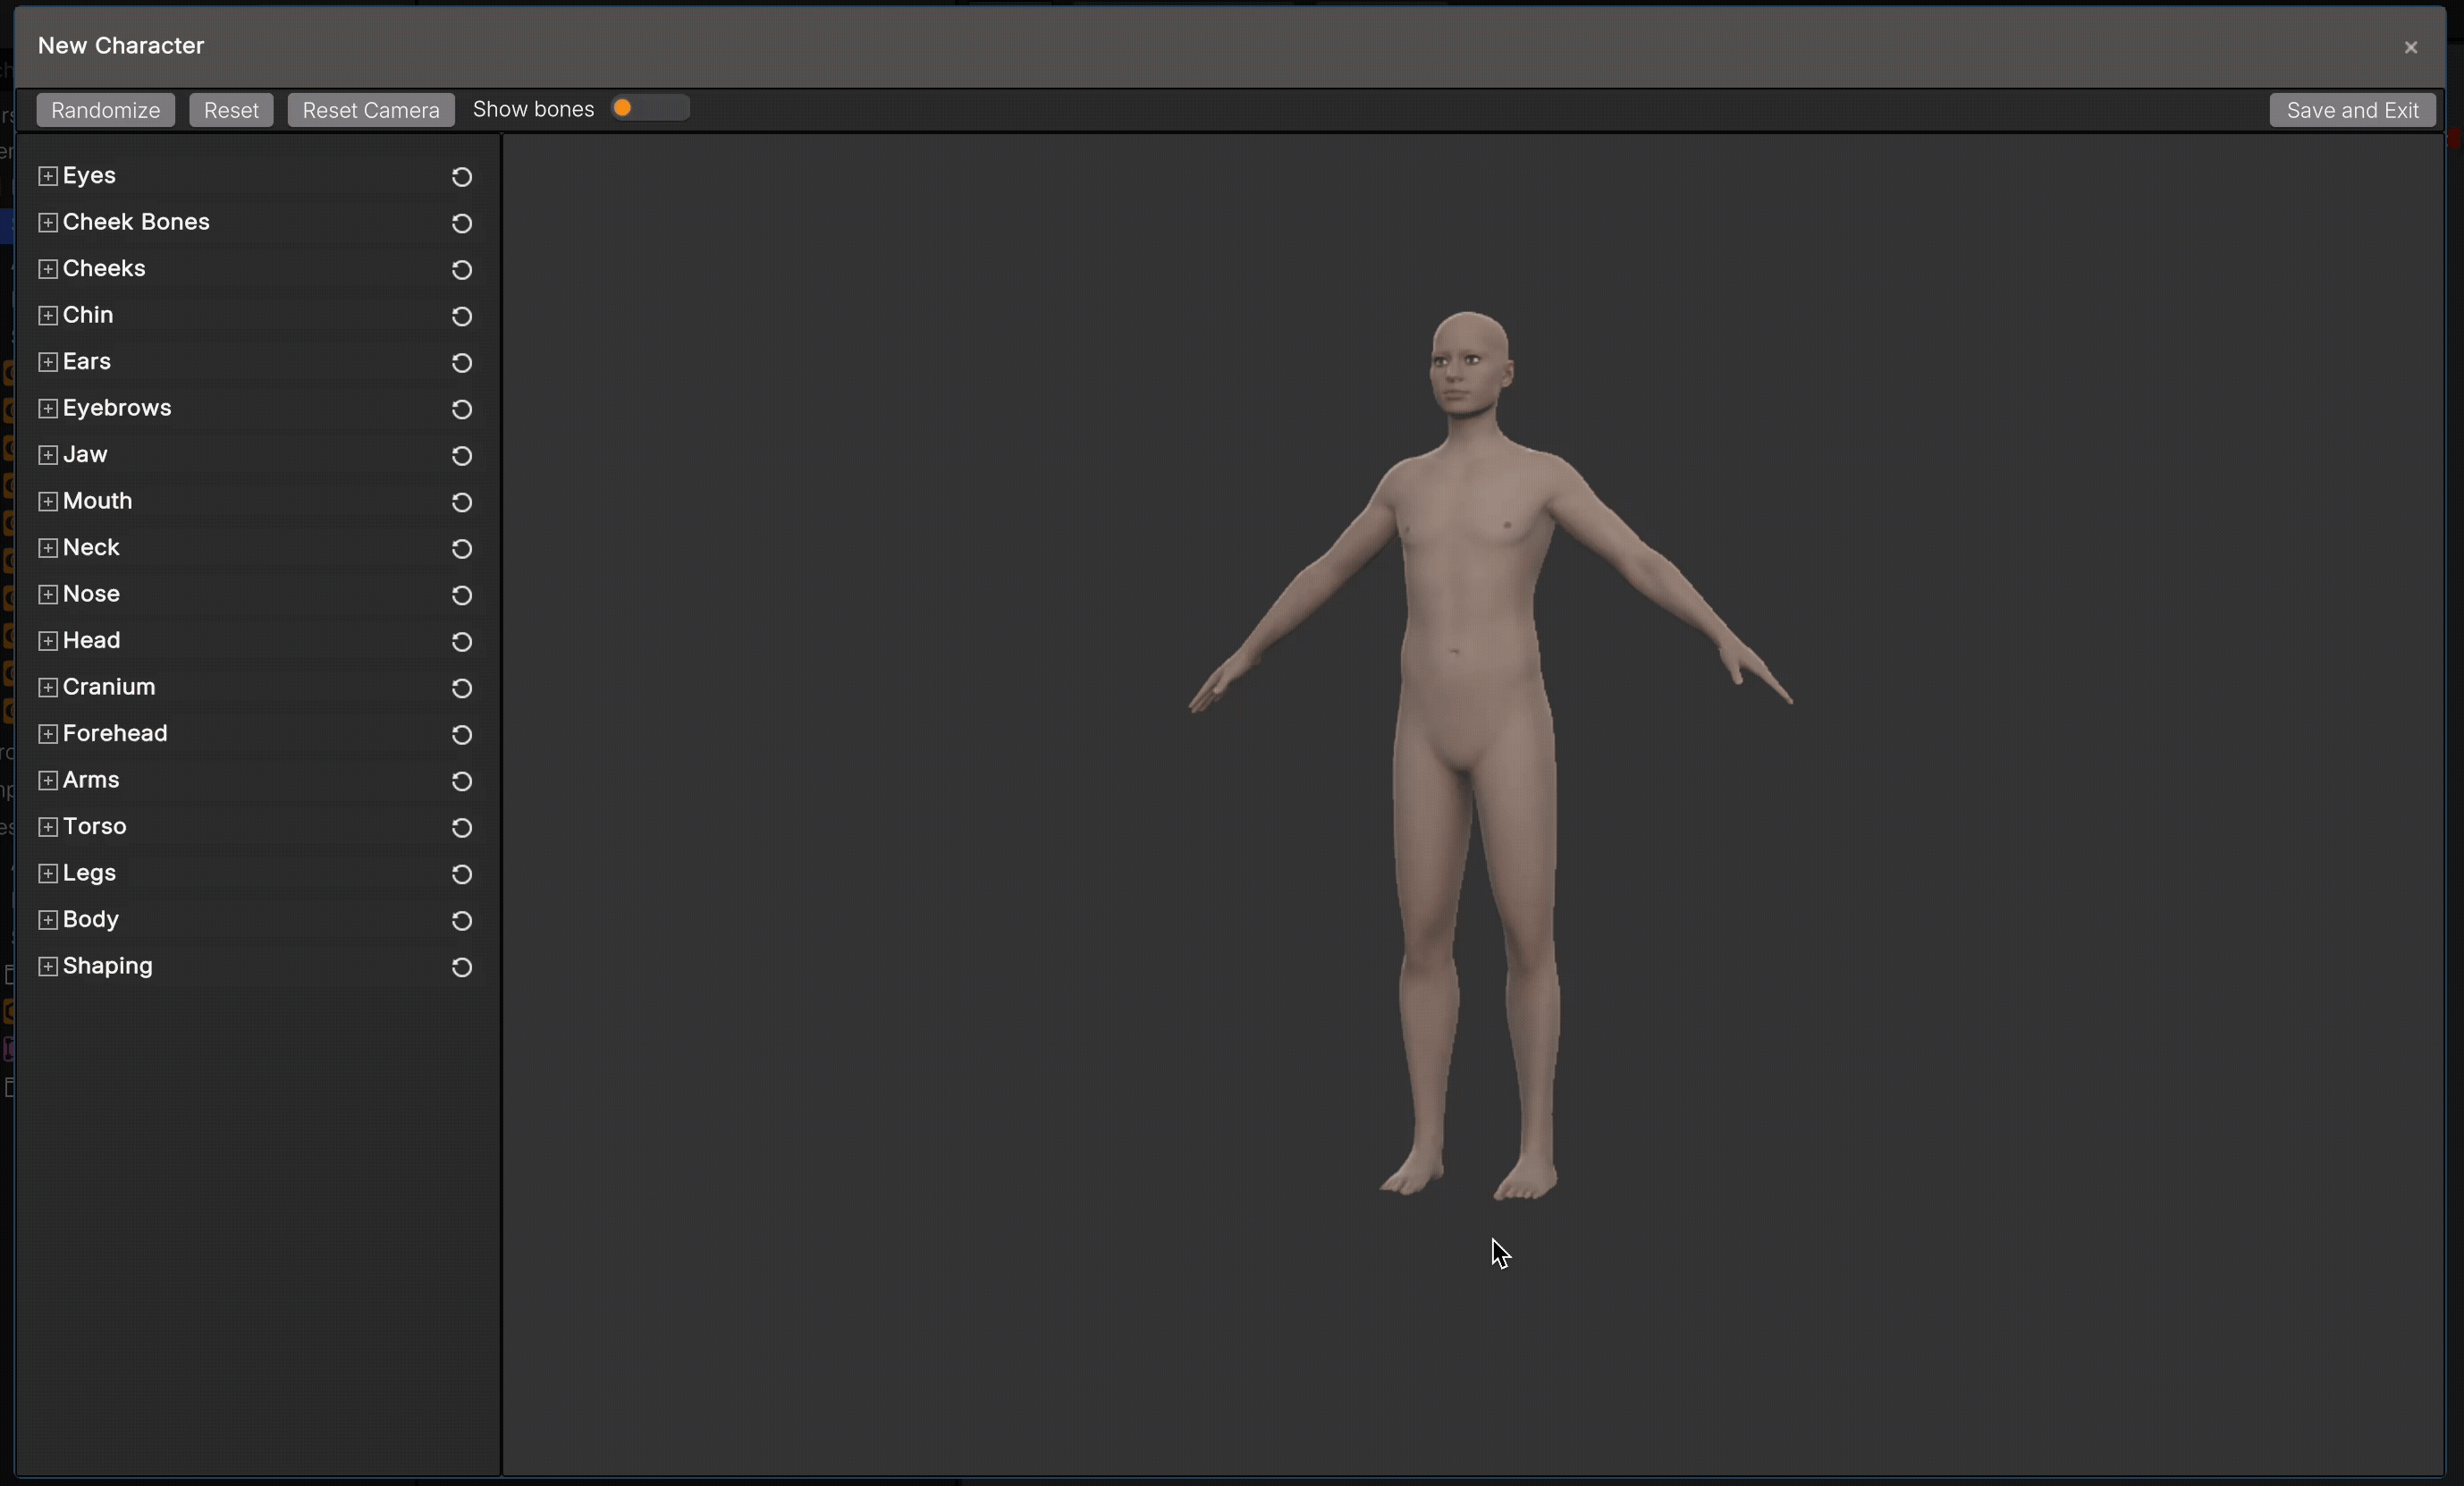
- Manually adjust features using sliders for precise control
Tip: If you overdo a change, click Reset (top-left) to revert to default values for the whole Shape.
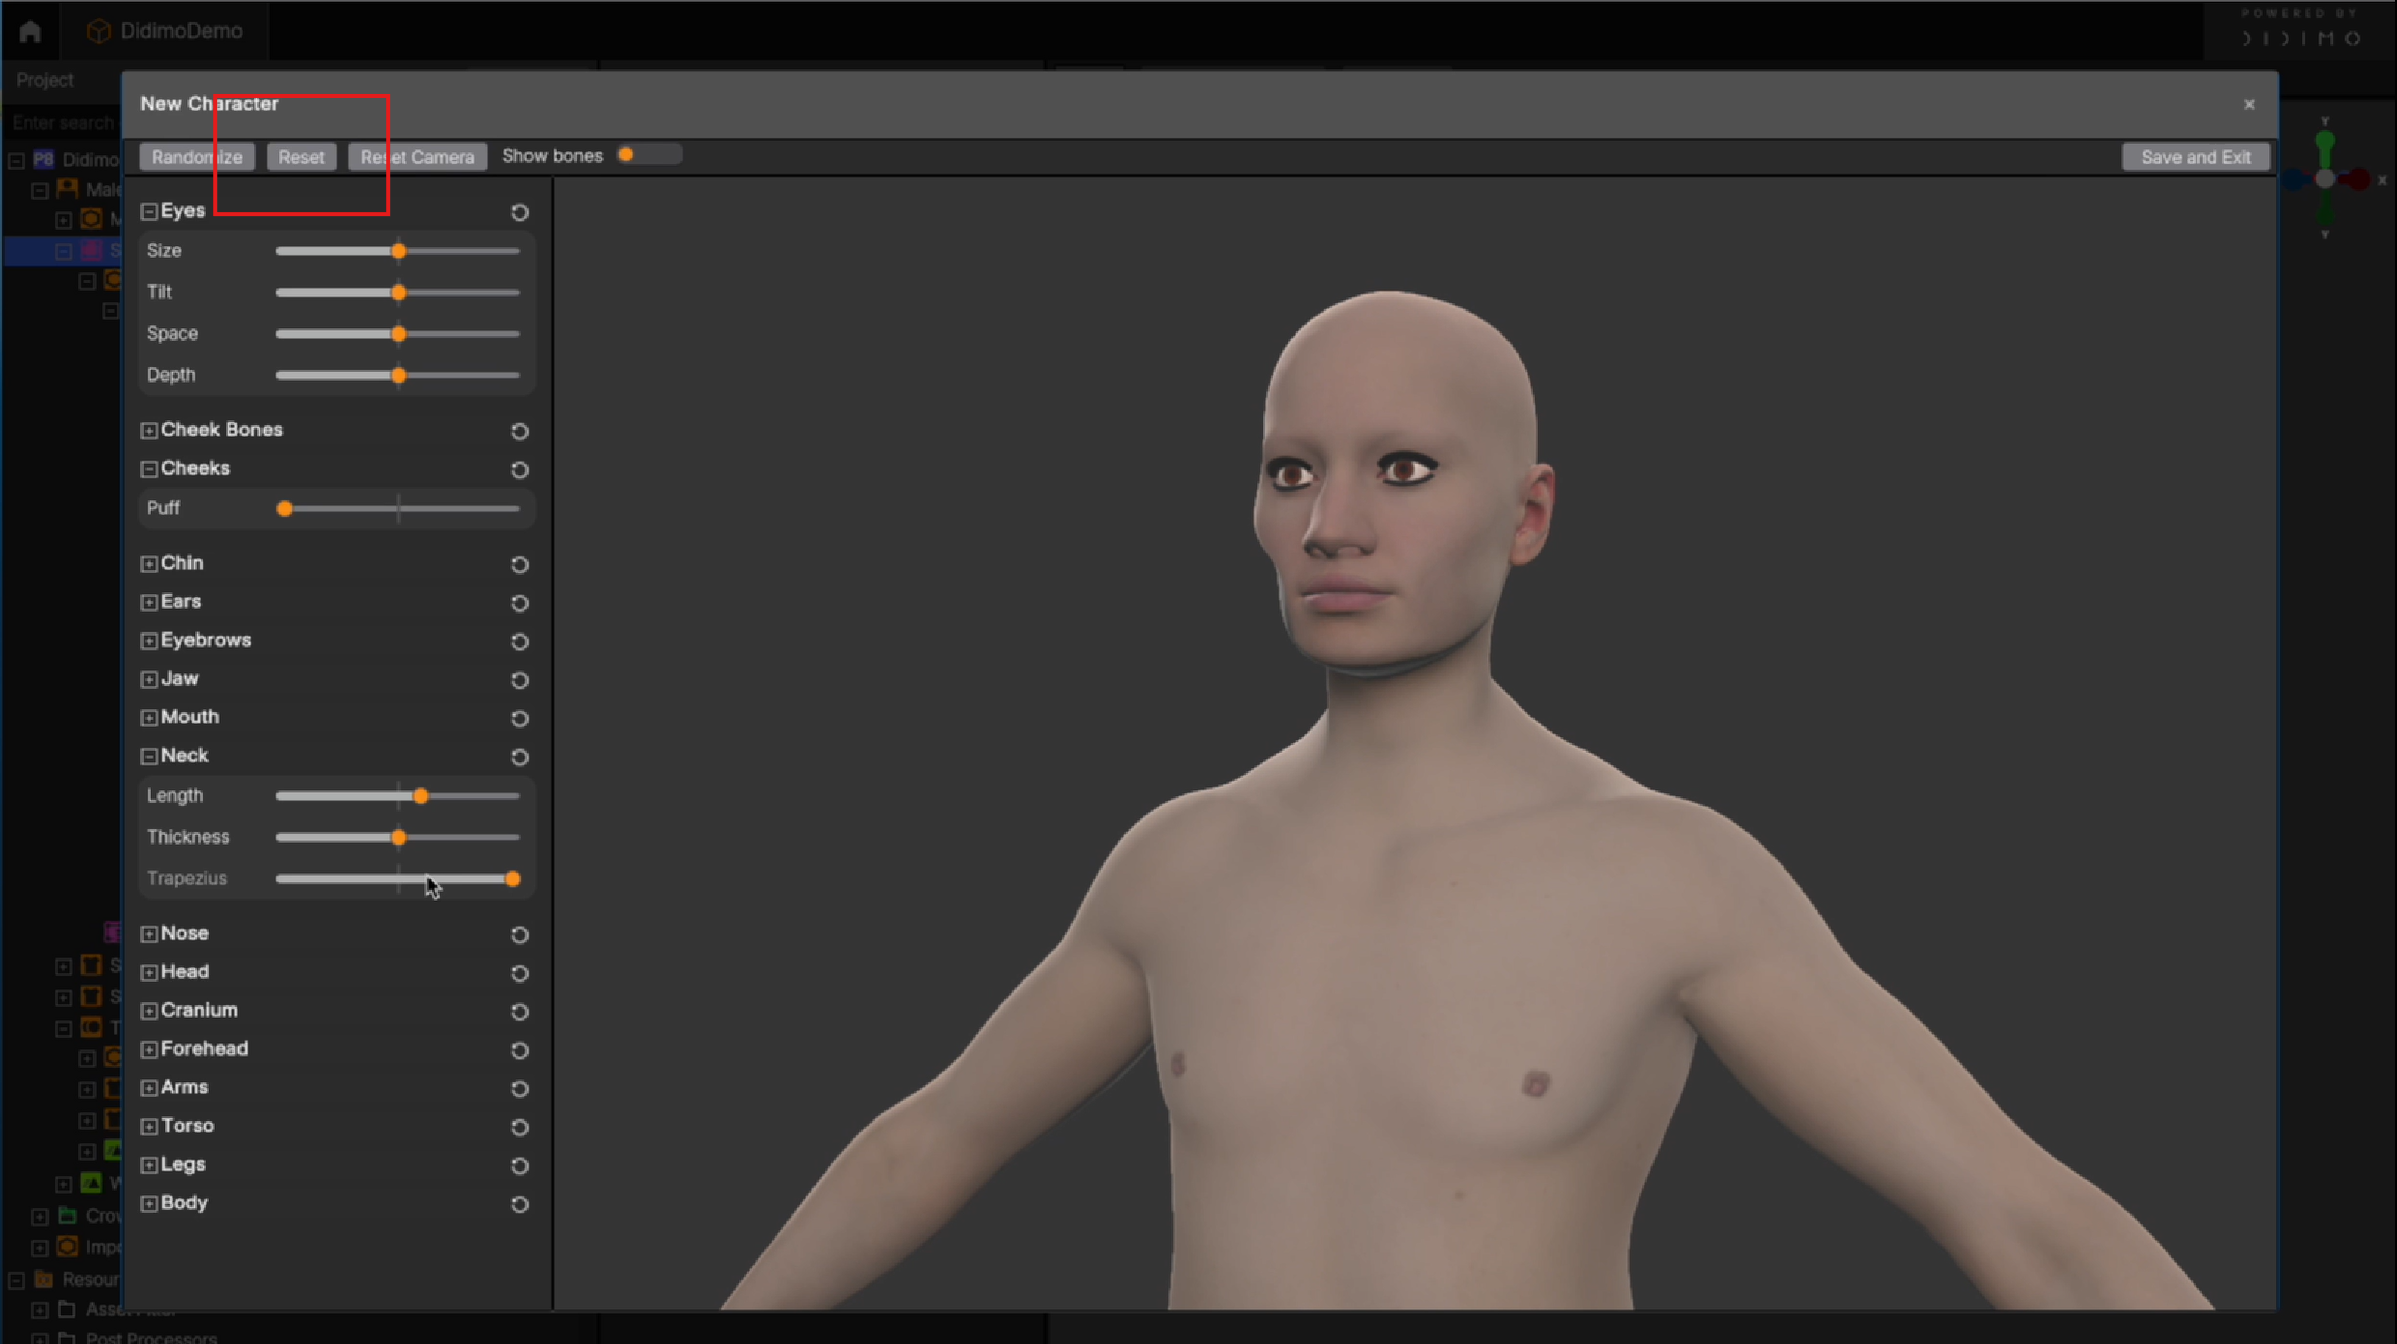
You can also reset individual areas like Nose or Legs.
3.2. Save Your Shape
- Once you’re happy with the result, click Save and Exit (top-right)
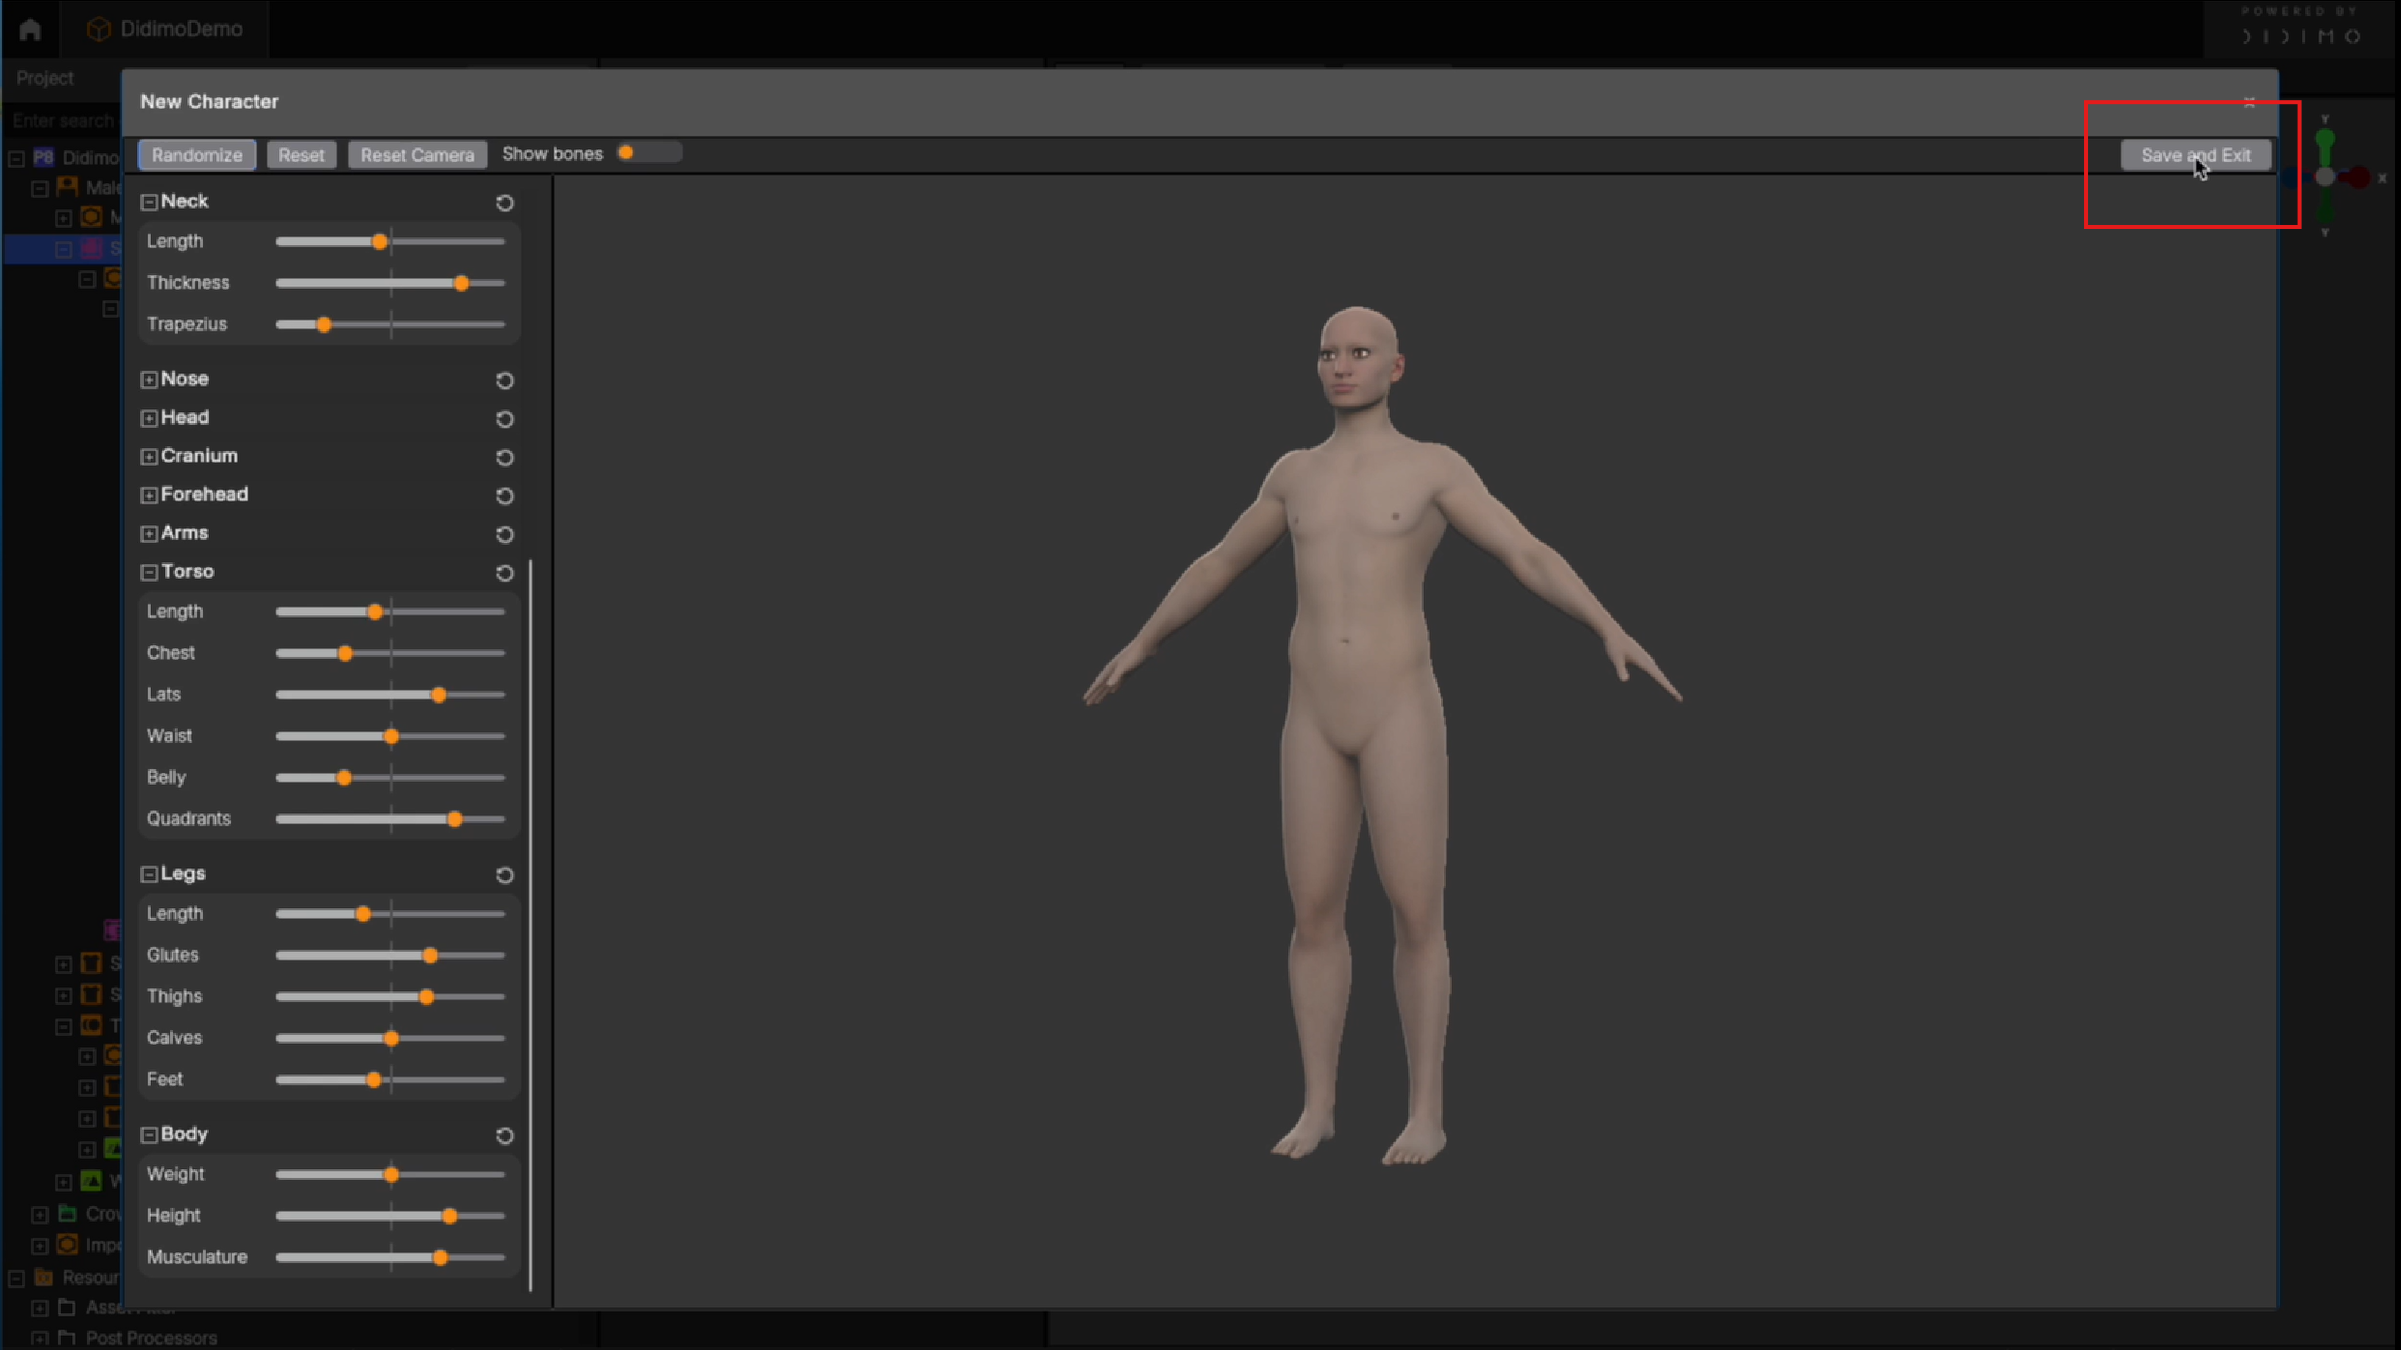
- Name your new Shape (e.g., TallMale, ShortFemale), this helps keep things organized
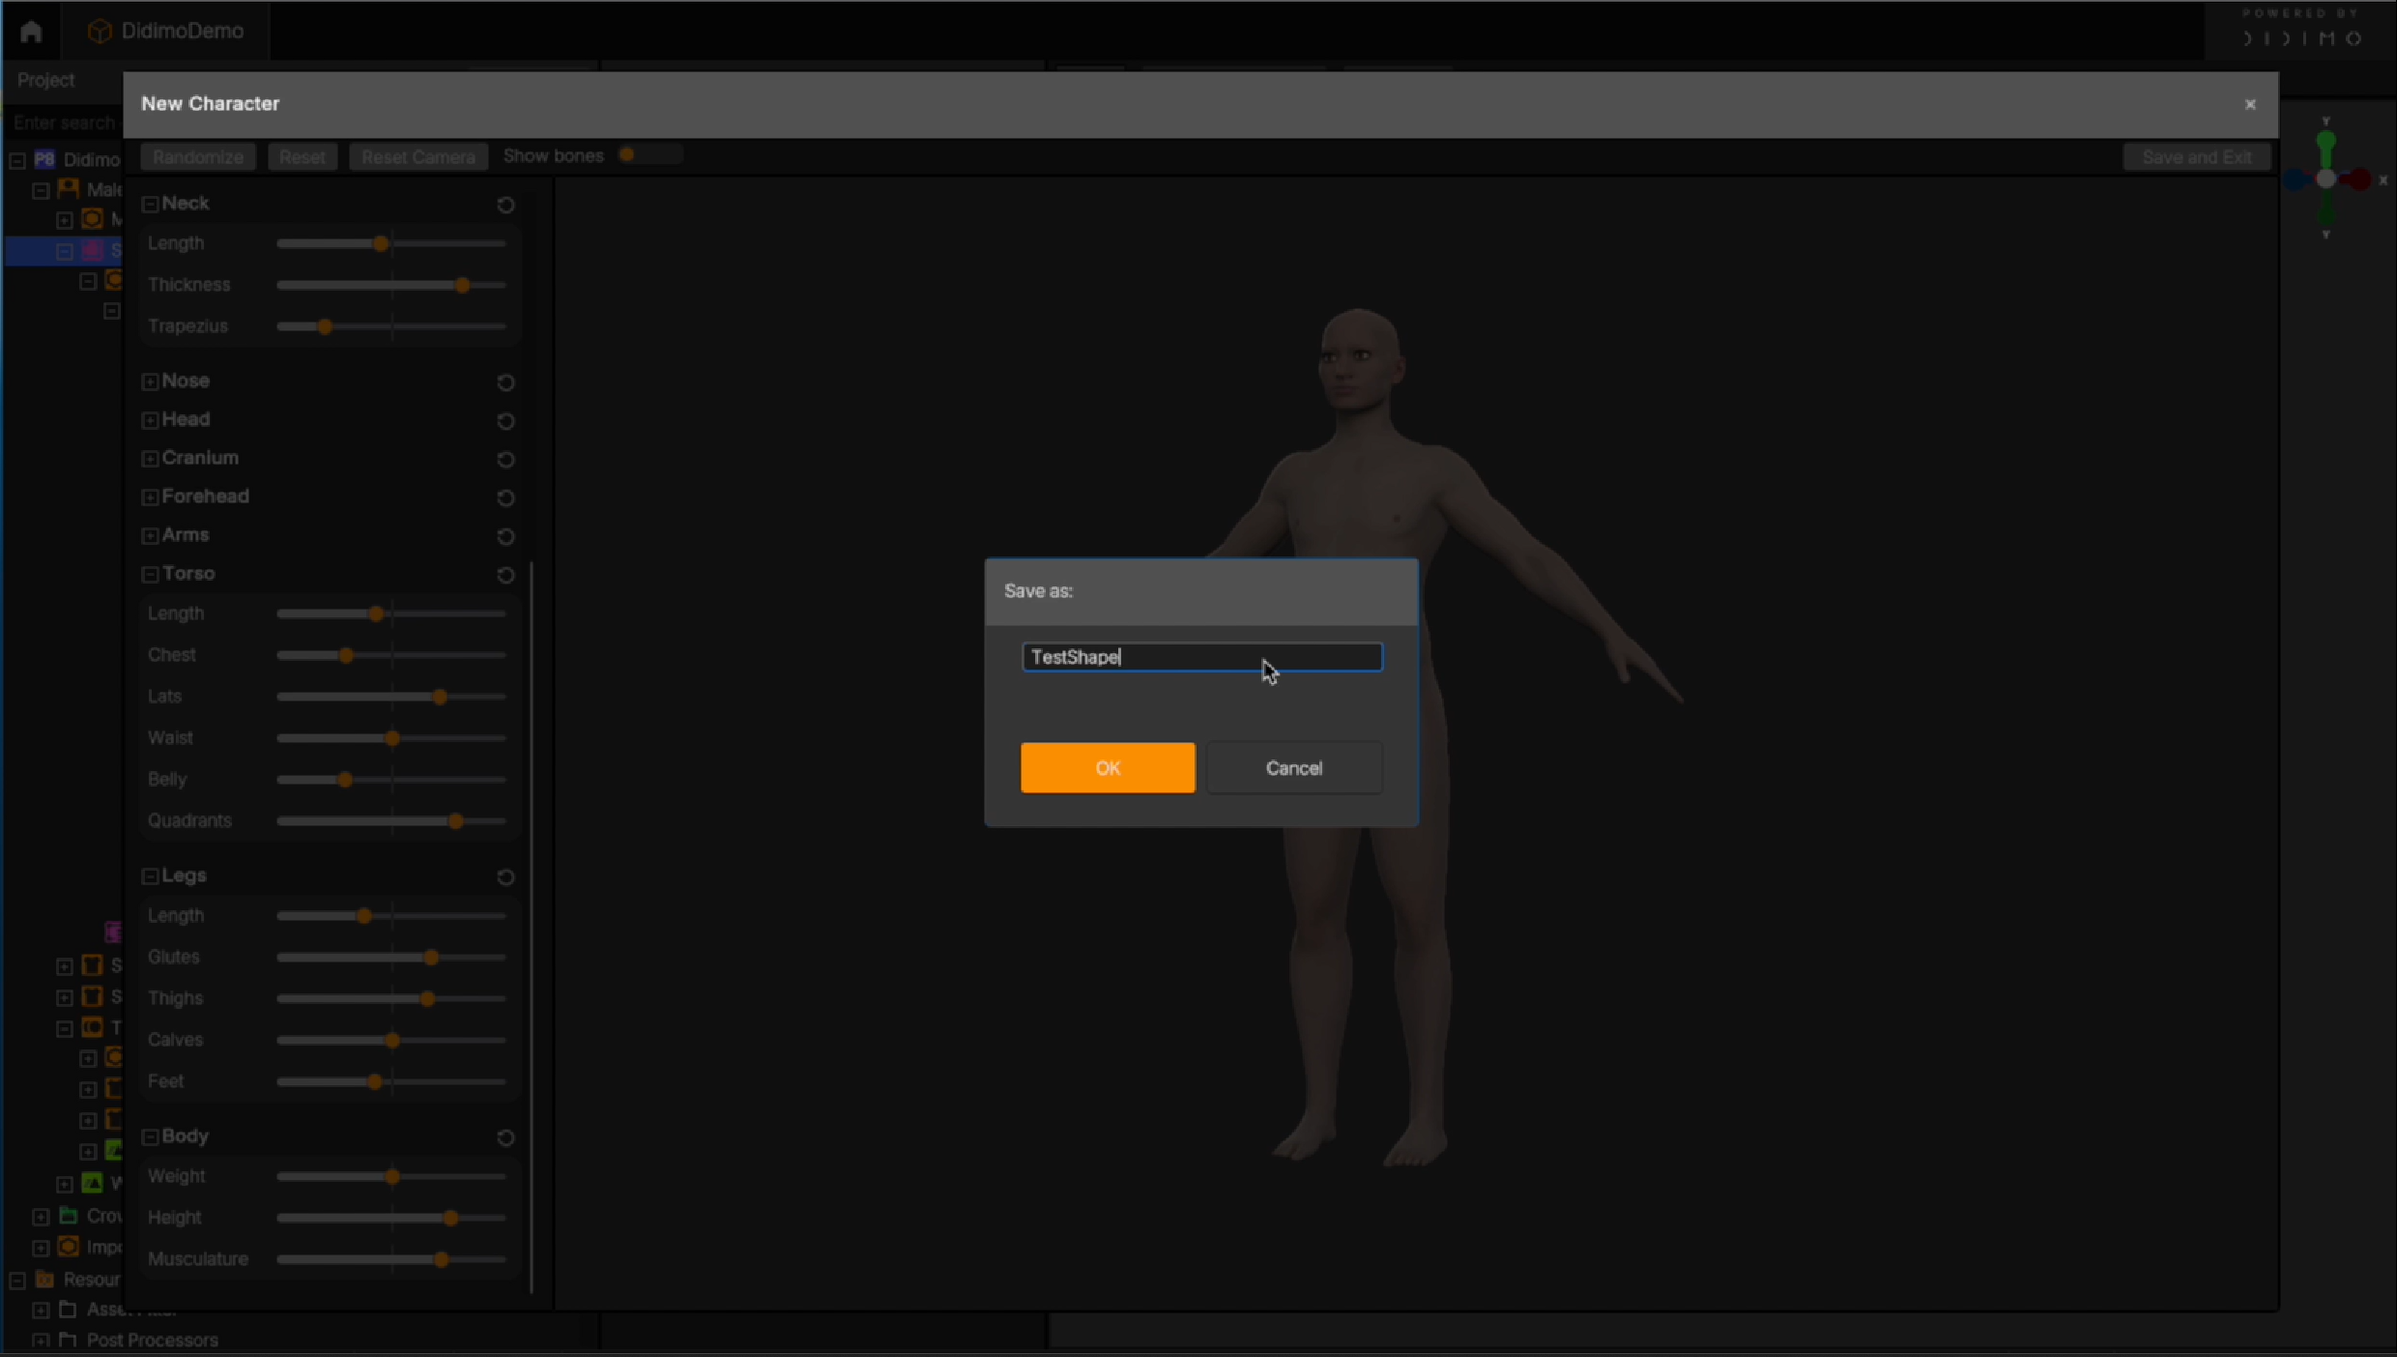
- Click OK
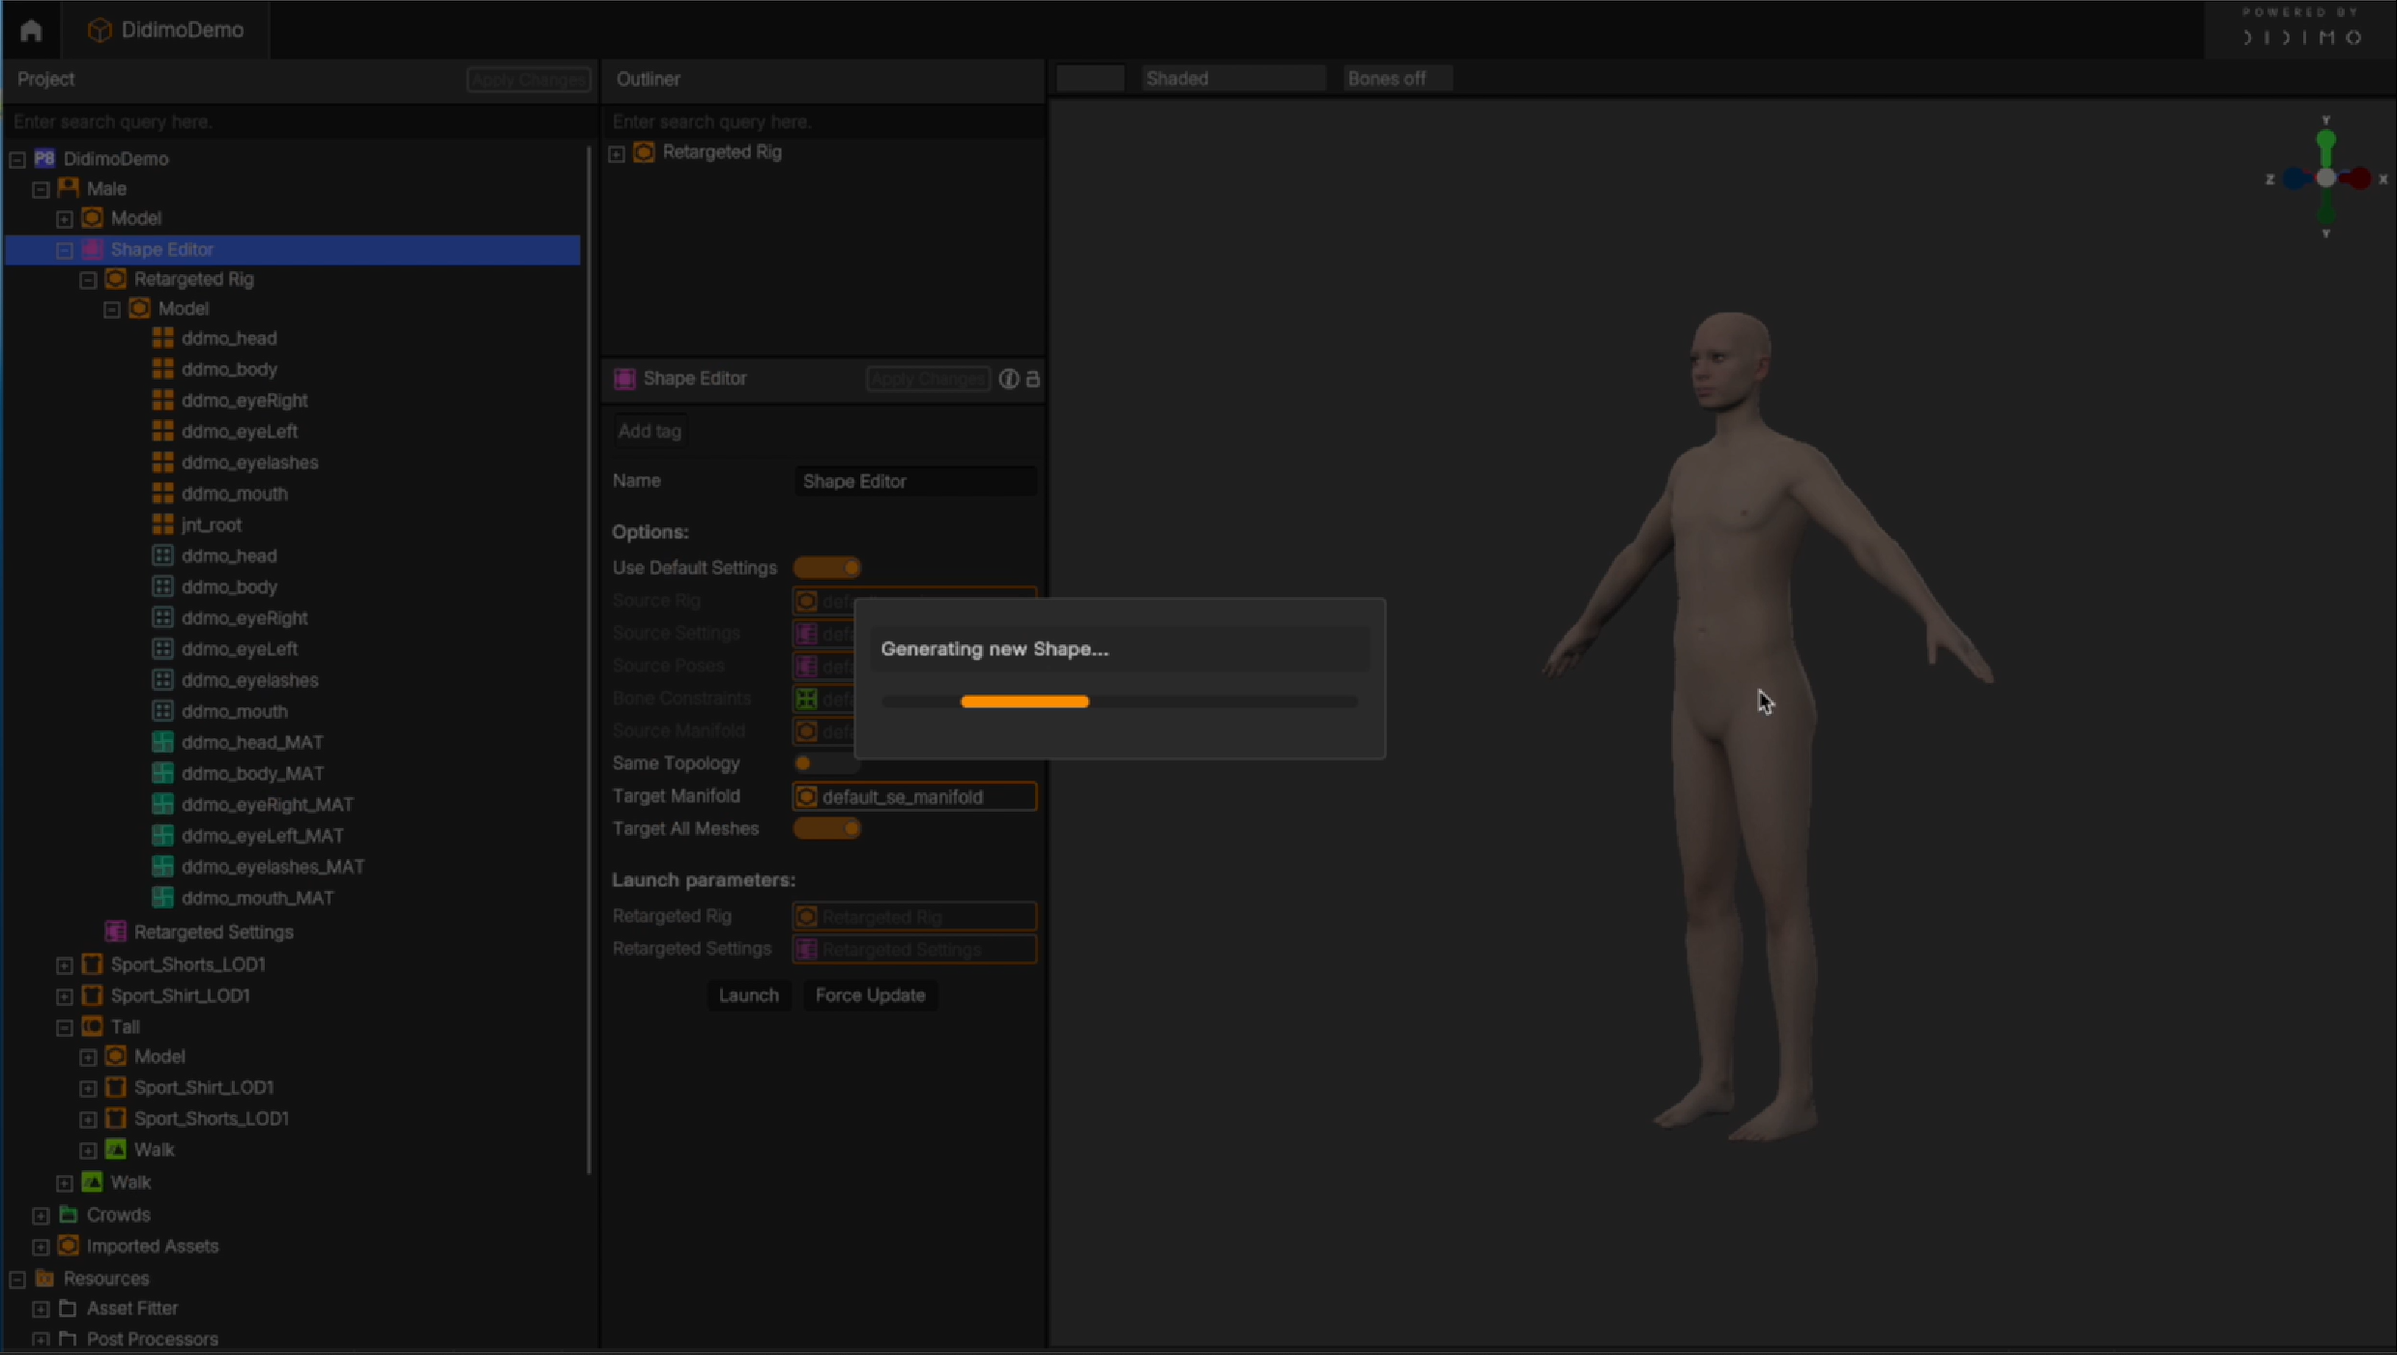
Info: Popul8 Express will now create the Shape, you’ll see messages "Generating New Shape" followed by "Building Assets"
4. What’s Next?
4.1. View Your New Shape
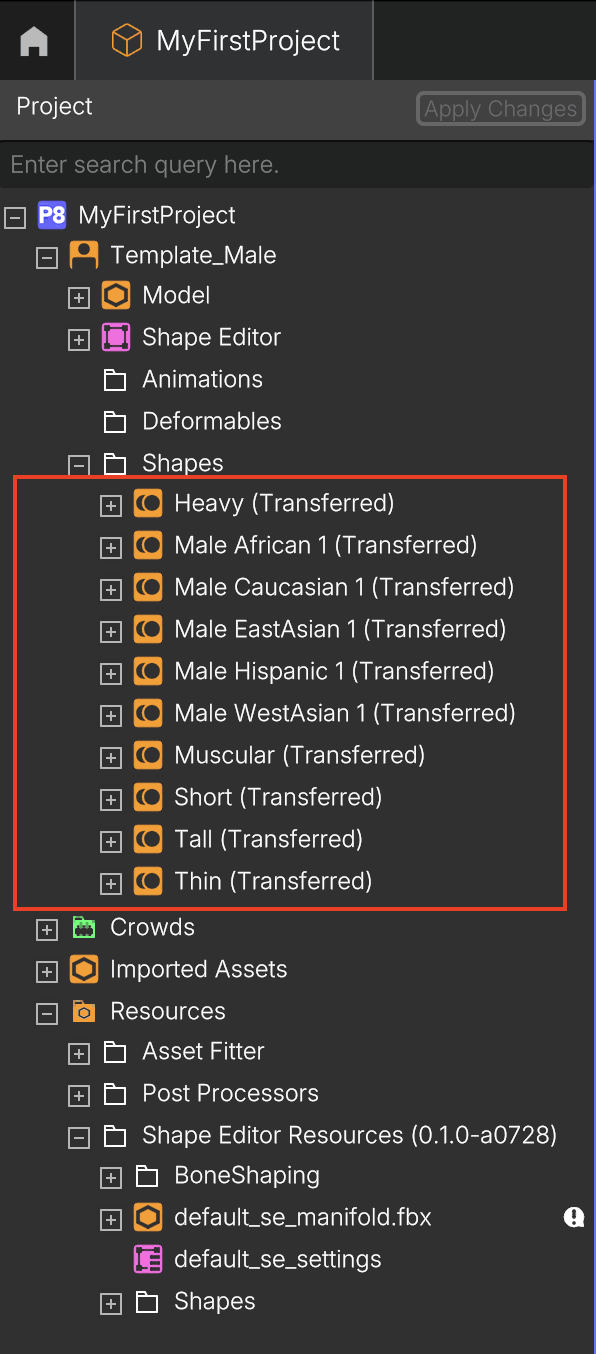
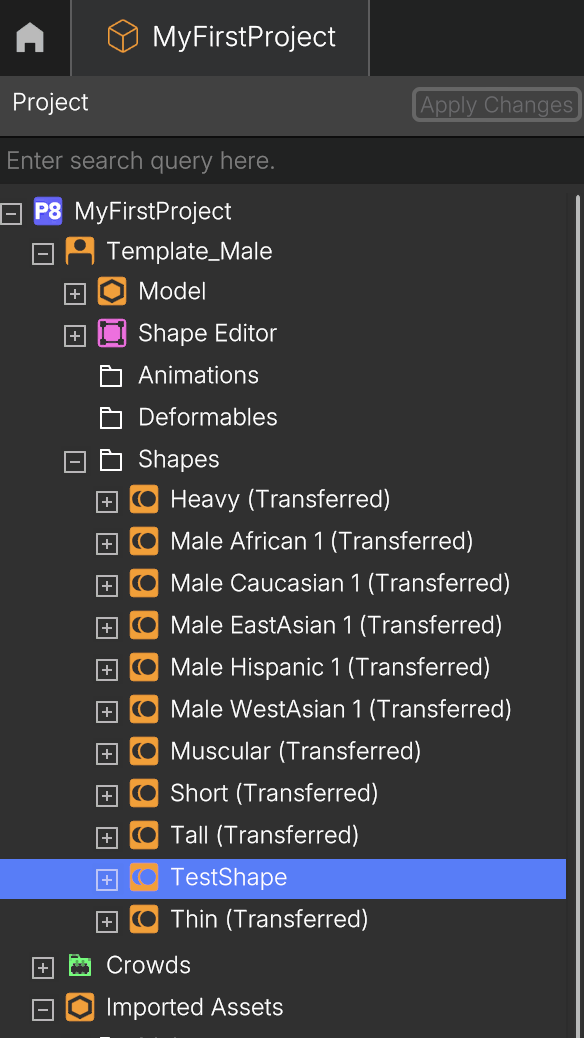
- The new Shape will appear in the project tree under the Template it was created for
- All Deformables associated with that Template (such as SportShirt, SportShorts, etc.) appear under the new Shape, as they have already been automatically fitted when saving the character in Step 6.
4.2. See Your Shape in Action
- Drag the newly created Shape into the Outliner
- Drag any Deformables into the Outliner as well to preview the full character setup (e.g., with clothing)
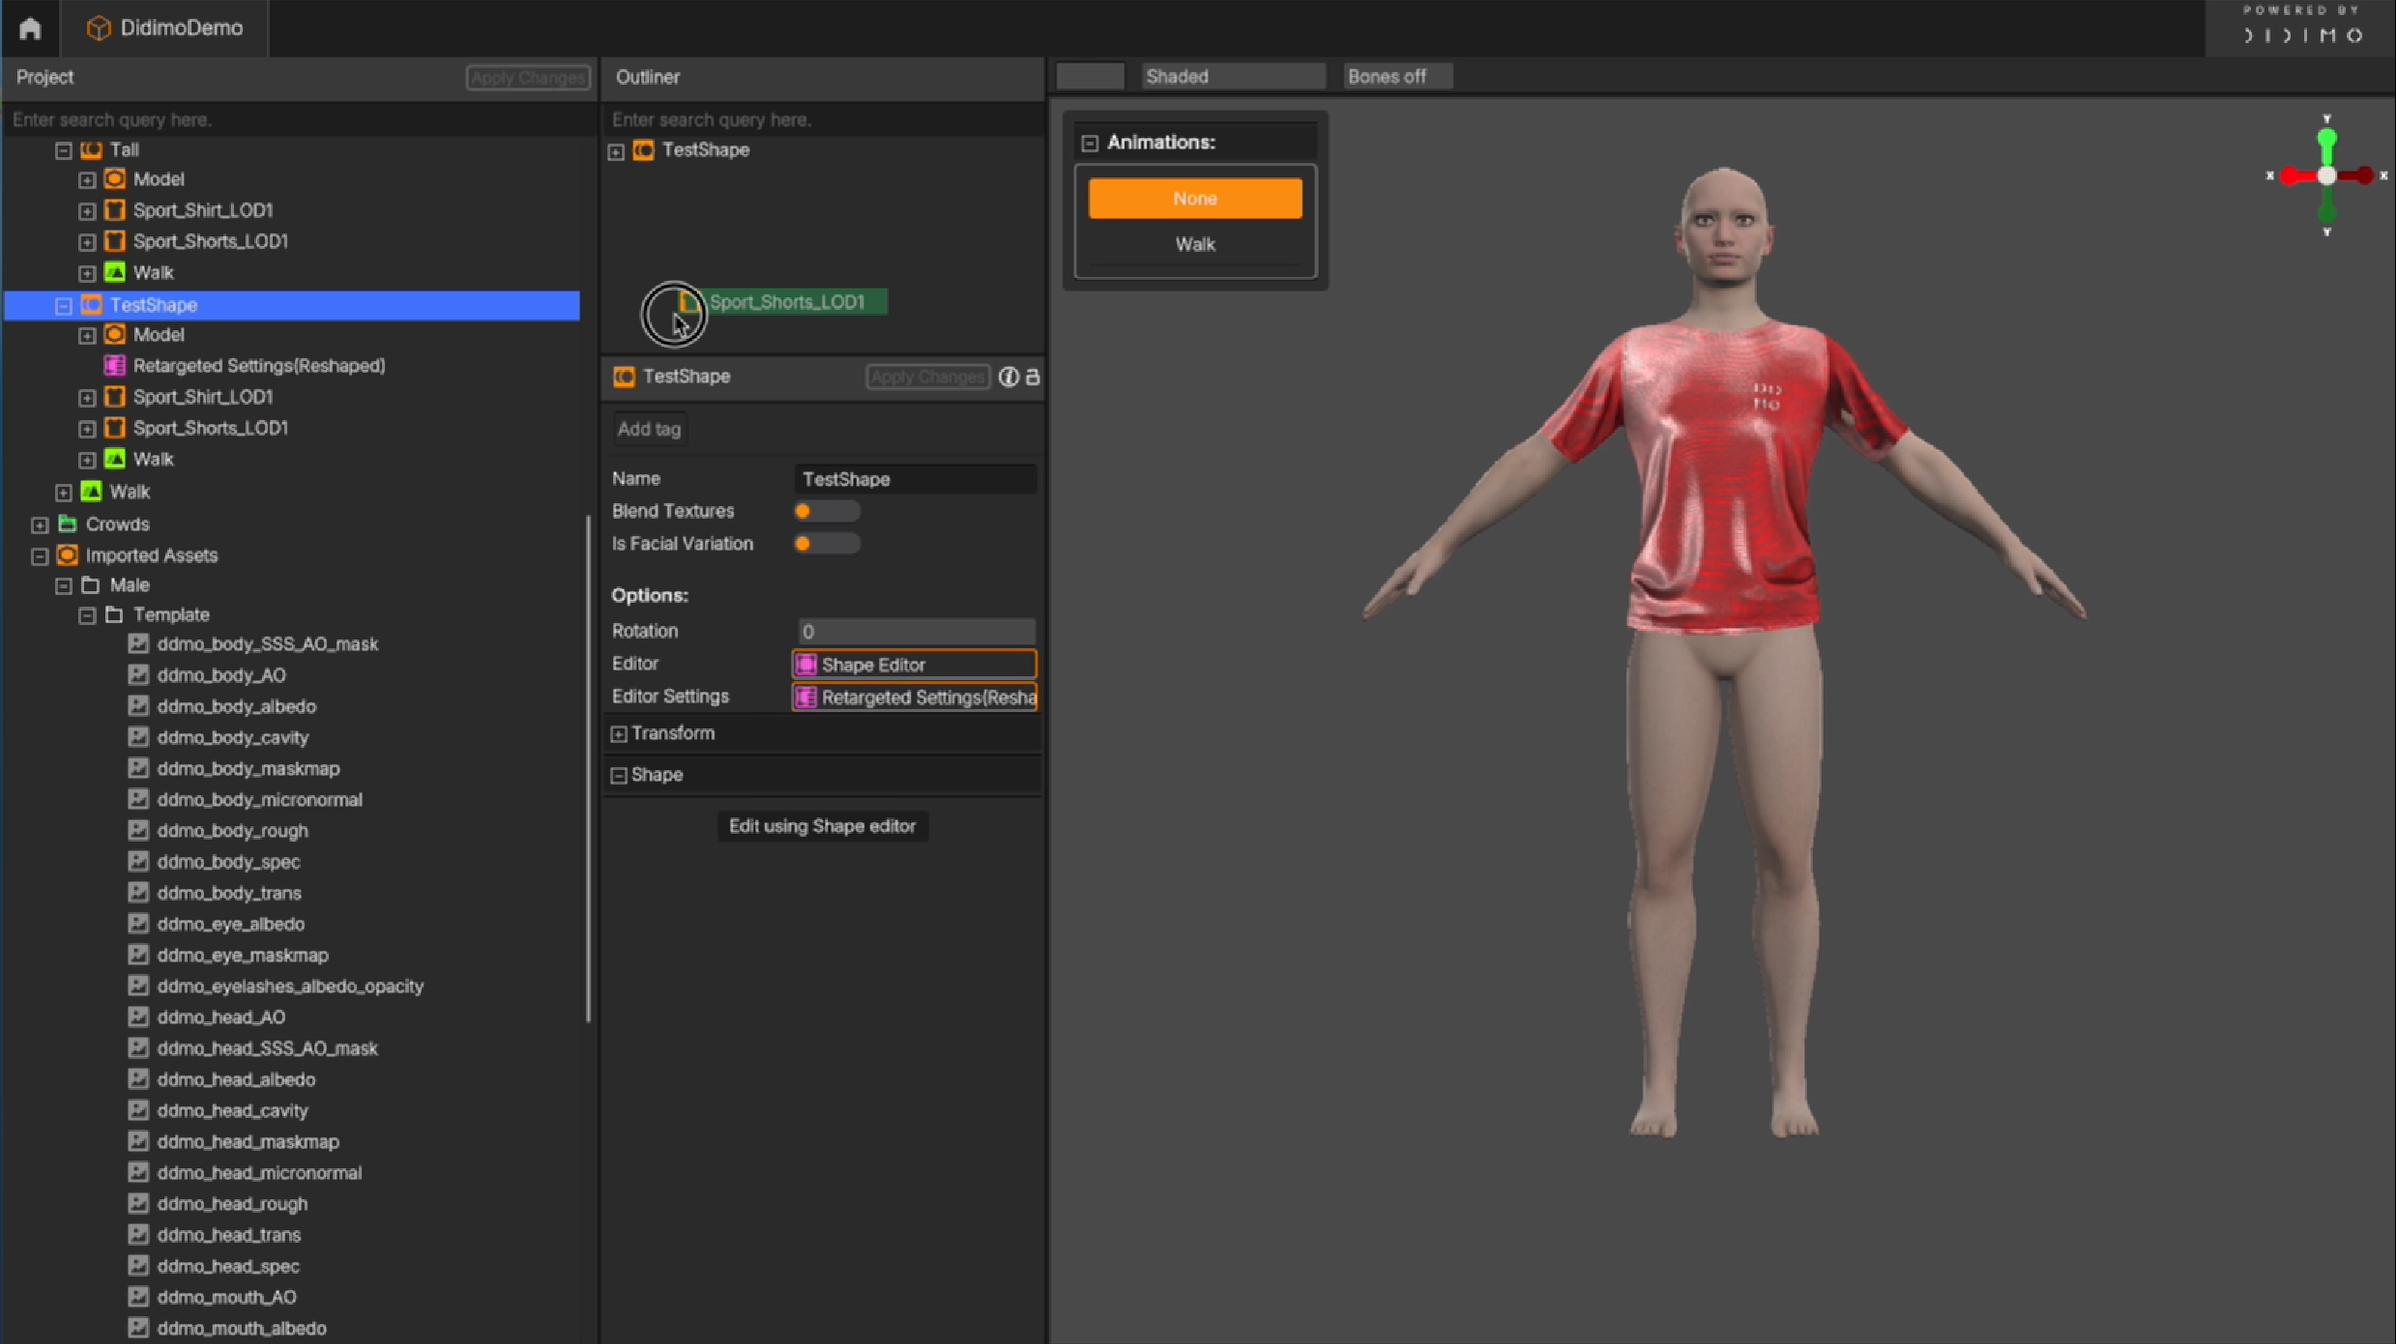
- If you previously added an animation, you can now test how the Shape behaves in motion

5. Create More Shapes
You can create multiple unique Shapes for any given Template, perfect for generating diverse characters in a Crowd for your project.
Updated 4 months ago