Creating a New Project
Creating your first project in Popul8 Express? Here's how to do it step by step:
🎬 Check our Tutorial Video:
1. Add your License
When you launch Popul8 Express for the first time, you’ll be asked to add a license file.
- Select the license file from the location where you saved it (you received it via email).
- Once confirmed, the application will be activated.
2. Create Project
On the main screen, click the Create Project button to start a new project.
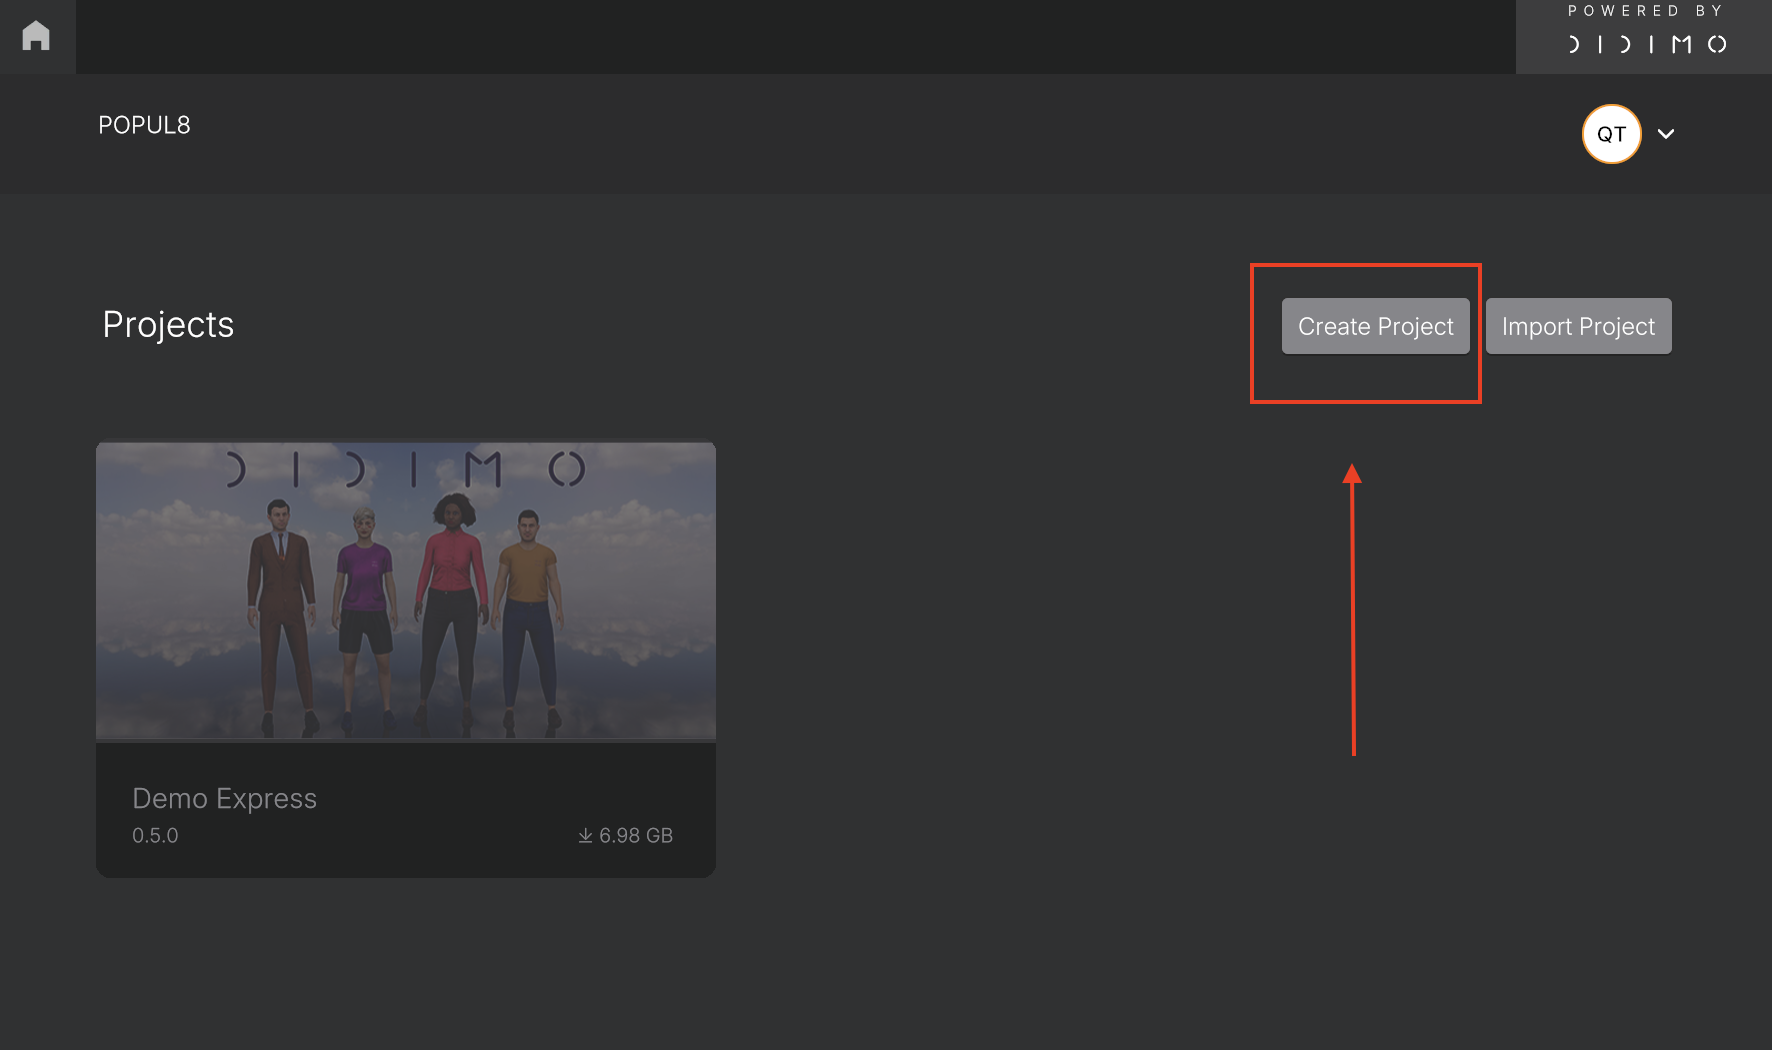
Create Project
3. Configure the Project's Name, Location and Thumbnail
In the dialog window that appears:
- Enter a project name (e.g., Demo_Test)
- Choose the project folder where the files will be saved.
- Add a thumbnail to make it easier to identify your project in the internal list.
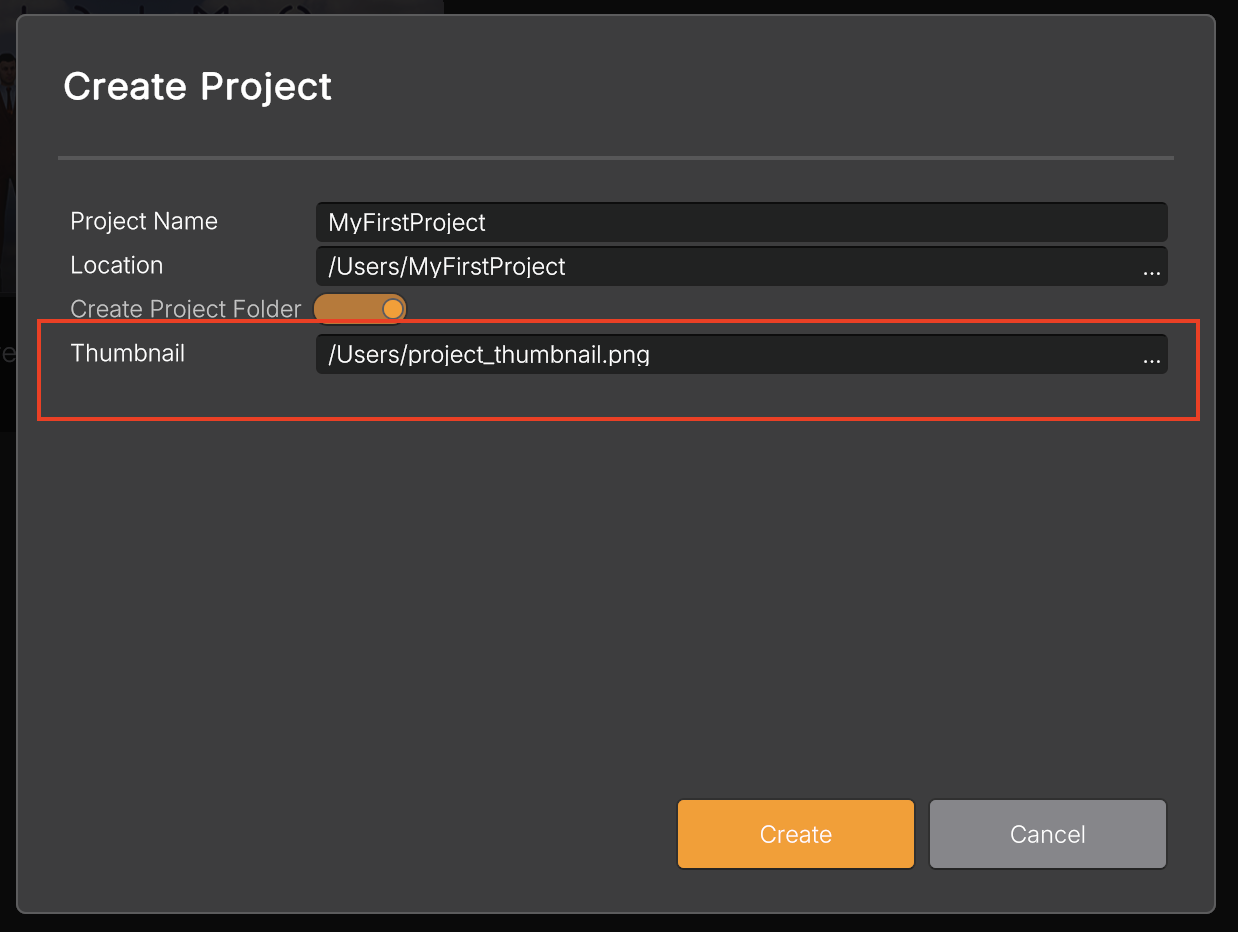
About the thumbnail:
- You can select an image file (e.g., a screenshot or logo) to use as the project icon by adding the path to the image in the Thumbnail field when creating a new project.
- Alternatively, you can manually specify the image path by updating the
thumbnailFilePathfield in your project’s.pp8file (ProjectName.pp8). If you choose this manual method, unlink your project, and then re-import it to apply the changes.
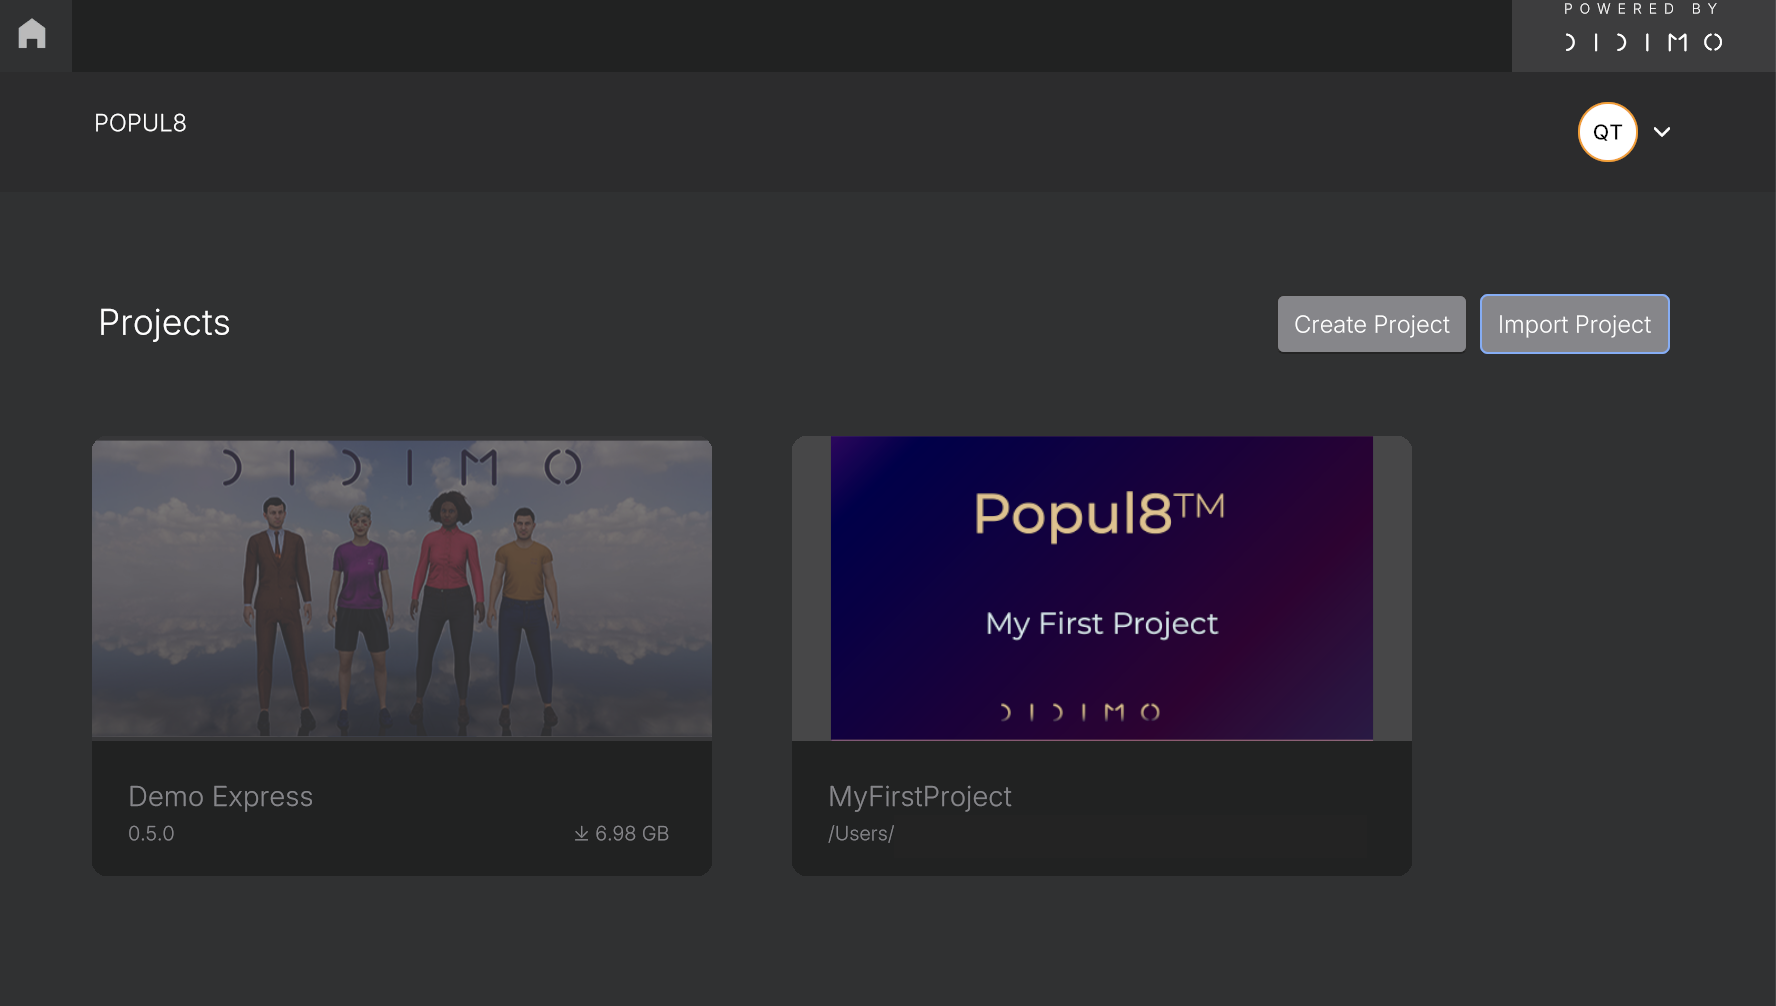
This helps you quickly recognize your project at a glance.
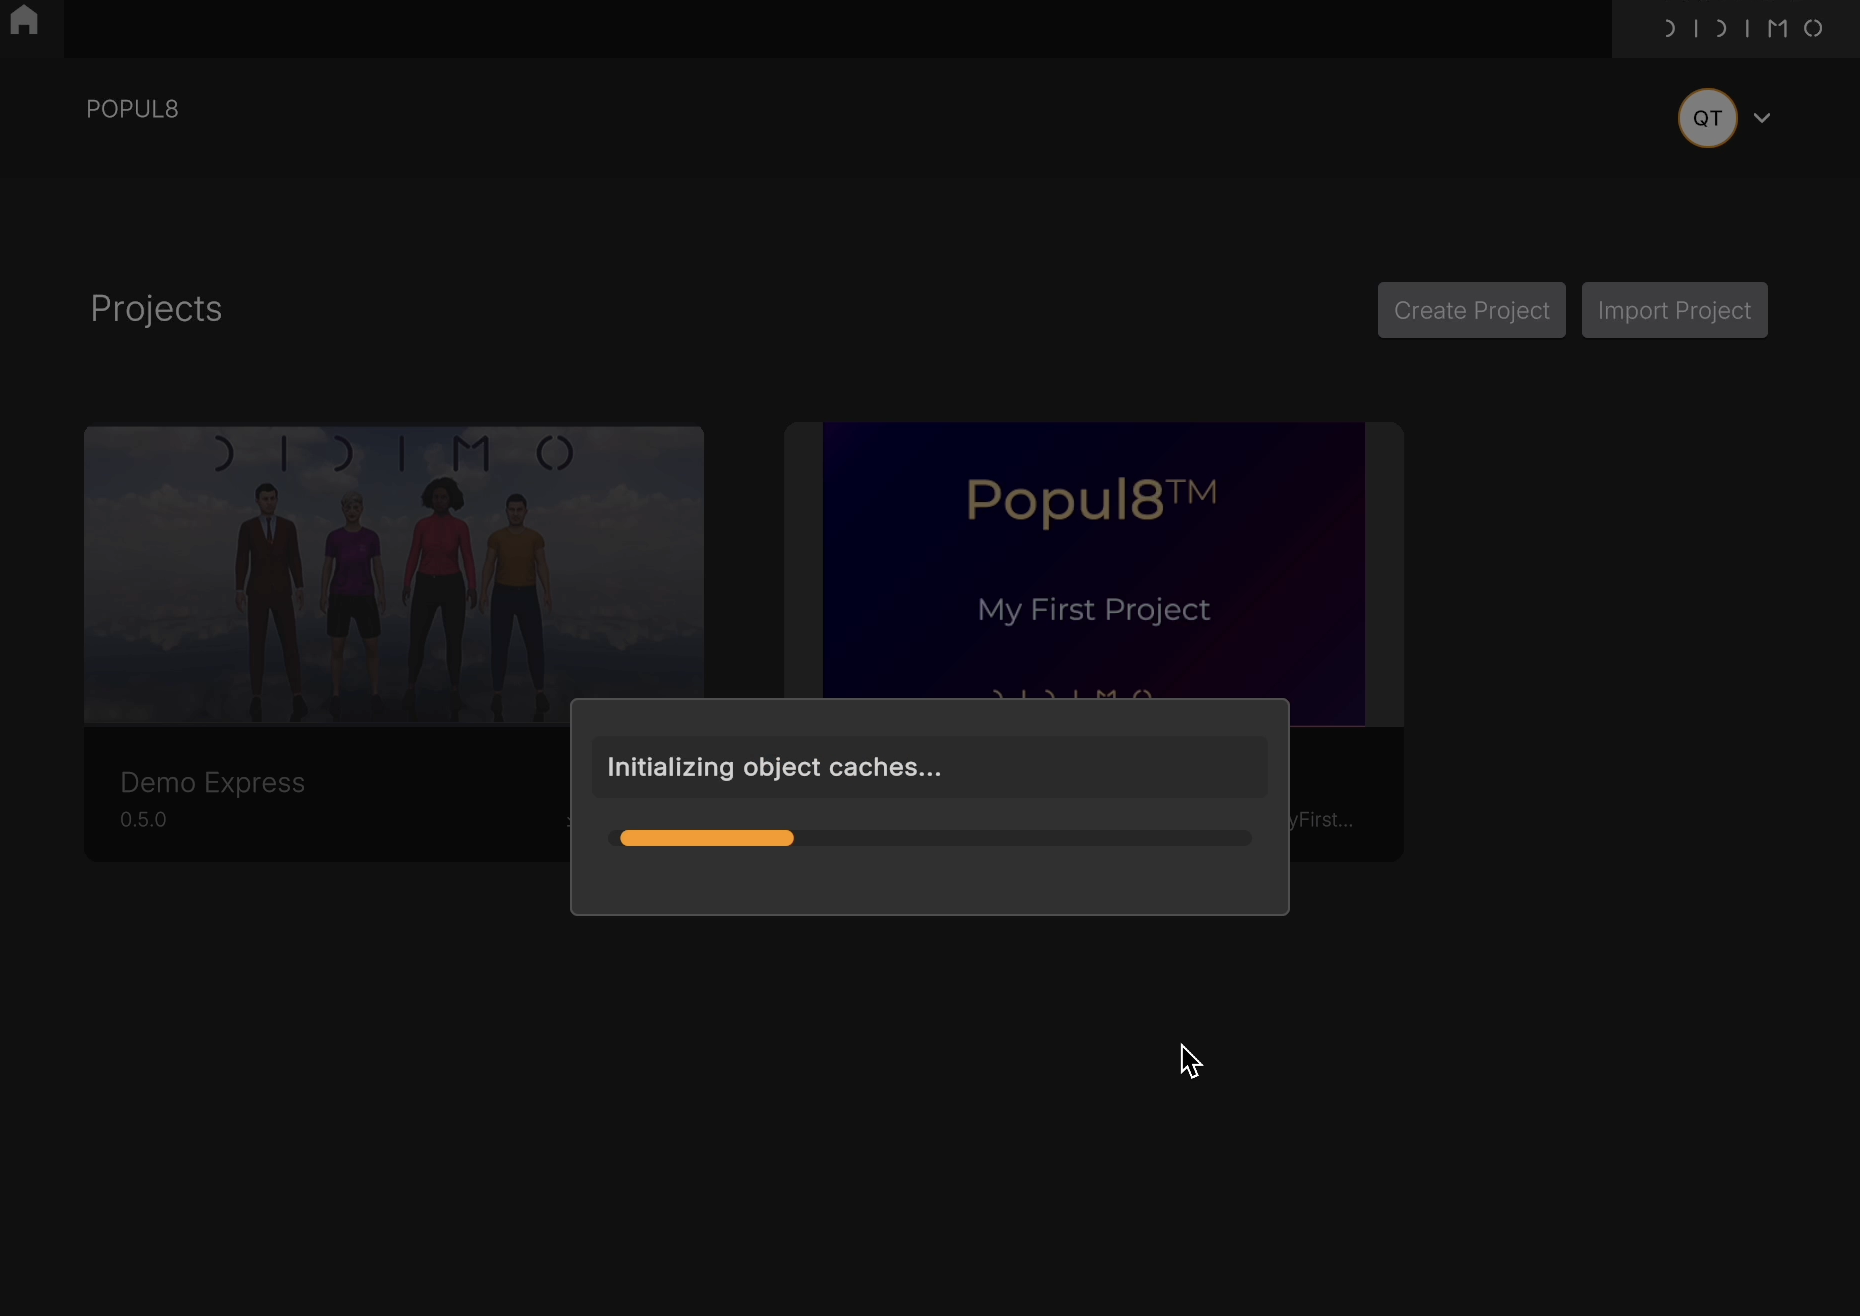
4. Wait for Project Initialization
Popul8 Express will set up all required components. This can take a few seconds.
✅ Done!
Your project has been successfully created, you’re ready to get started.
Good luck!
❓ What’s next?
Check how to add your first character to the scene → Importing Your Own Base Character (Template)
Updated 12 months ago
Did this page help you?