Create a Manifold for your Template
Create a target manifold for your template to be used in the Shape Editor transfer
Step by Step Guide
Download Didimo's Manifold
Download Shape Editor default manifold. Download.
Create Wrap using Faceform Wrap
Start Faceform Wrap
Ensure you have an .obj of your base model.
In this guide, we will explain how to use the Faceform Wrap Software. Please note that alternative tools are also available, such as Faceform ZWrap for ZBrush or MeshMatch for Maya.
To get started, download and Install Faceform Wrap Software . If you're not familiar with Faceform Wrap pipeline, additional documentation is available here.
Import the Base and Target Models
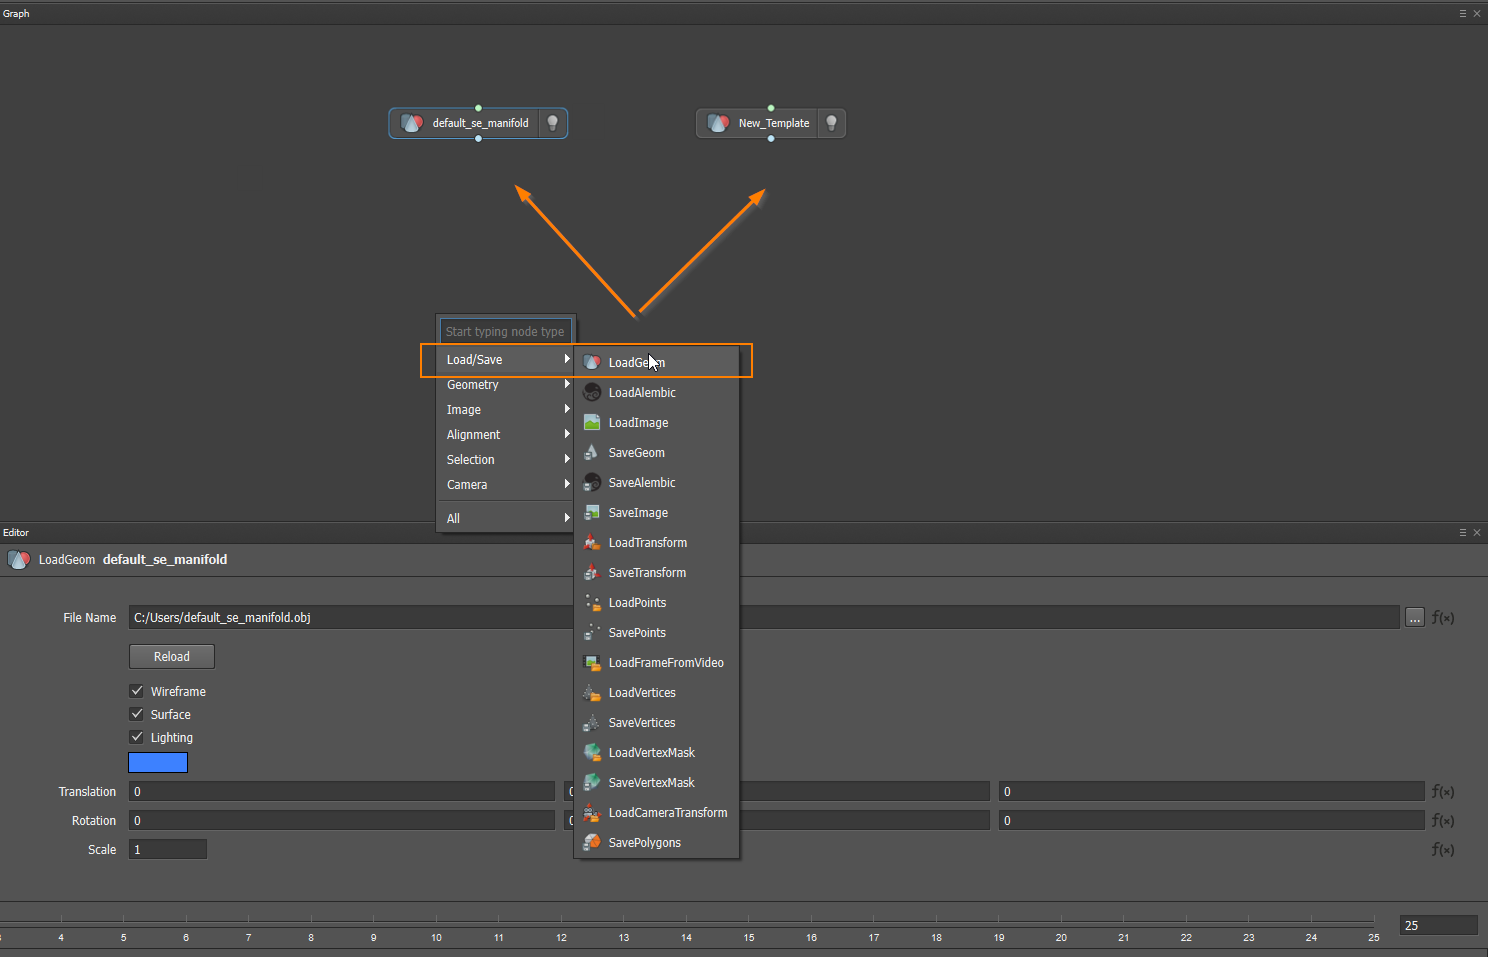
- In the Graph area, right-click and select Load/Save > LoadGeom.
- Add two LoadGeom nodes - One for default_se_manifold.obj and another one for your target model.
- Import the previously downloaded default_se_manifold (base) and your New Template (target topology) into their respective nodes.
Align Models
To ensure both models are properly aligned:
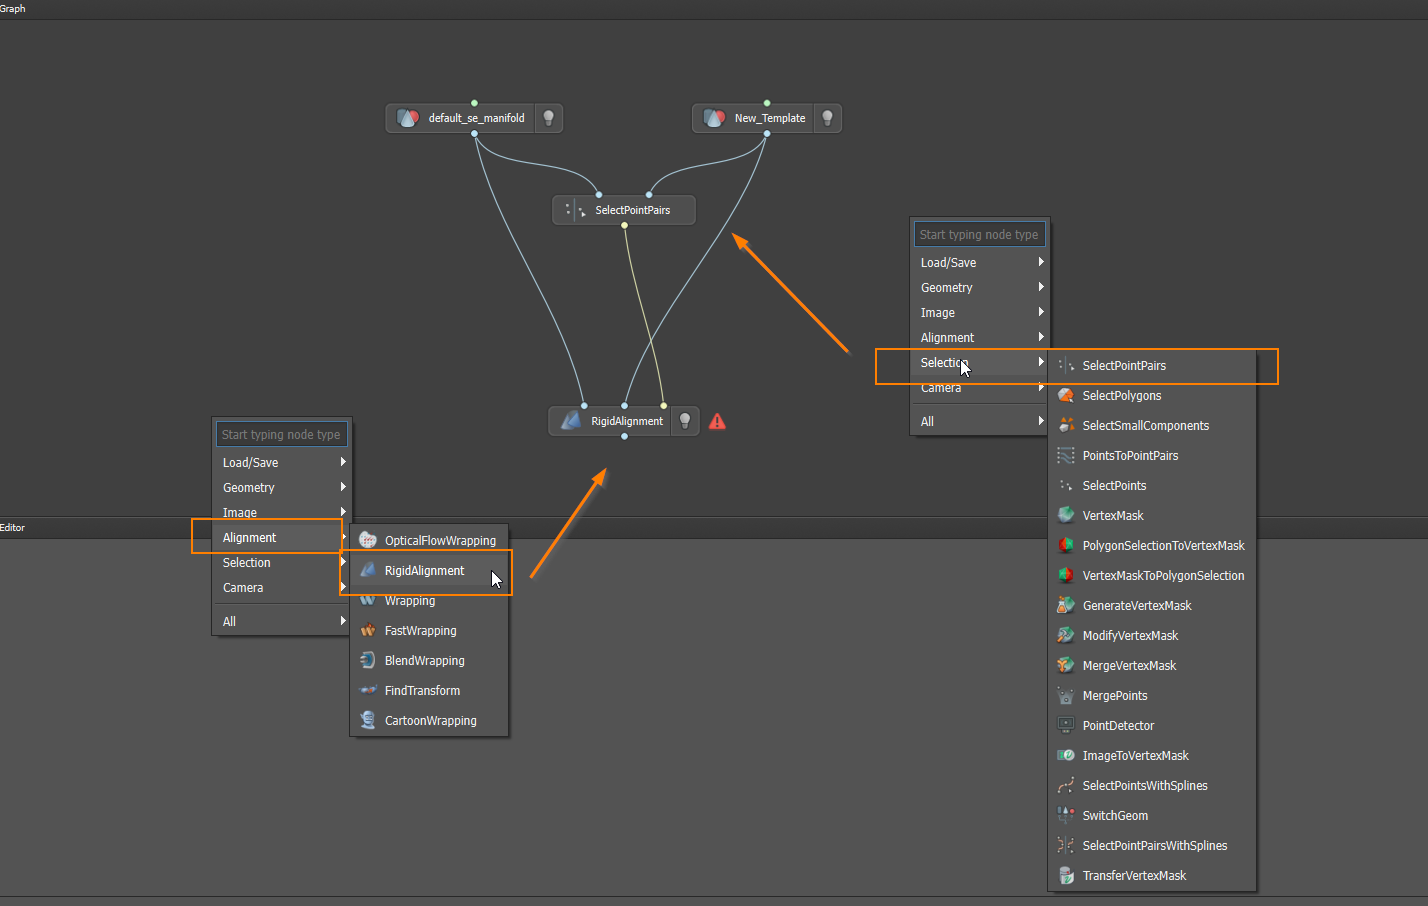
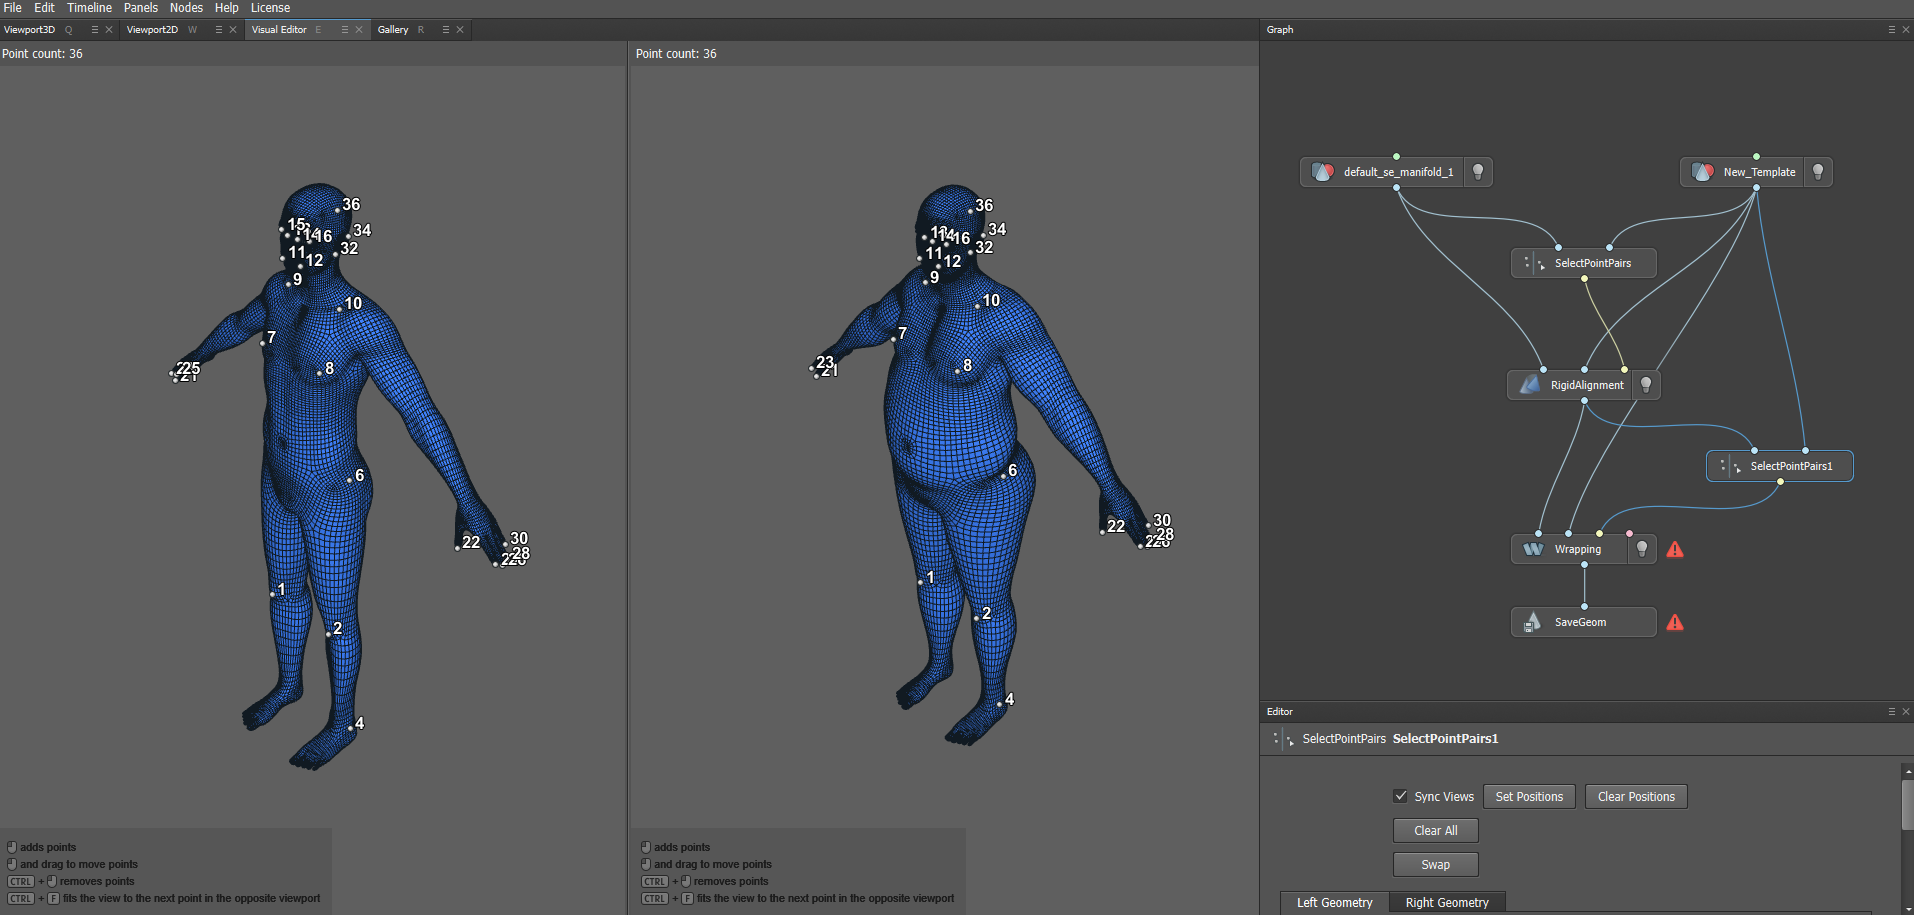
- In the Graph area, right-click and select Selection > SelectPointPairs.
- Then, right-click again and choose Alignment > RigidAlignment
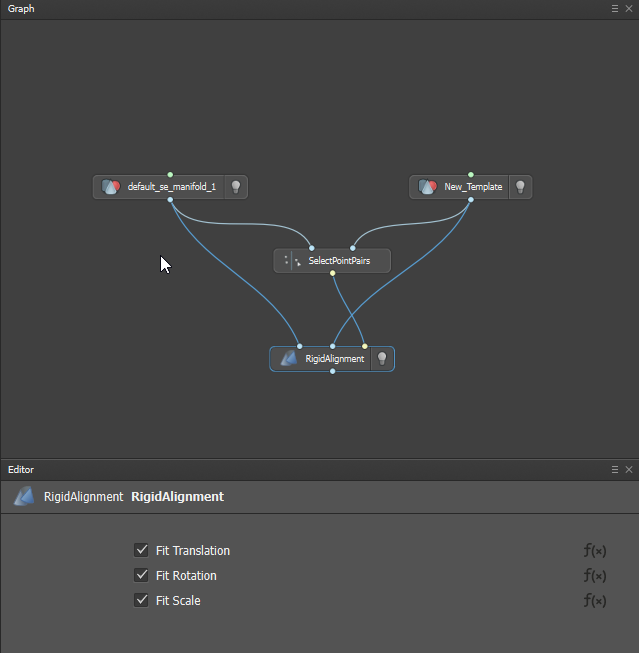
- Connect the nodes as shown in the image below and in the RigidAlignment node, ensure all options are selected.
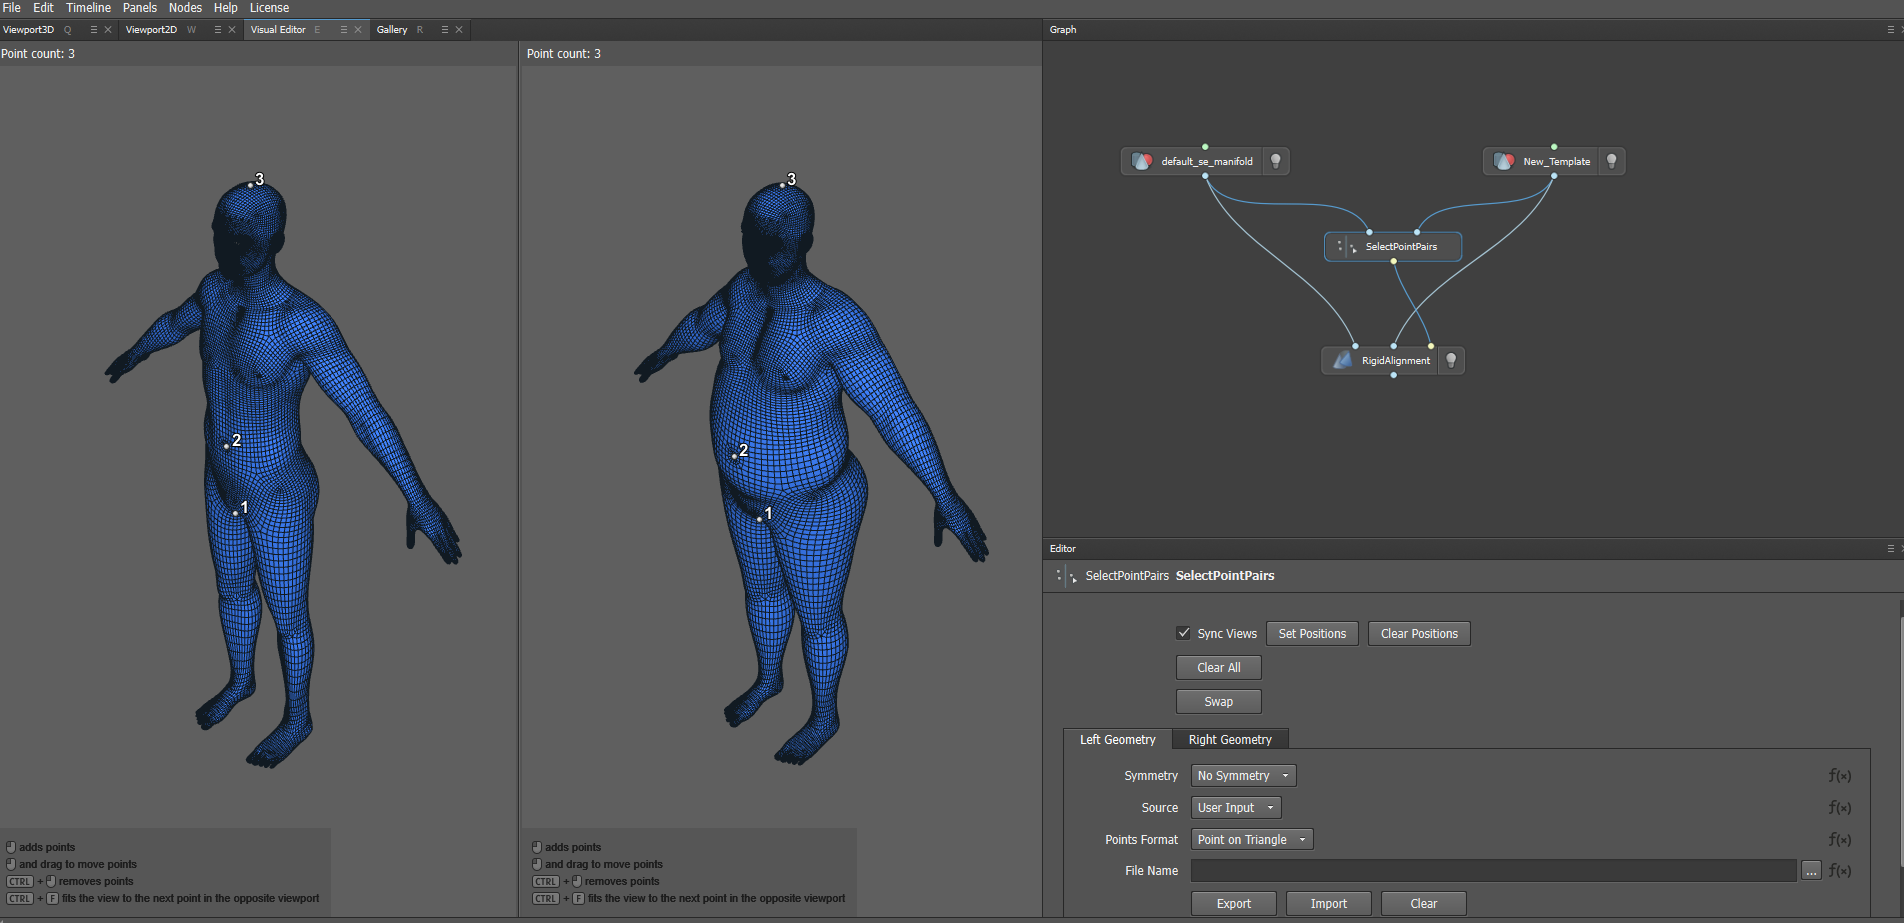
- Click on the SelectPointPairs node and, in the VisualEditor view, define corresponding point pairs between the two models. You don’t need to add too many, just enough to establish proper alignment.
A minimum of 3
selectionPointPairsis required to proceed. However, if the results are not sufficiently accurate, you may add additional pairs to improve alignment and overall precision.
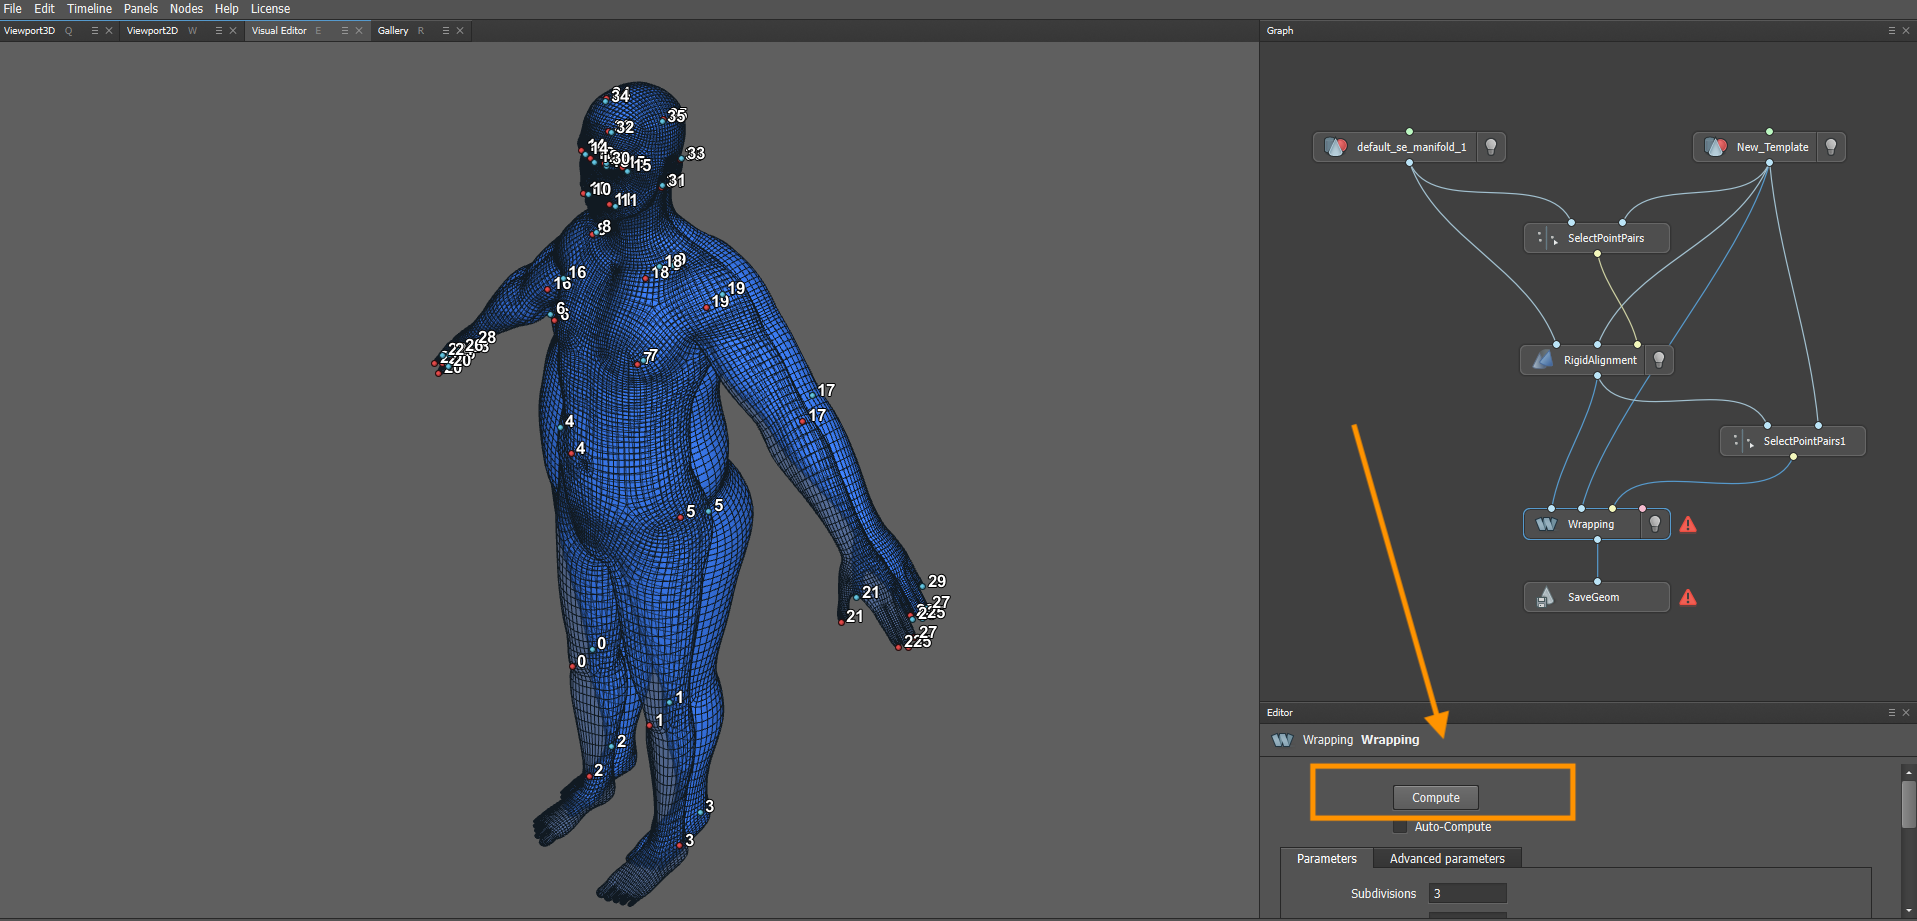
Generating the Wrap
To generate the wrap between your base and target models, follow the steps below to add required nodes to the Graph area:
- Right-click and select Selection > SelectPointPairs.
- Right-click again and choose Alignment > Wrapping.
- Right-click once more and select Load/Save > SaveGeom.
- Connect the nodes as shown in the reference image.

- Select Point pairs, click on the SelectPointPairs node and, in the VisualEditor, define corresponding point pairs between the source and target models.
- Compute Wrap, after defining your point pairs, select the Wrapping node and press Compute and wait for the wrapping process to complete.
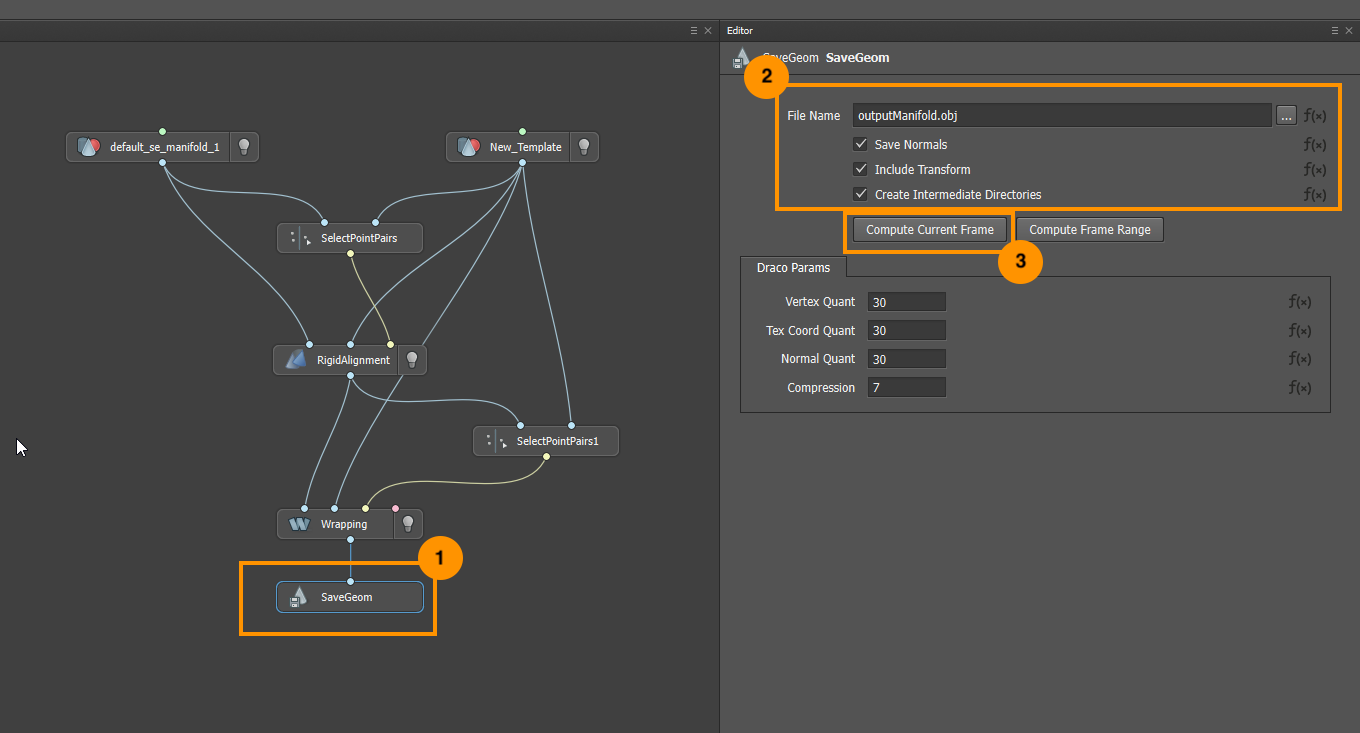
- Export the Wrapped Geometry
- Select the SaveGeom node.
- Set the export path and make sure the Save Normals option is enabled.
- Click Compute Current Frame to export the wrapped model.
Convert to FBX
-
Convert to FBX using Blender (Please note that alternative tools are also available).
- Open Blender and navigate to File > Import > Wavefront (.obj) to import the .obj file previously saved.
- Once imported, you might need to downscale your model to 0.01
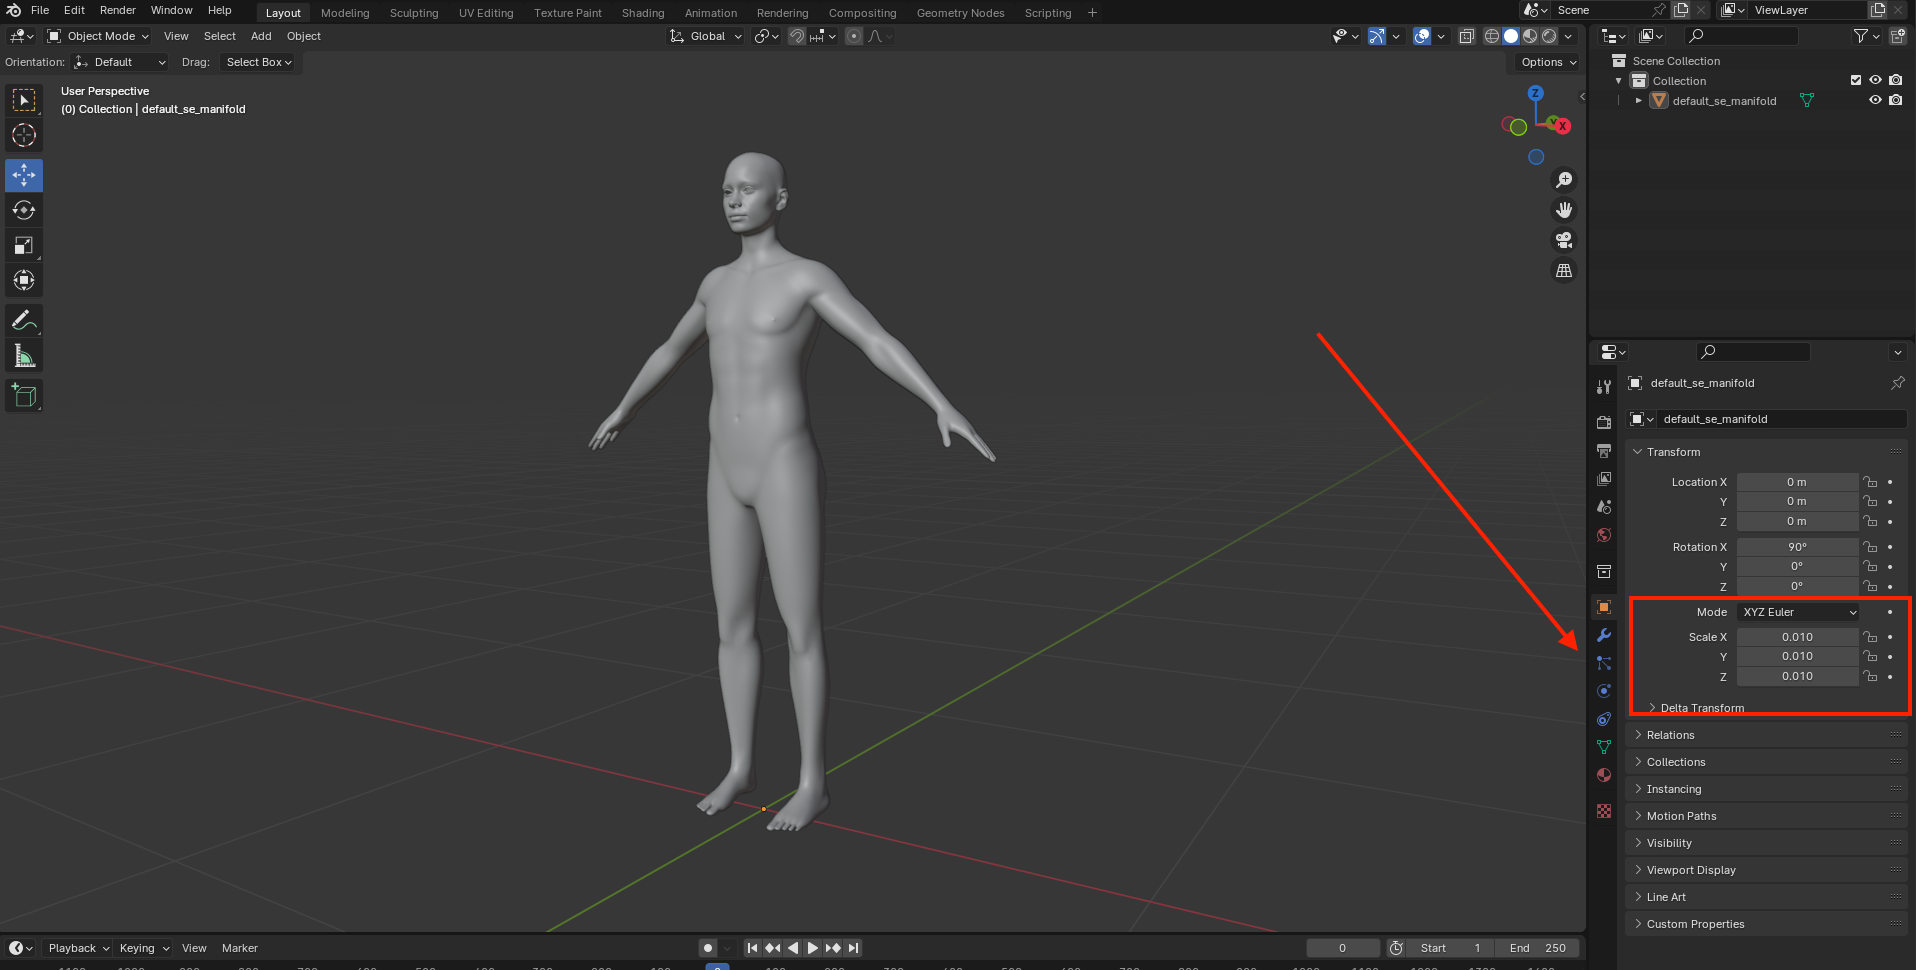
iii. Then File > Export > FBX (.fbx)
Now you are ready to create a Shape Editor.
Updated 9 months ago