Create a Crowd of 250 East Asian Athletic Males
From a Base Character to a Crowd in 15 minutes
This is the exact use case that Popul8 Express was built for. Have your characters, your style and your specifications automated at scale: instantly fit assets, create variations, generate crowds, and export game-ready characters.
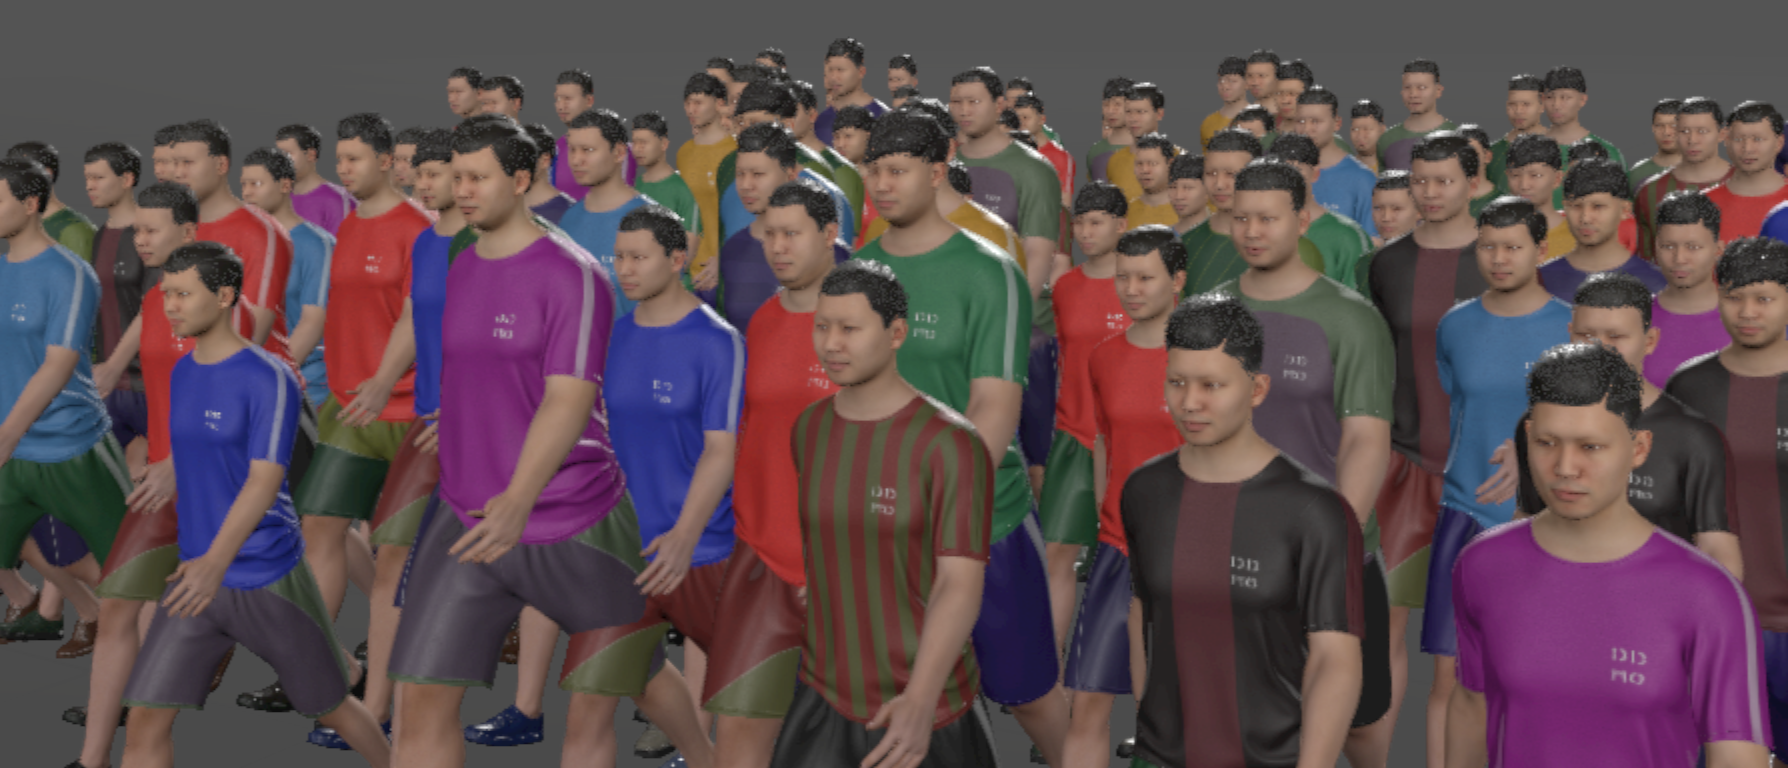
This guide shows how to generate a large-scale crowd of 3D Human Characters with East Asian features, all dressed in athletic attire, to populate stadiums, marathons, fitness scenes, or any environment requiring realistic and diverse active characters.
Step 1: Choose Your Base Character
For this example, we will use the Didimo Male Template Character included in the Demo Express Package.
You can find more information about downloading our Demo Express Project here.
If you have your own Base Character, you can instead start by
Step 2: Download and Setup the Didimo East Asian Male Package
Popul8 Express comes with different Asset Packages that you can download to help you quickly create variations form your Template Character. In this instance, we will download the Didimo East Asian Male Asset Package.
Follow the detailed instructions here to download and setup the package provided.
Once the download is complete, verify that the package appears under the Resources folder.
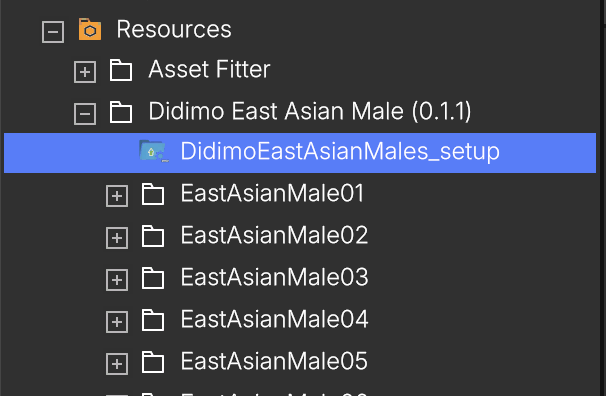
Inside, find the installer file named DidimoEastAsianMales_setup. Right-click the file and select Run Setup.
In the Package Setup window that appears, drag and drop the Male template (corresponding to this package) into the designated area, then click Start to begin the setup process.

This setup will automatically import all East Asian Male Shapes from the package into your project and generate a preconfigured Crowd that you can immediately adapt and customize to fit your project’s needs.
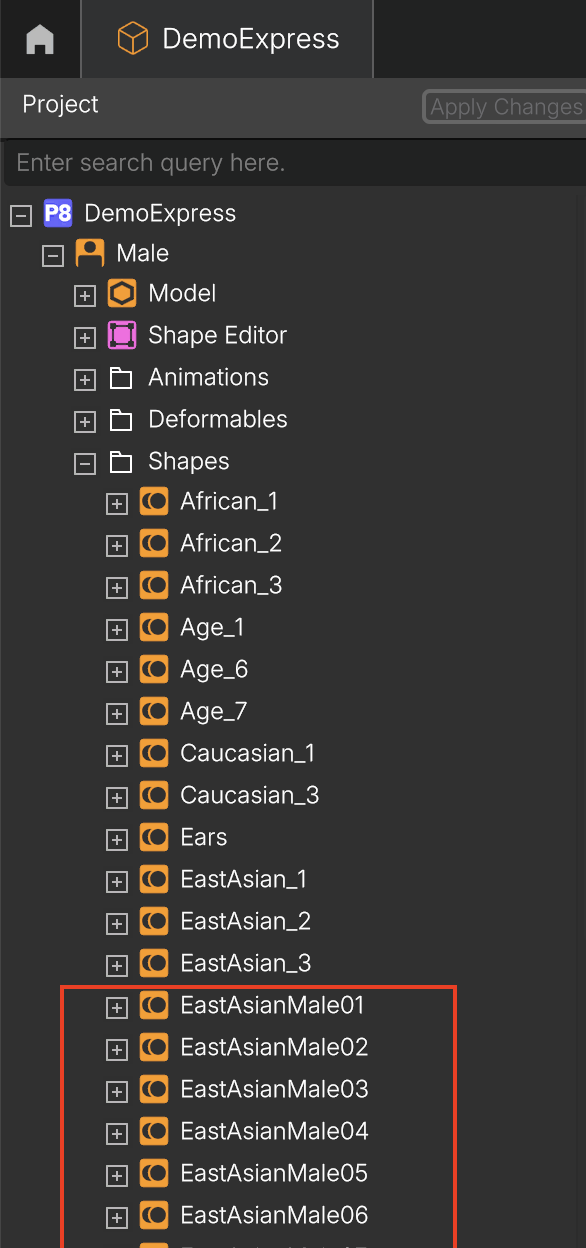
Once the setup is complete, you’ll find all imported shapes under the Male → Shapes folder, along with any previously existing shapes.
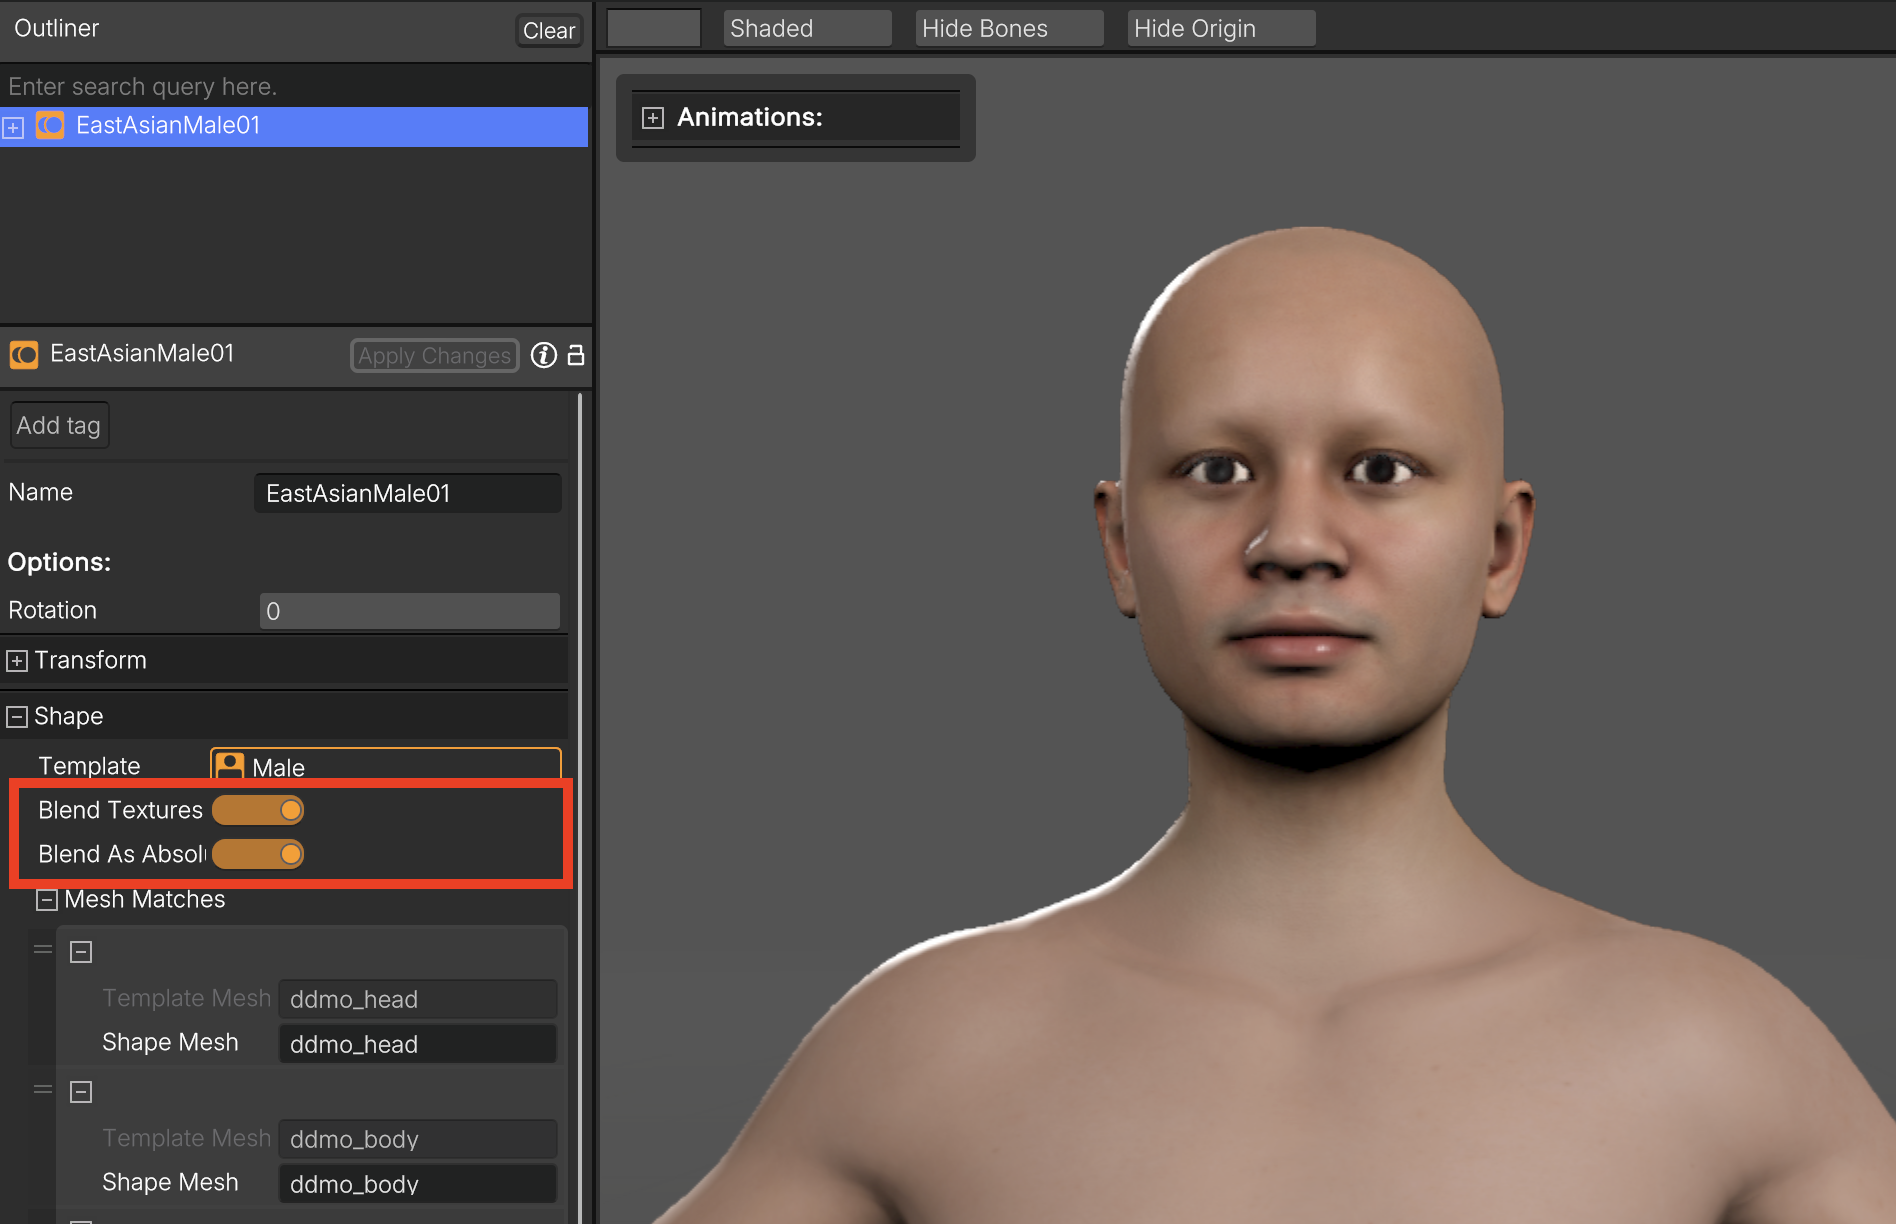
To inspect the new shapes visually, drag and drop a few of them into the Outliner. Ensure that the flags Blend Textures and Blend As Absolute are both enabled for each East Asian Male shape. These settings guarantee that each character’s distinct head shape, skin tone, and facial details are accurately represented within your generated crowds.
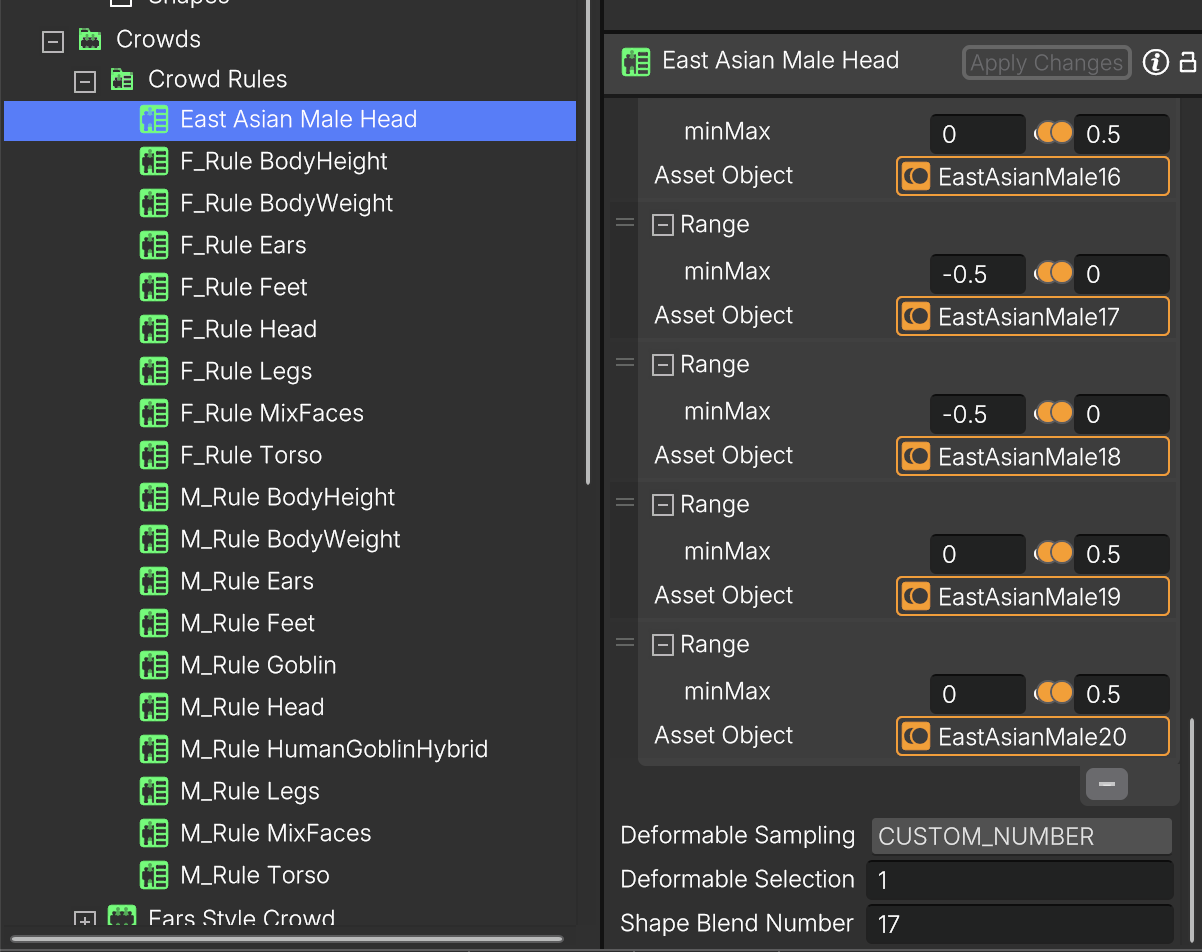
You should also see a new Crowd Rule named East Asian Male Head under the Crowd Rules folder. You can review the recommended preset Range (min/Max) values for each shape, as well as the optimal Shape Blend Number used by the rule.
These parameters have been fine-tuned for balanced diversity and realism. Modifying may affect the natural variation within your crowd.
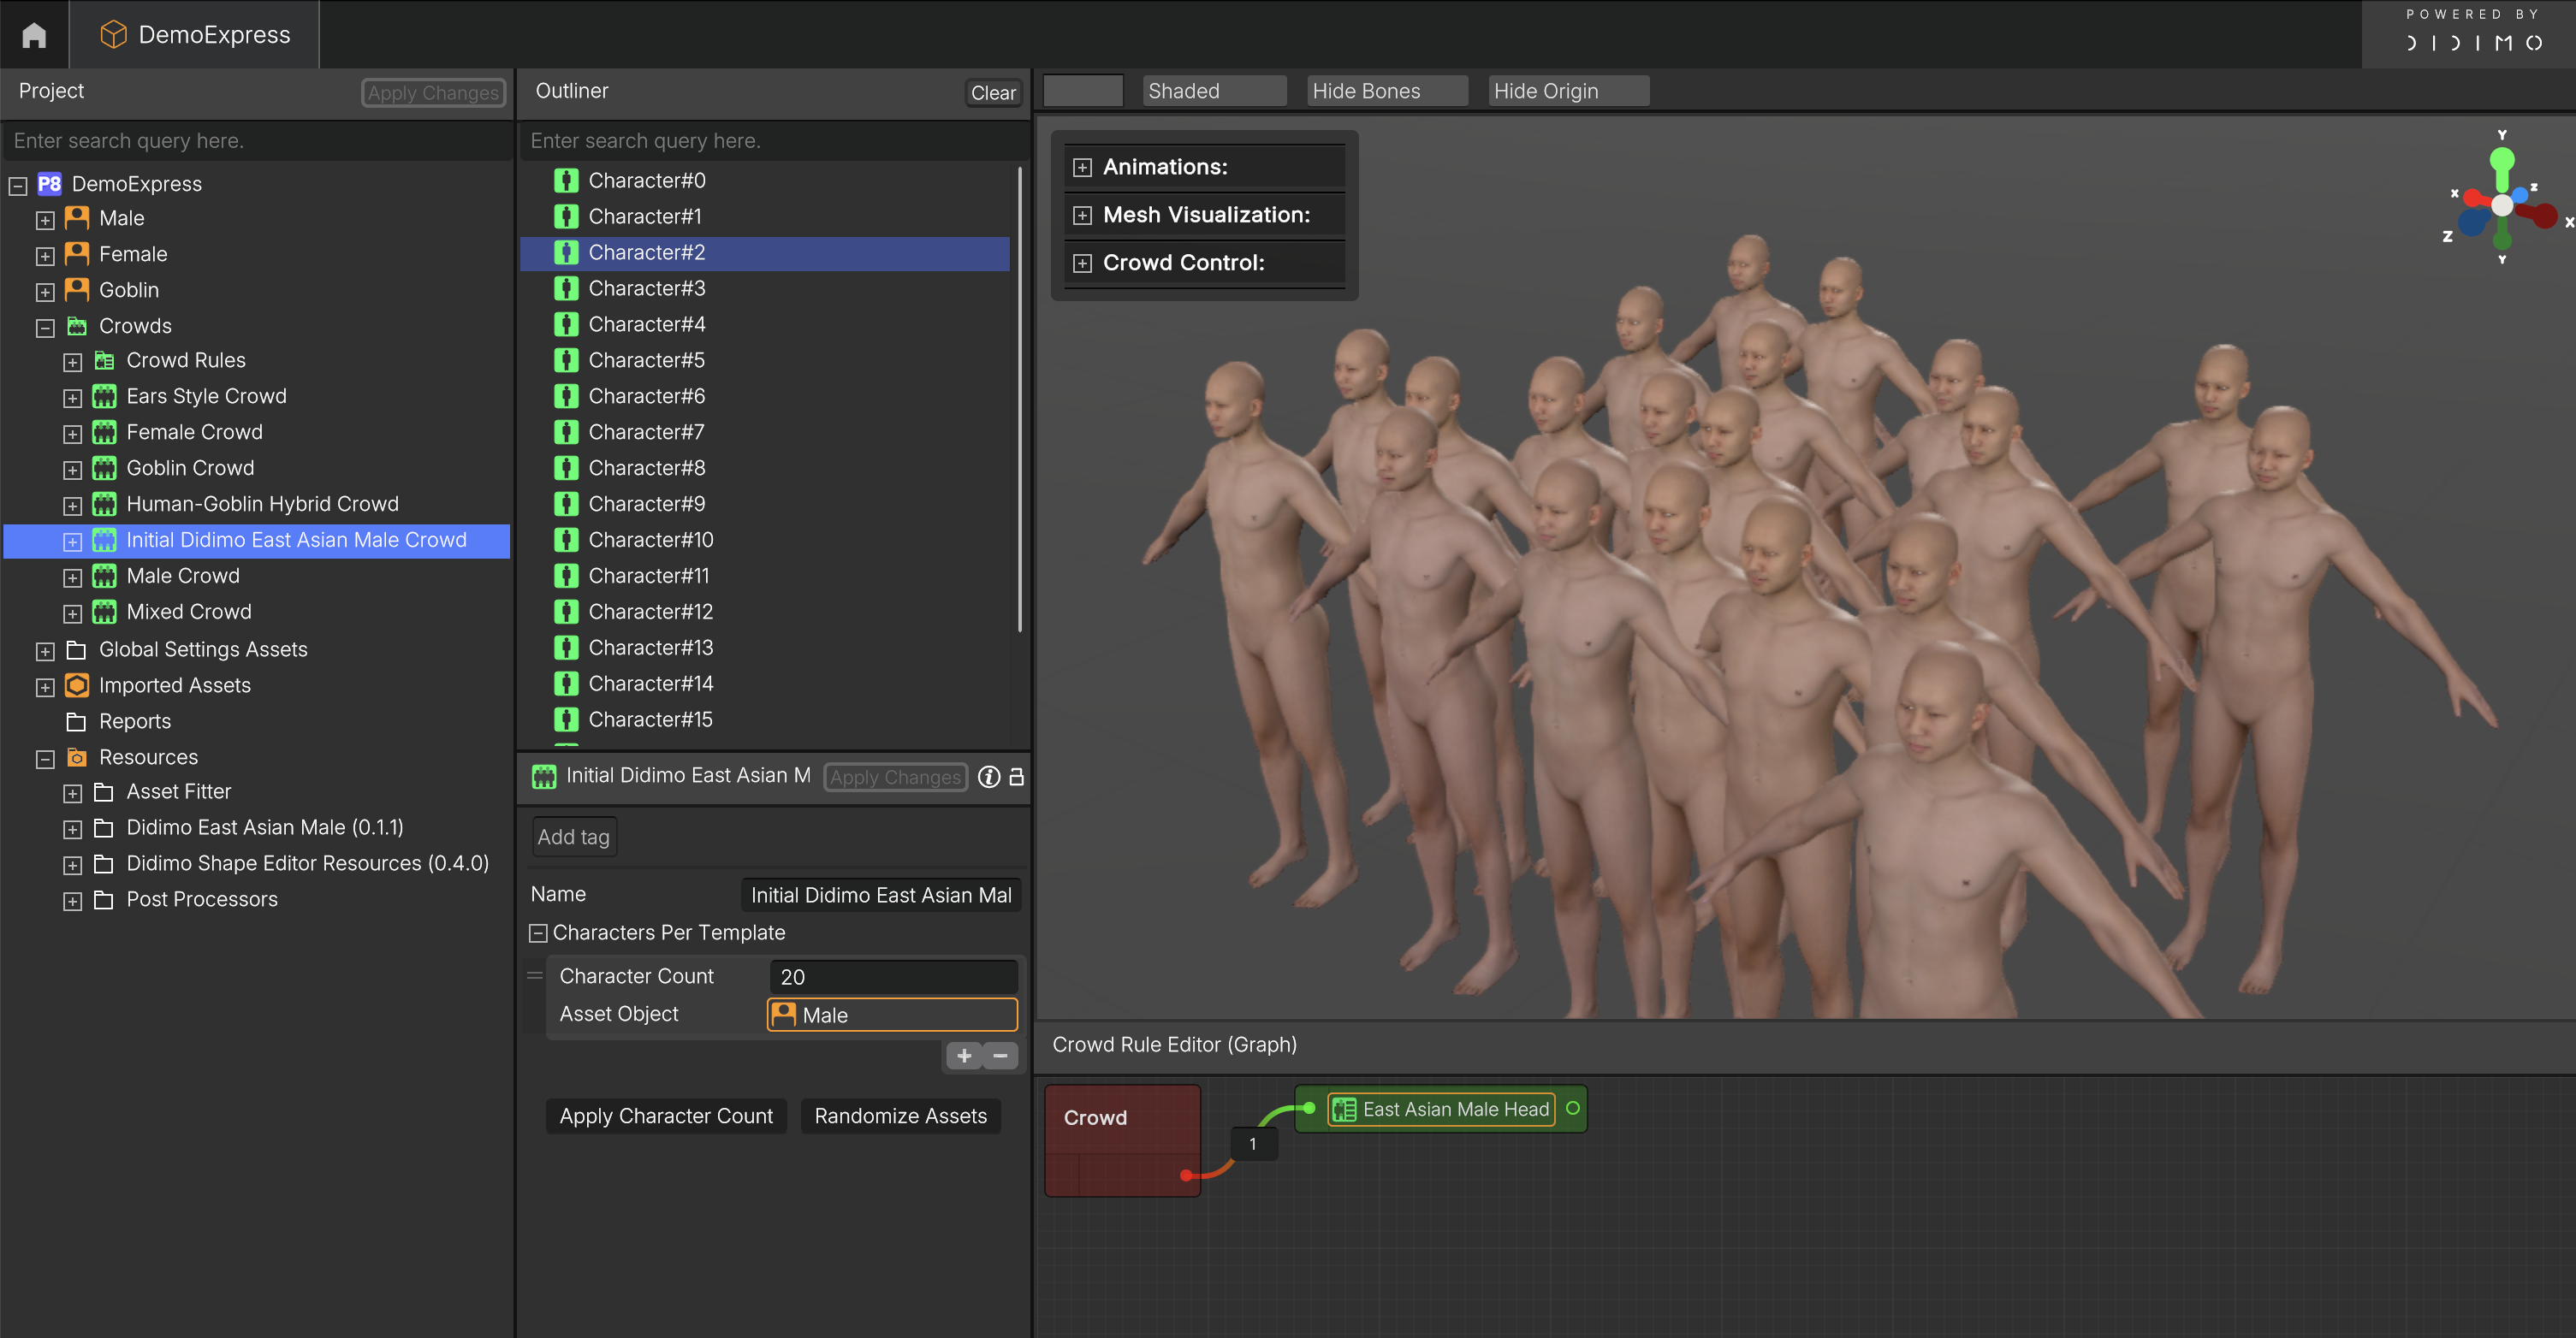
Finally, you should now see an initial crowd named Initial East Asian Male Crowd under the Crowds folder.
This crowd automatically uses the East Asian Male Head rule described above.
At this stage, the crowd is still basic: all characters share the same body, have no hair, and are unclothed. To bring more realism and diversity to the crowd, you’ll need to add additional crowd rules, which we’ll cover in the next step.
Step 3: Customize the Crowd
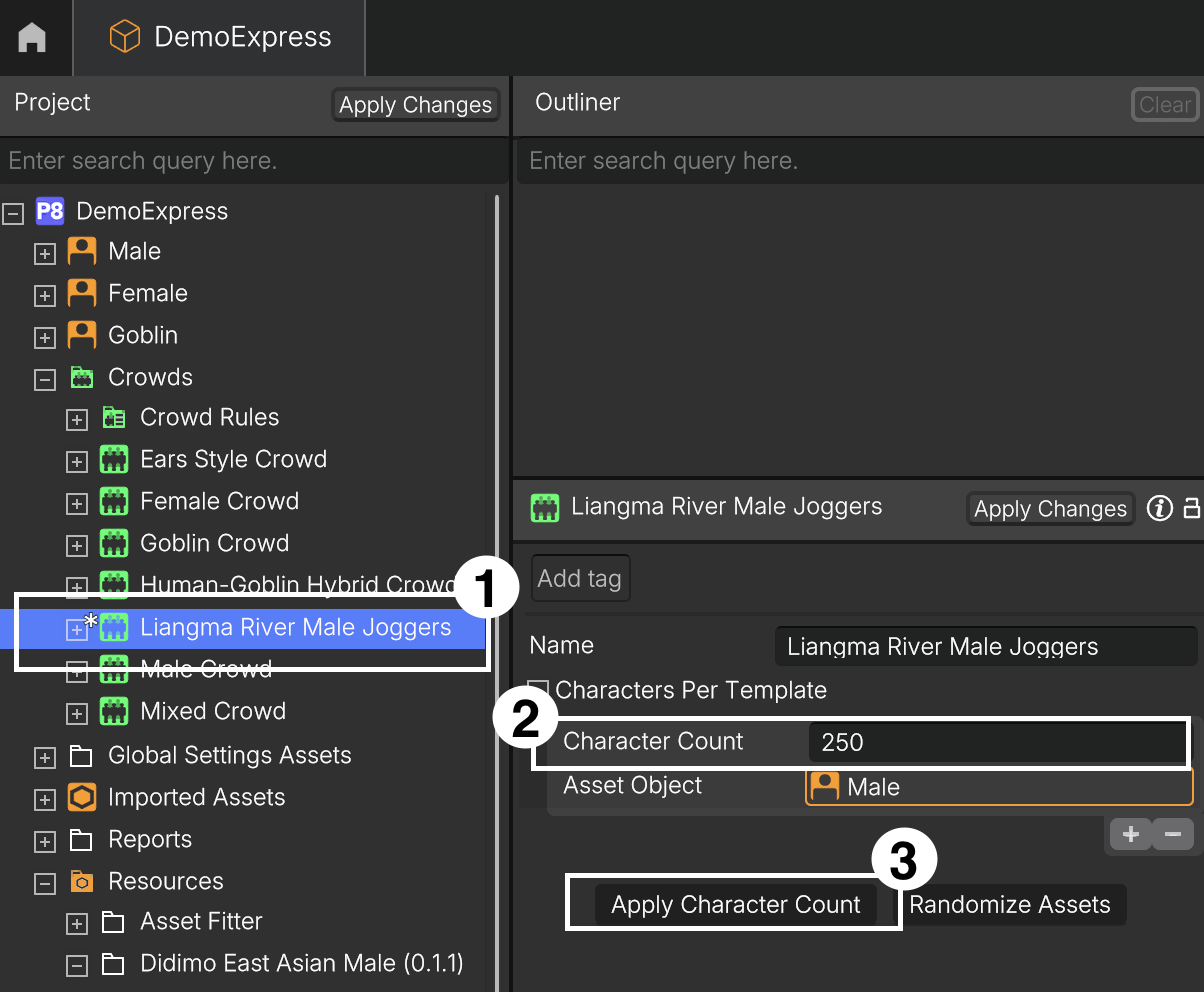
You can start by giving your crowd a more descriptive name. In the crowd window, replace the default name Initial East Asian Male Crowd with something more meaningful, for example, Liangma River Male Joggers, and click Apply Changes to save it.
Next, you’ll enrich the crowd by adding diversity and context. Following the general Crowd Creation Guidelines, create new rules or use existing ones to define variations in hair, height, and weight, and to assign an appropriate sport outfit to your characters.
Once these new rules are created, connect them together in the Crowd Rule Editor (Graph). This modular setup allows you to control each aspect of your crowd’s appearance and behavior, making it easy to generate large, realistic groups with diverse looks and proportions.
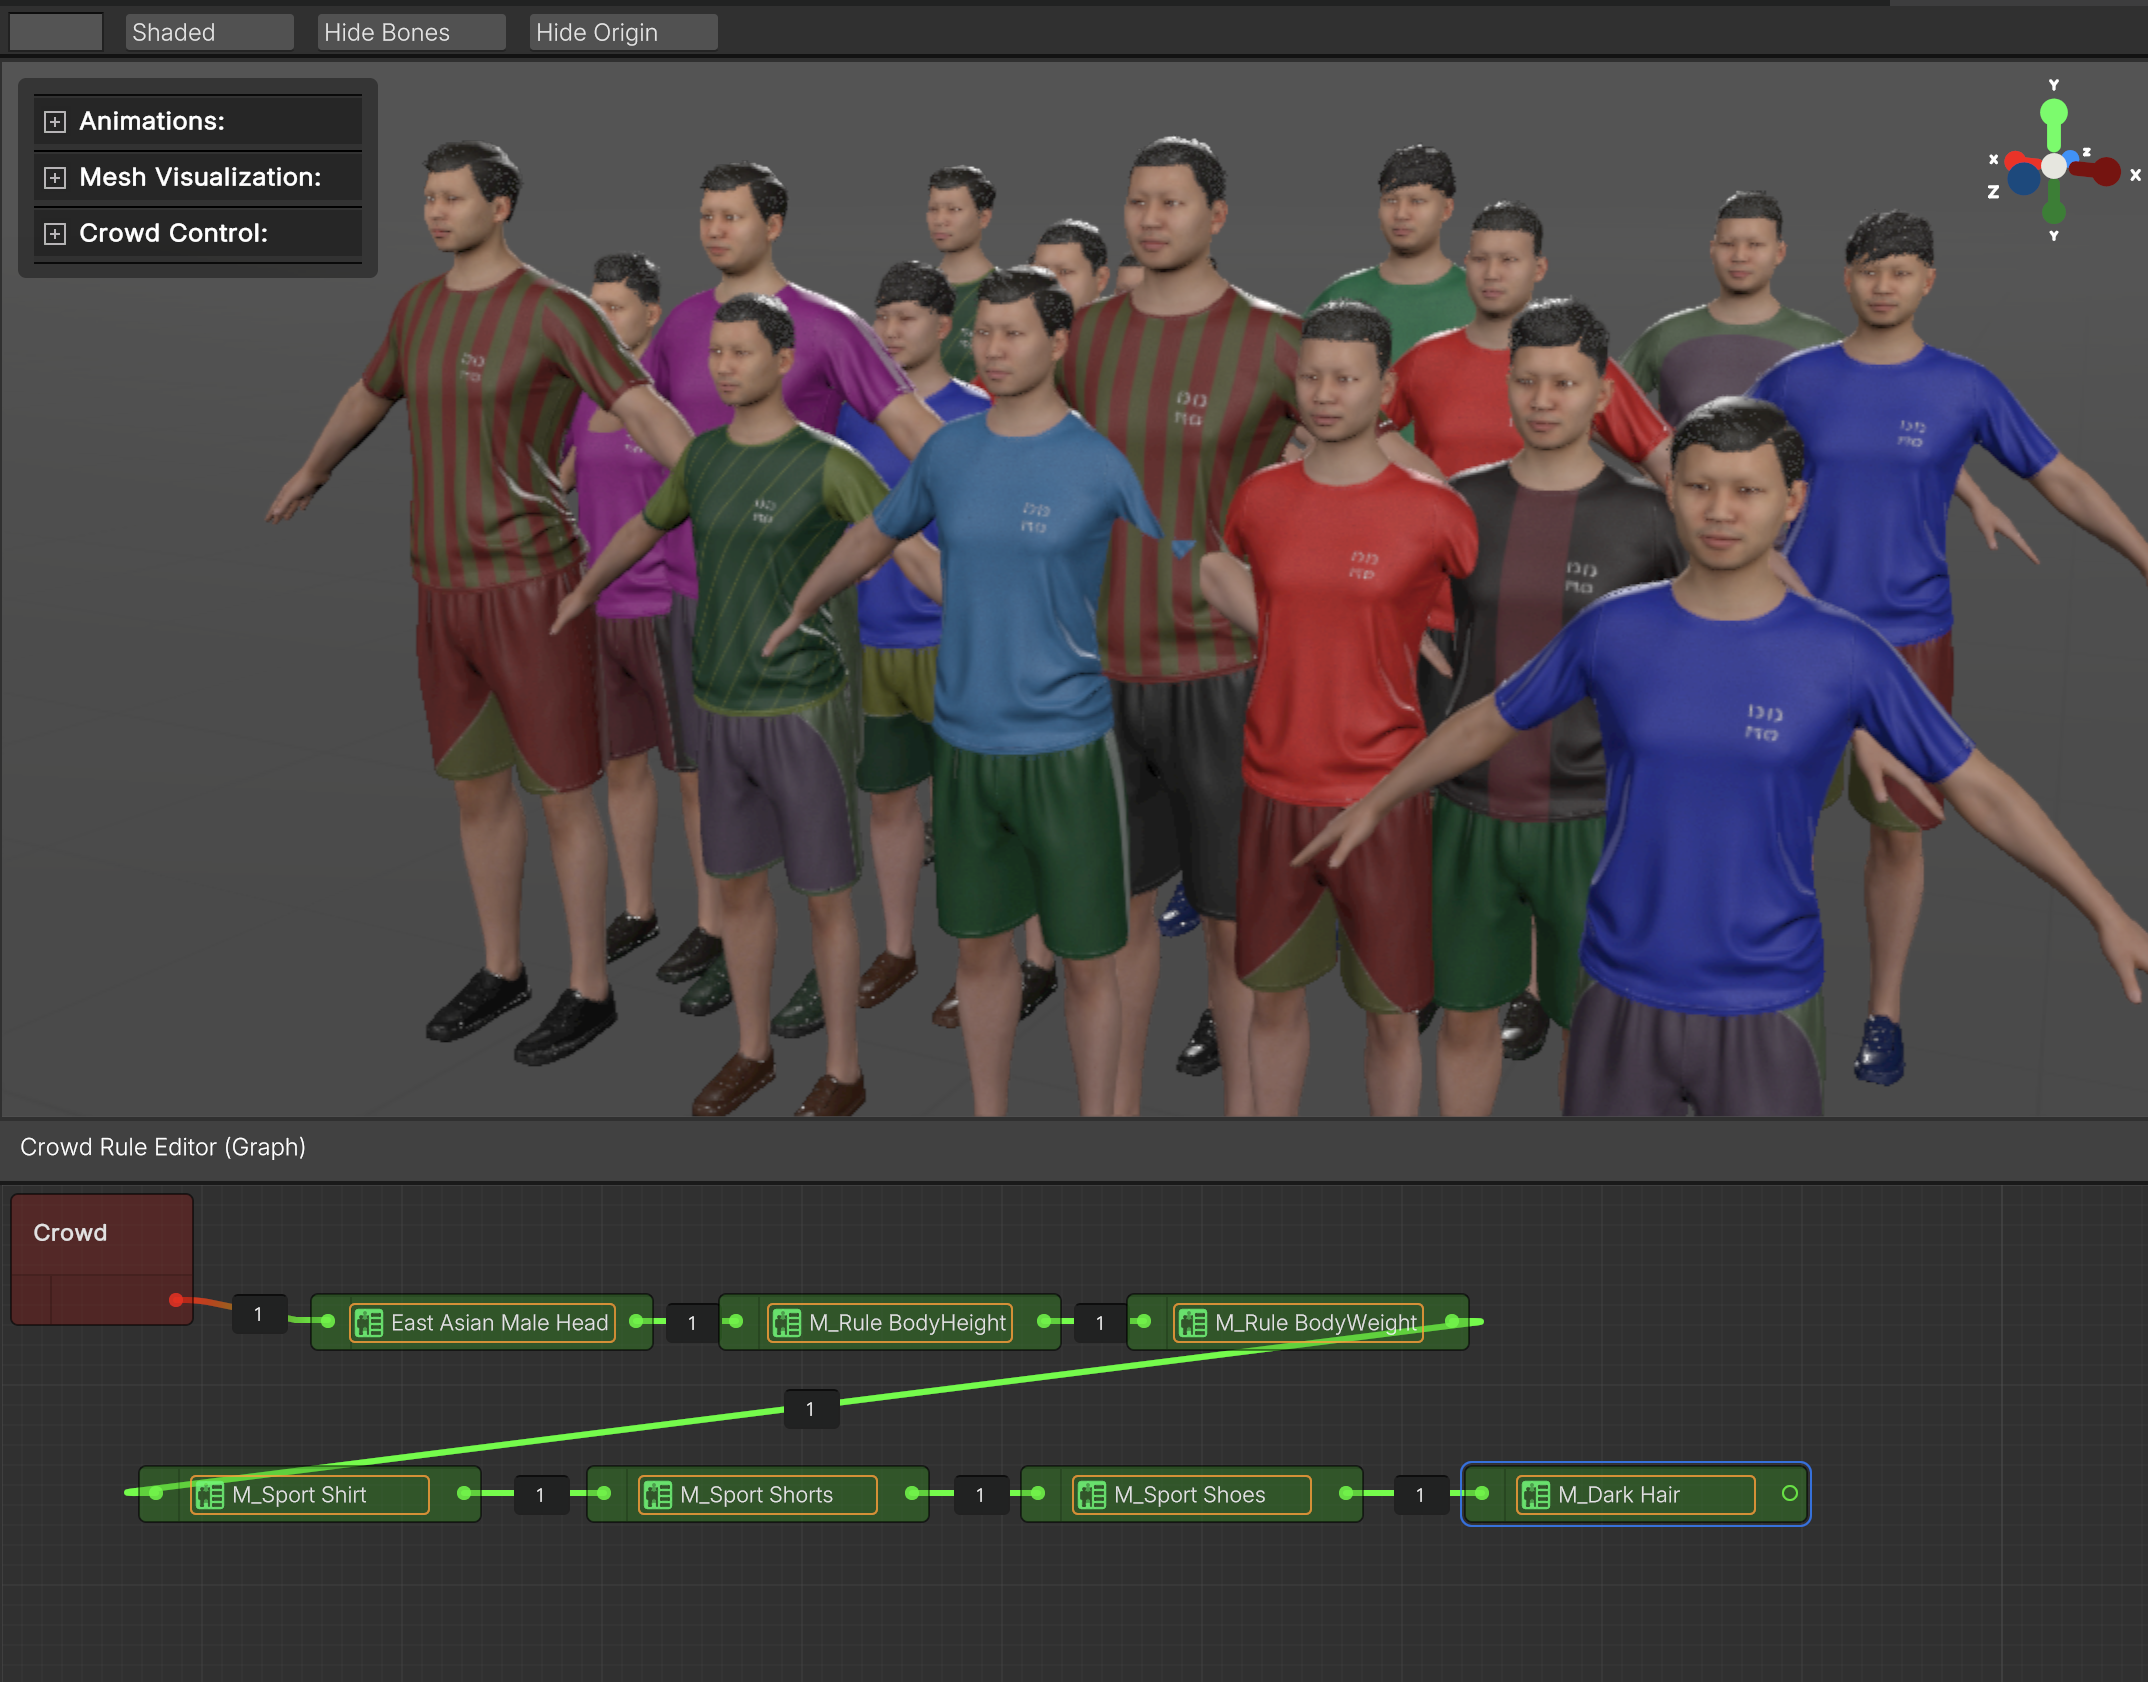
This is a good opportunity to confirm that your parameter ranges and rule combinations are producing the intended level of diversity.
Step 4: Bridge the Crowd
Now that your crowd is ready, you can bridge a complete set of 250 unique characters generated from your configuration.
To do this, open the crowd window, set the Character Count field to 250, then click Apply Character Count followed by Apply Changes. Popul8 Express will generate the corresponding variations based on your defined rules.
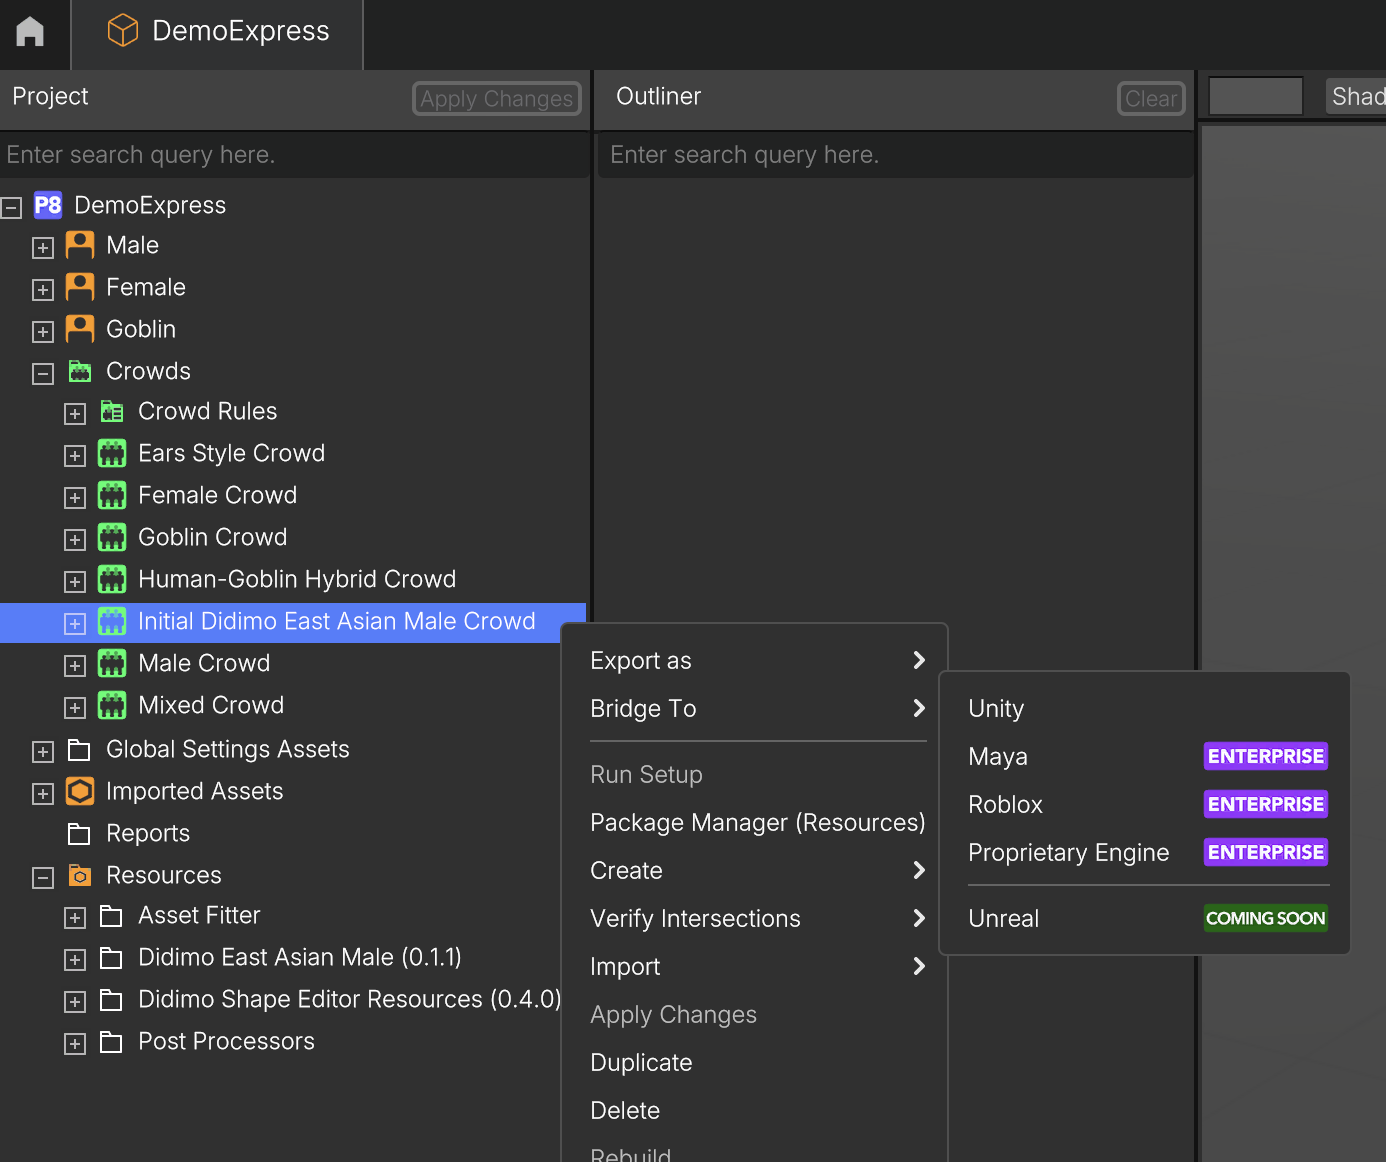
Popul8 Express supports exporting to different formats depending on the target engine.
- For Unity Engine, right-click the Liangma River Male Joggers crowd and select Bridge To → Unity.
- For Unreal Engine, choose Export as → Crowd instead.
An Export Crowd window will appear. Choose the Target Folder where you want your exported files to be saved, then click Export to start the process.
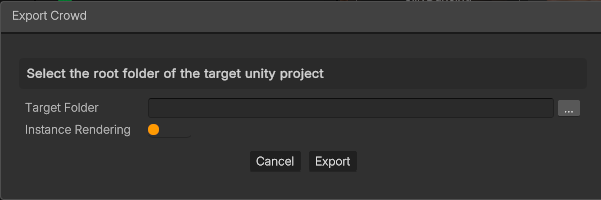
Depending on the size of your crowd and system performance, this step may take a few minutes.
Updated 9 months ago