Crowds
Control the variety of your Characters
A Crowd is a collection of characters that follow their Template’s technical requirements but feature variations in head and body shape, along with randomized Deformables assigned to each Crowd Character. You can create rules to control how these elements influence your Crowd's appearance.
How to create a Crowd
Right-click anywhere in the project and select Create → Crowd. This will generate a new Crowd object under the Crowds section in the Project tab. You can now rename your Crowd.
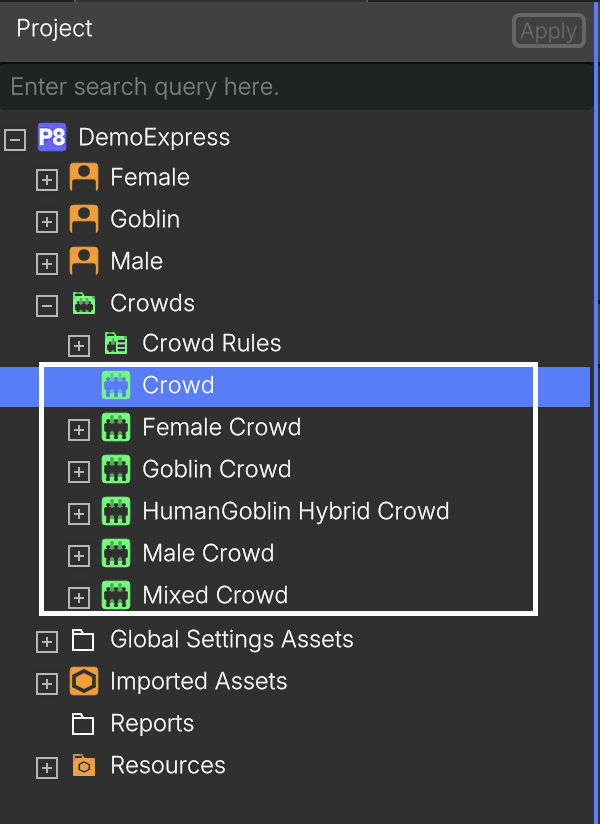
Locating the Crowds section on the Project tab.
Instantiate Characters on your Crowd - A Crowd can include Characters from multiple Templates. To define how many Characters each Template should contribute:
-
Add a new entry under Characters Per Template.
-
Enter the desired number of characters in the Character Count slot.
-
Drag the corresponding Template into the Asset Object slot.
-
Click Apply to generate the Characters.
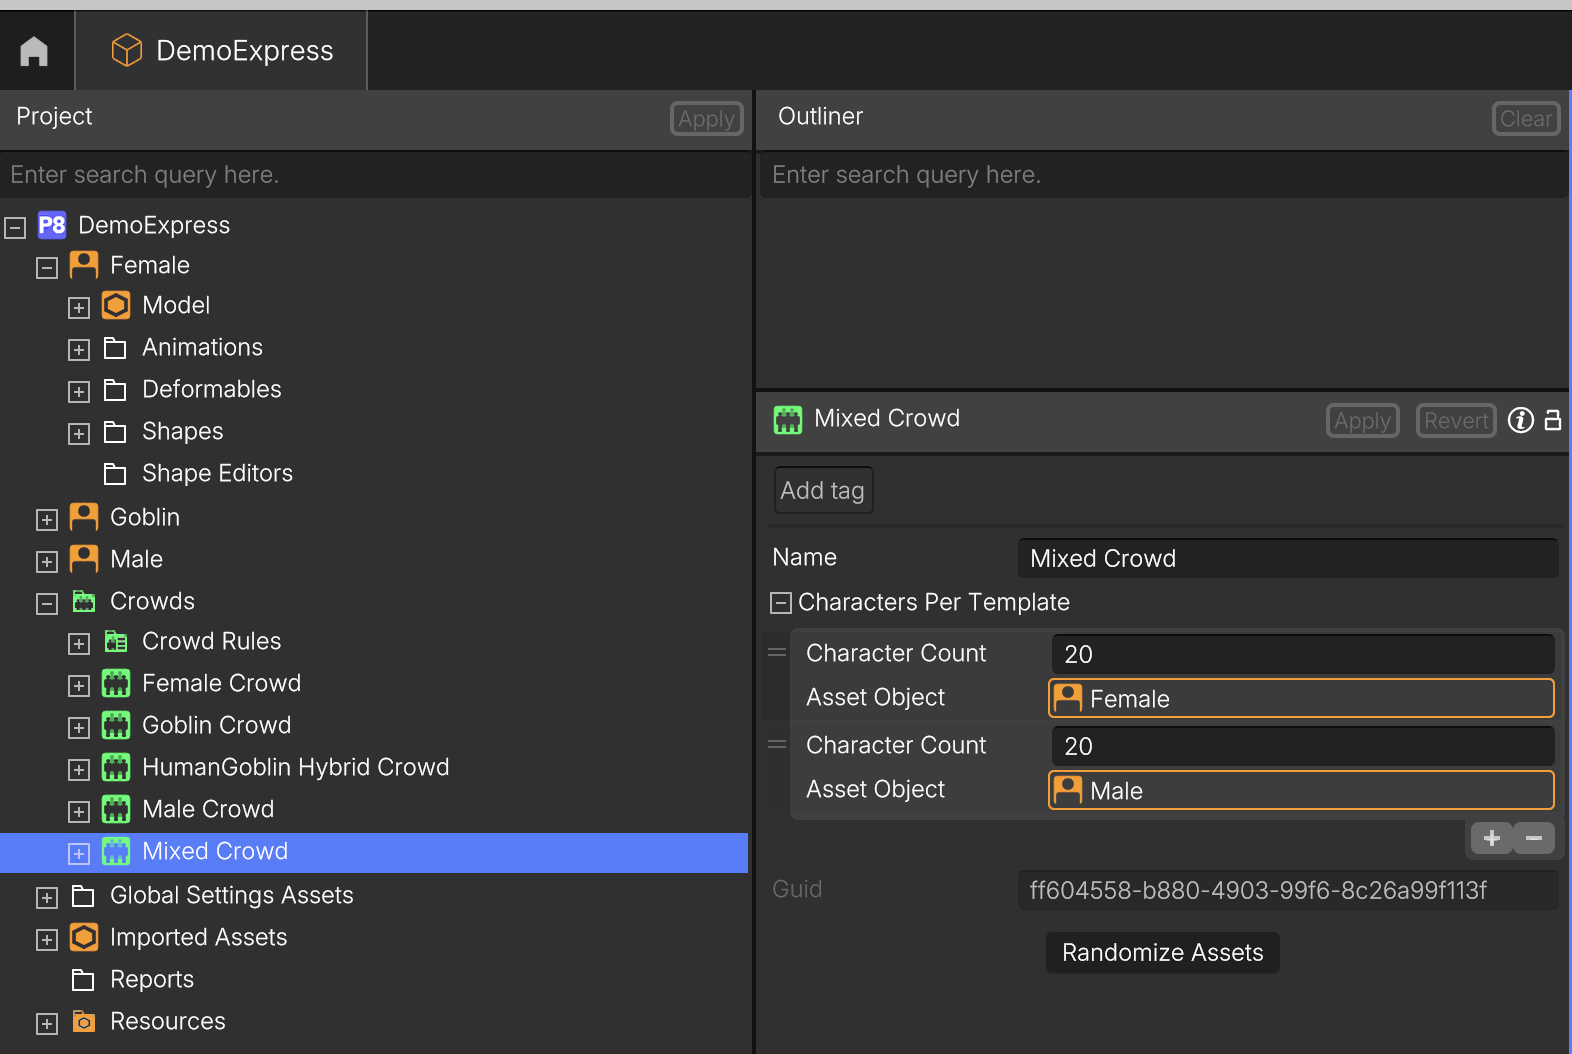
Instantiating Characters in a Crowd.
Your Crowd will now contain the correct number of Characters, all matching their respective Templates. From here, you can define rules to introduce variations and make your Crowd come to life!
Crowd Rules Setup
Depending on the project setup, you may need to create crowd rules using different configurations. Each crowd rule must be defined by a specific Template. This means that assets cannot be mixed across different Templates within the same rule. All Shapes and Deformables used in a rule must belong to the same Template.
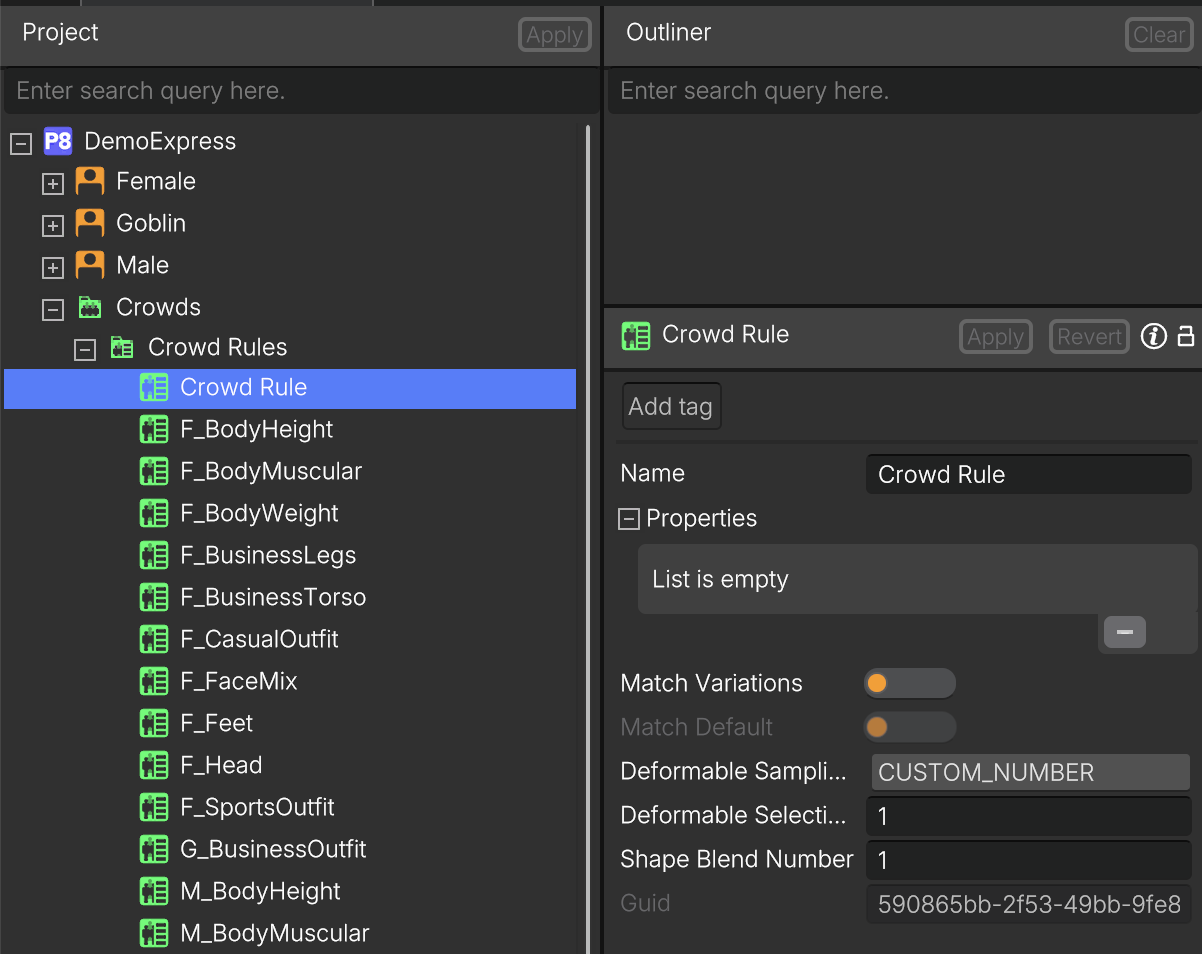
To create a New Crowd Rule, right-click anywhere in the project and select Create → Crowd Rule. This will instantiate a new Crowd Rule, which you can rename.
Crowd Rules for Face Variation
Take crowd variation even further by adding facial variation to your characters.
However, before creating a crowd rule for face variation, some parameters must first be configured on the shape asset itself. These settings are importante to ensure a natural and varied looking result.
In the shape assets, enable the following options:
- Blend Texture- this make that the rule blends the texture between the template or/and the selected shapes.
- Blend as Absolute - this helps preserve facial details so they are accurately represented in the generated crowd.
With these settings enabled, facial variations will appear more natural and visually consistent across the characters.
In the DemoExpress project, you'll find 15 externally designed Shapes as an example assigned to the Male and Female Template.
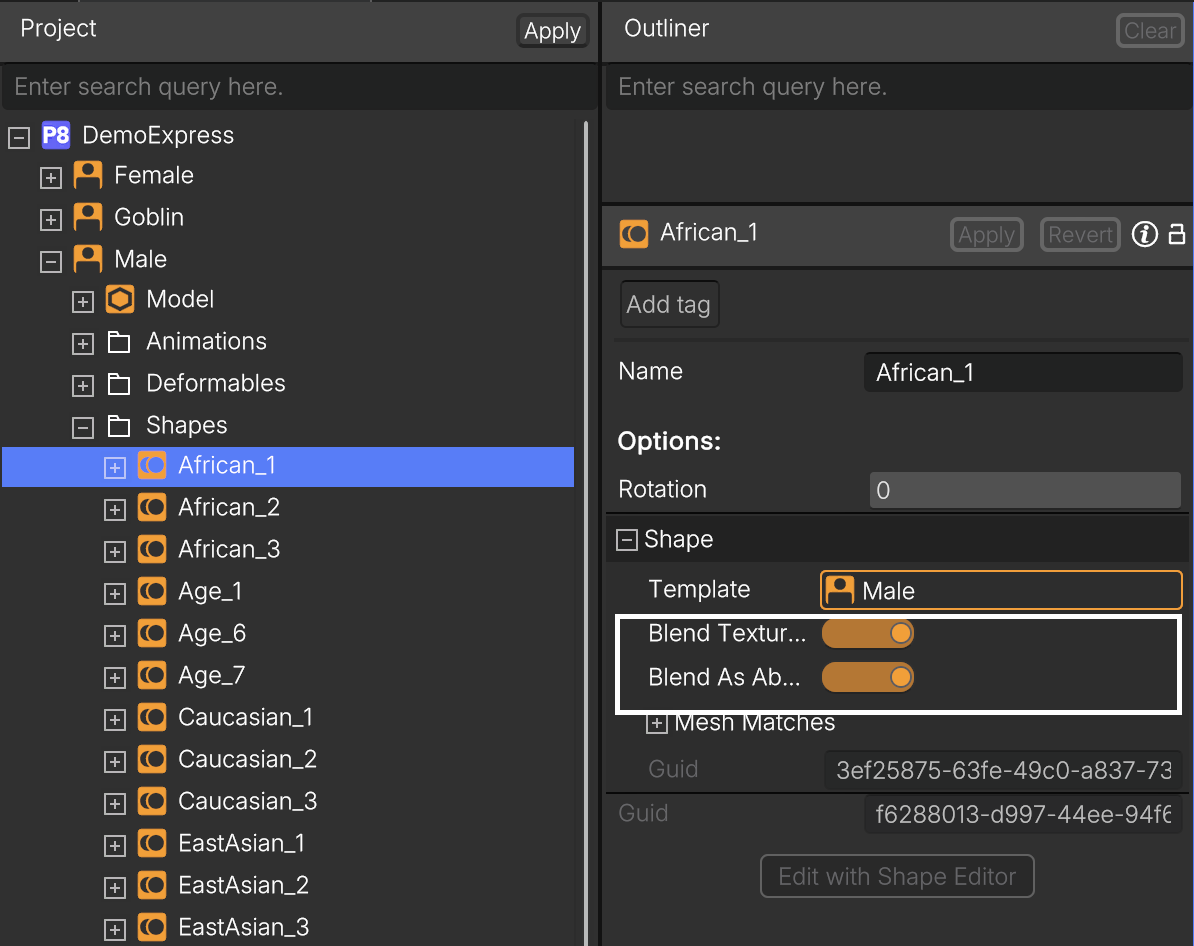
Blend Textures and Blend As Absolute toggles.
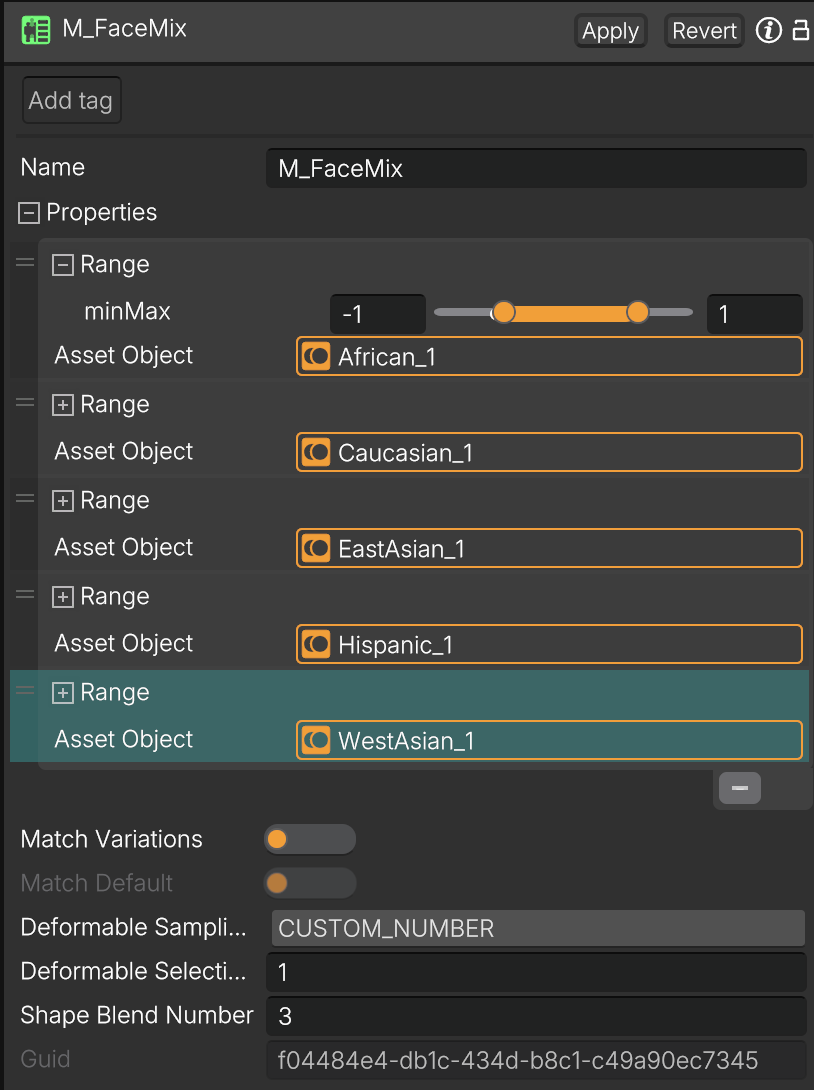
Once the shape asset is correctly configured, the crowd rule for facial variation can be created by dragging and dropping as many facial variation shapes as needed into the rule.
To increase variation even further, more than one facial variation can be applies at the same time by increasing the Shape Blend Number. This allows multiple facial shapes to blend together on a single character, creating more subtle and natural looking differences across the crowd.
Using multiple blended facial variations helps produce a more organic result and significantly improves the visual diversity of your generated characters.
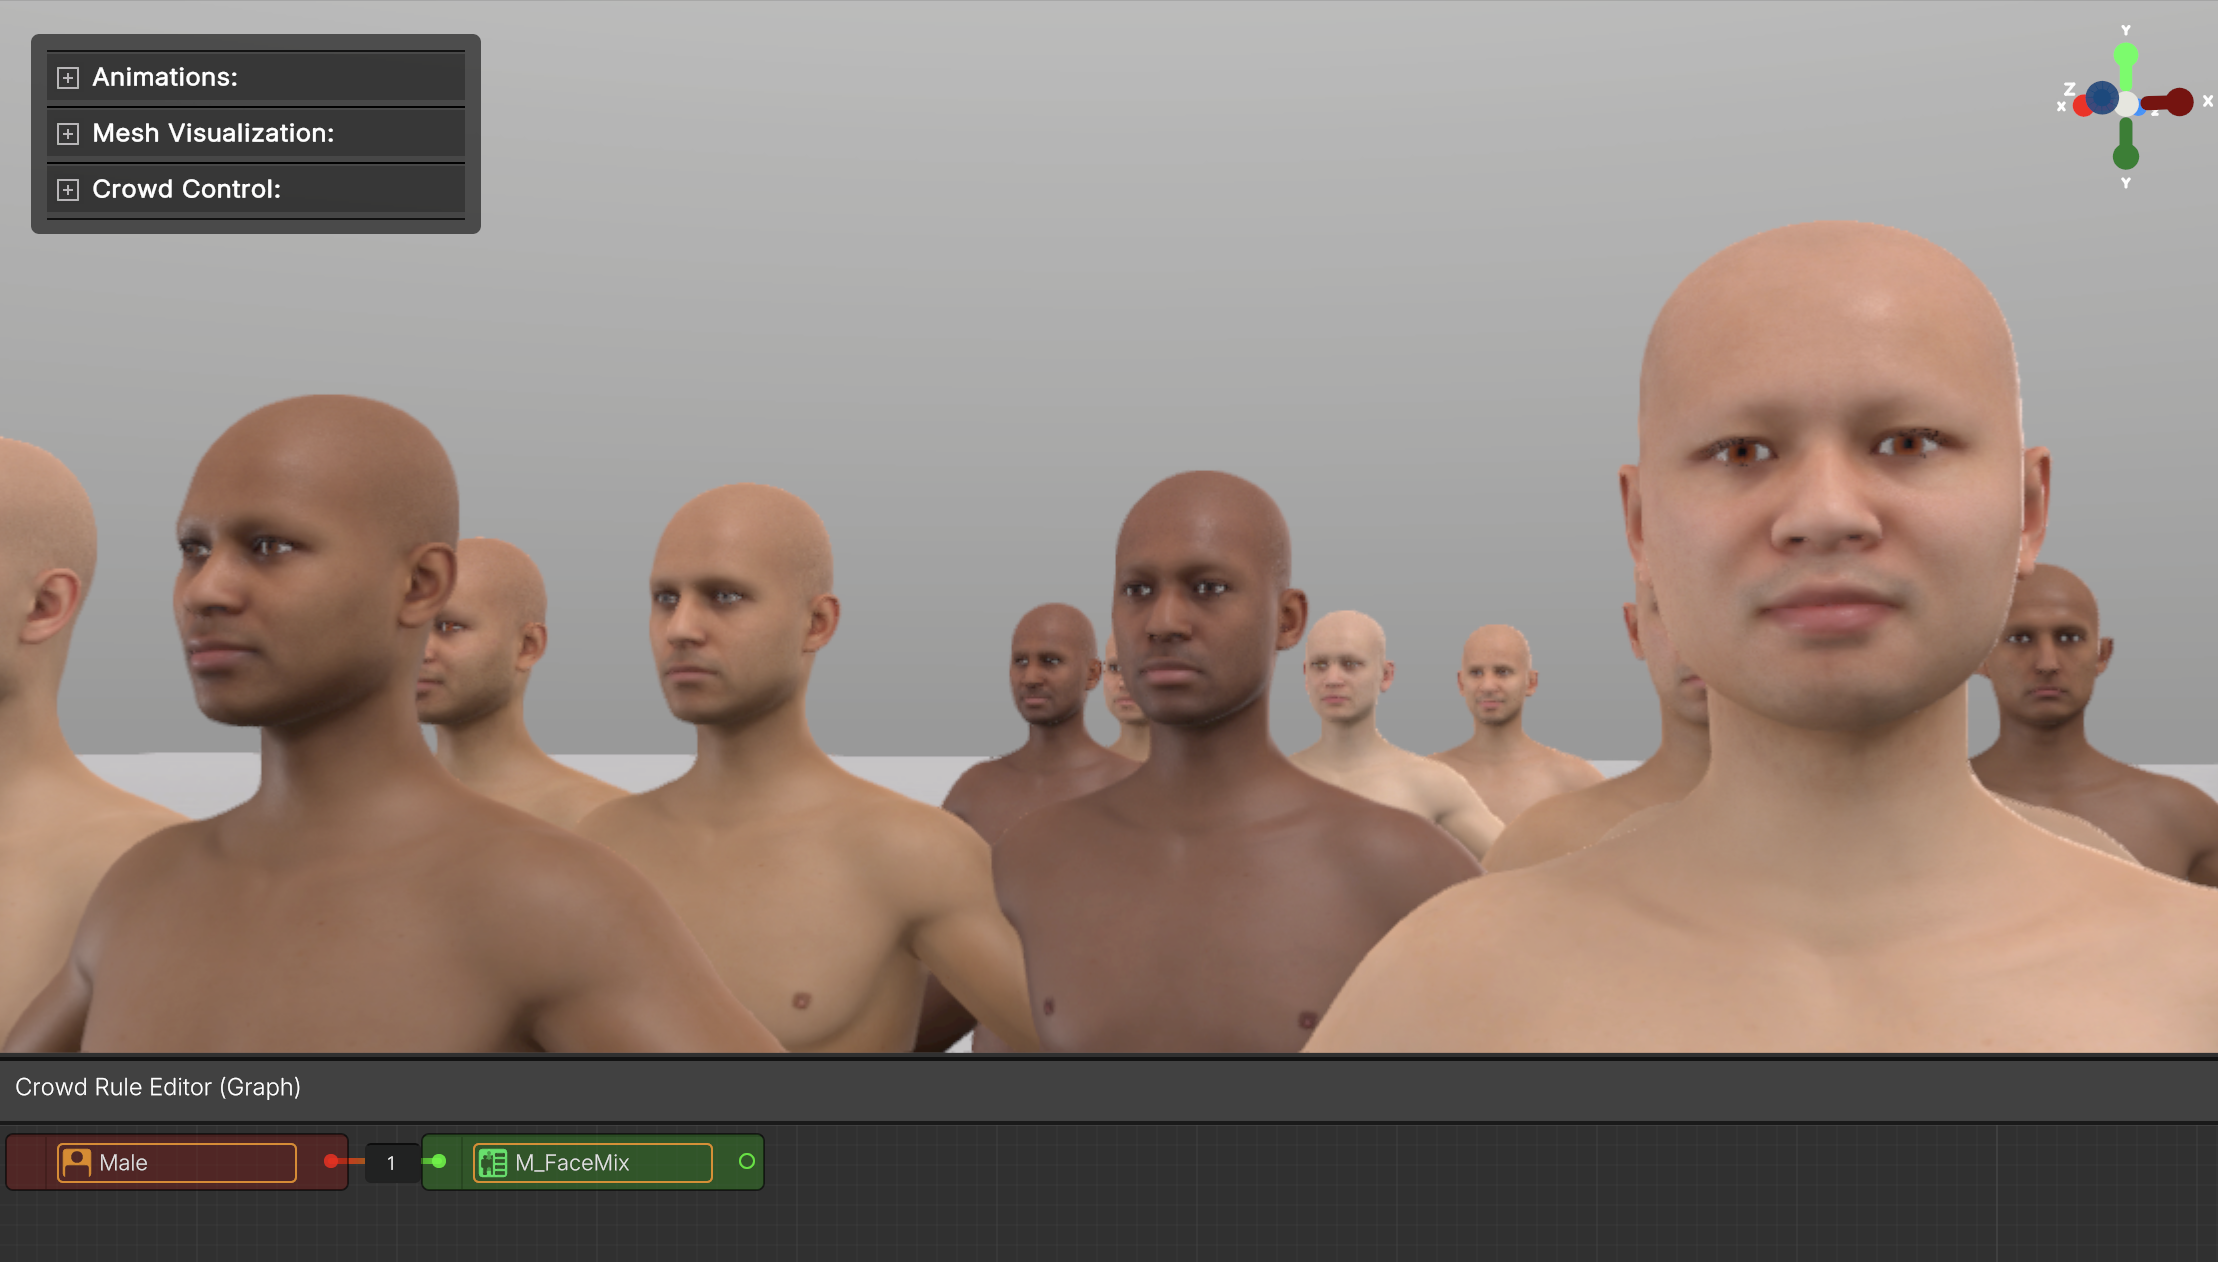
Crowd with Facial Variation
Crowd Rules for Body Shape Variation
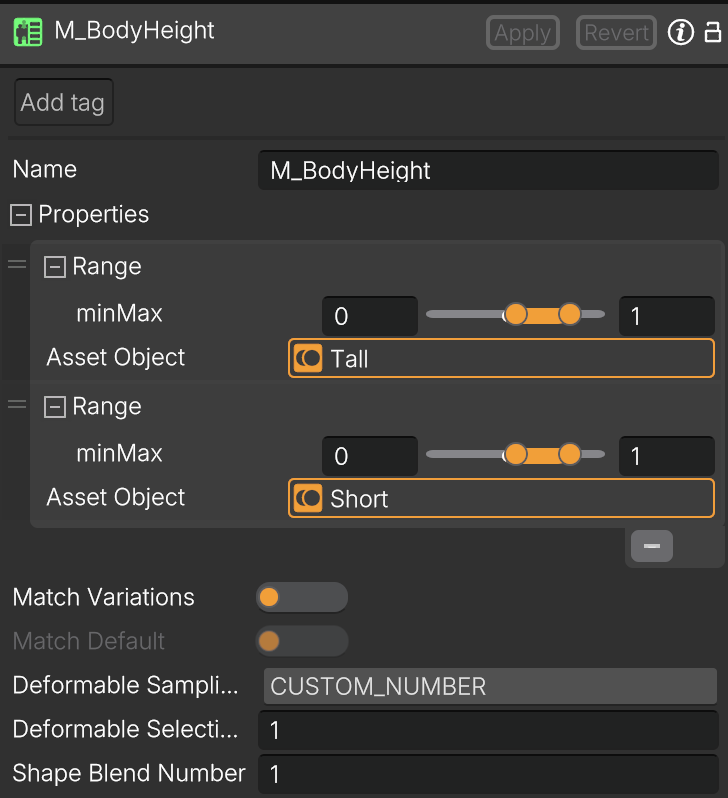
We can want to introduce body shape variations, such as characters who are shorter, taller, slimmer or heavier. In this case, we recommend creating a separate crowd rule like the ones shown below.
Keeping body variations in their own rule makes the setup easier to control and allows you to adjust character proportions independently from the deformable rules.
| Crowd Rule for Height Variation | Crowd Rule for Weight Variation |
|---|---|
 |  |
You can see below the effect of linking these two rules on the Crowd Rule Editor .

Adding the weight and height rules to the Crowd Rule Editor.
As a result, applying specific height and weight values independently to each character, creates a more diverse crowd.
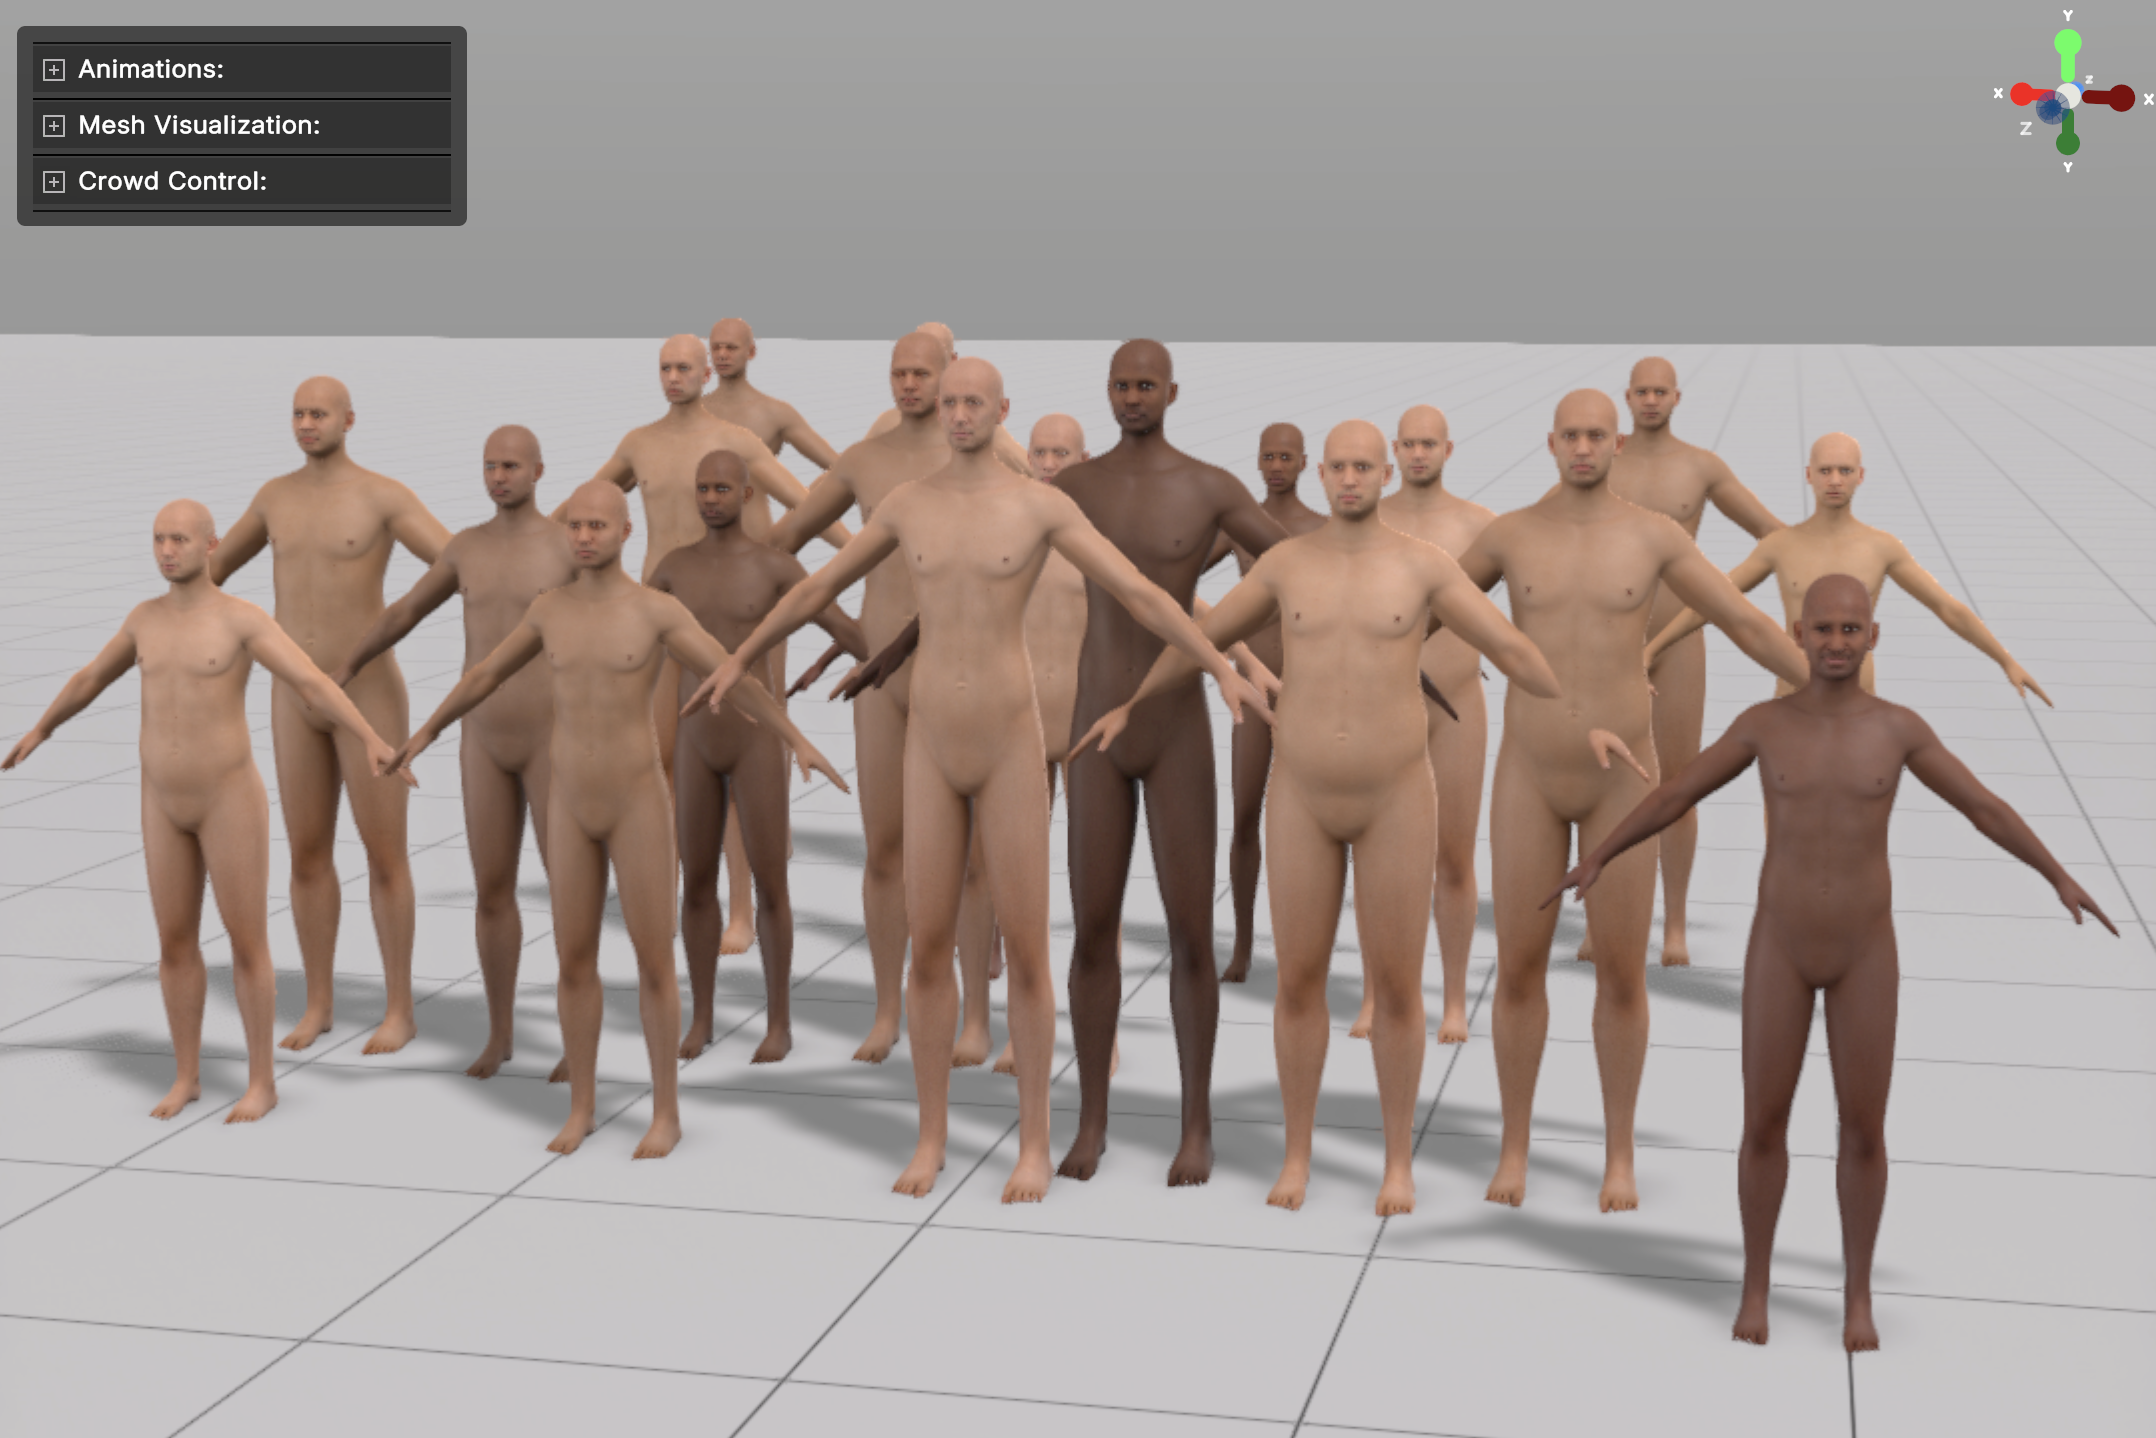
A Crowd with Facial and Body variations.
Crowd Rules for Deformables (Garments, Accessories or Grooms)
Setting up crowds can become challenging when a character requires multiple layers of variation and several possible combinations. Because of this, crowd rules for garments and grooms can be configured in different ways depending on the desired result.
To help manage these setups, the Deformable Sampling dropdown provides different selection modes:
- ALL - Selects all deformables added to the crowd rule.
- CUSTOM_NUMBER (default) - Selects a specific number of deformables defined in the Deformable Selection field.
- CUSTOM_RANGE - Allows you to configure different ranges for the number of deformables that can be selected.
Setup All
We recommend using this option when all characters should use the same outfit configuration, such as in sports crowds.
For example, you can drag all garments into a single crowd rule, and every deformable in that rule will always be applied.
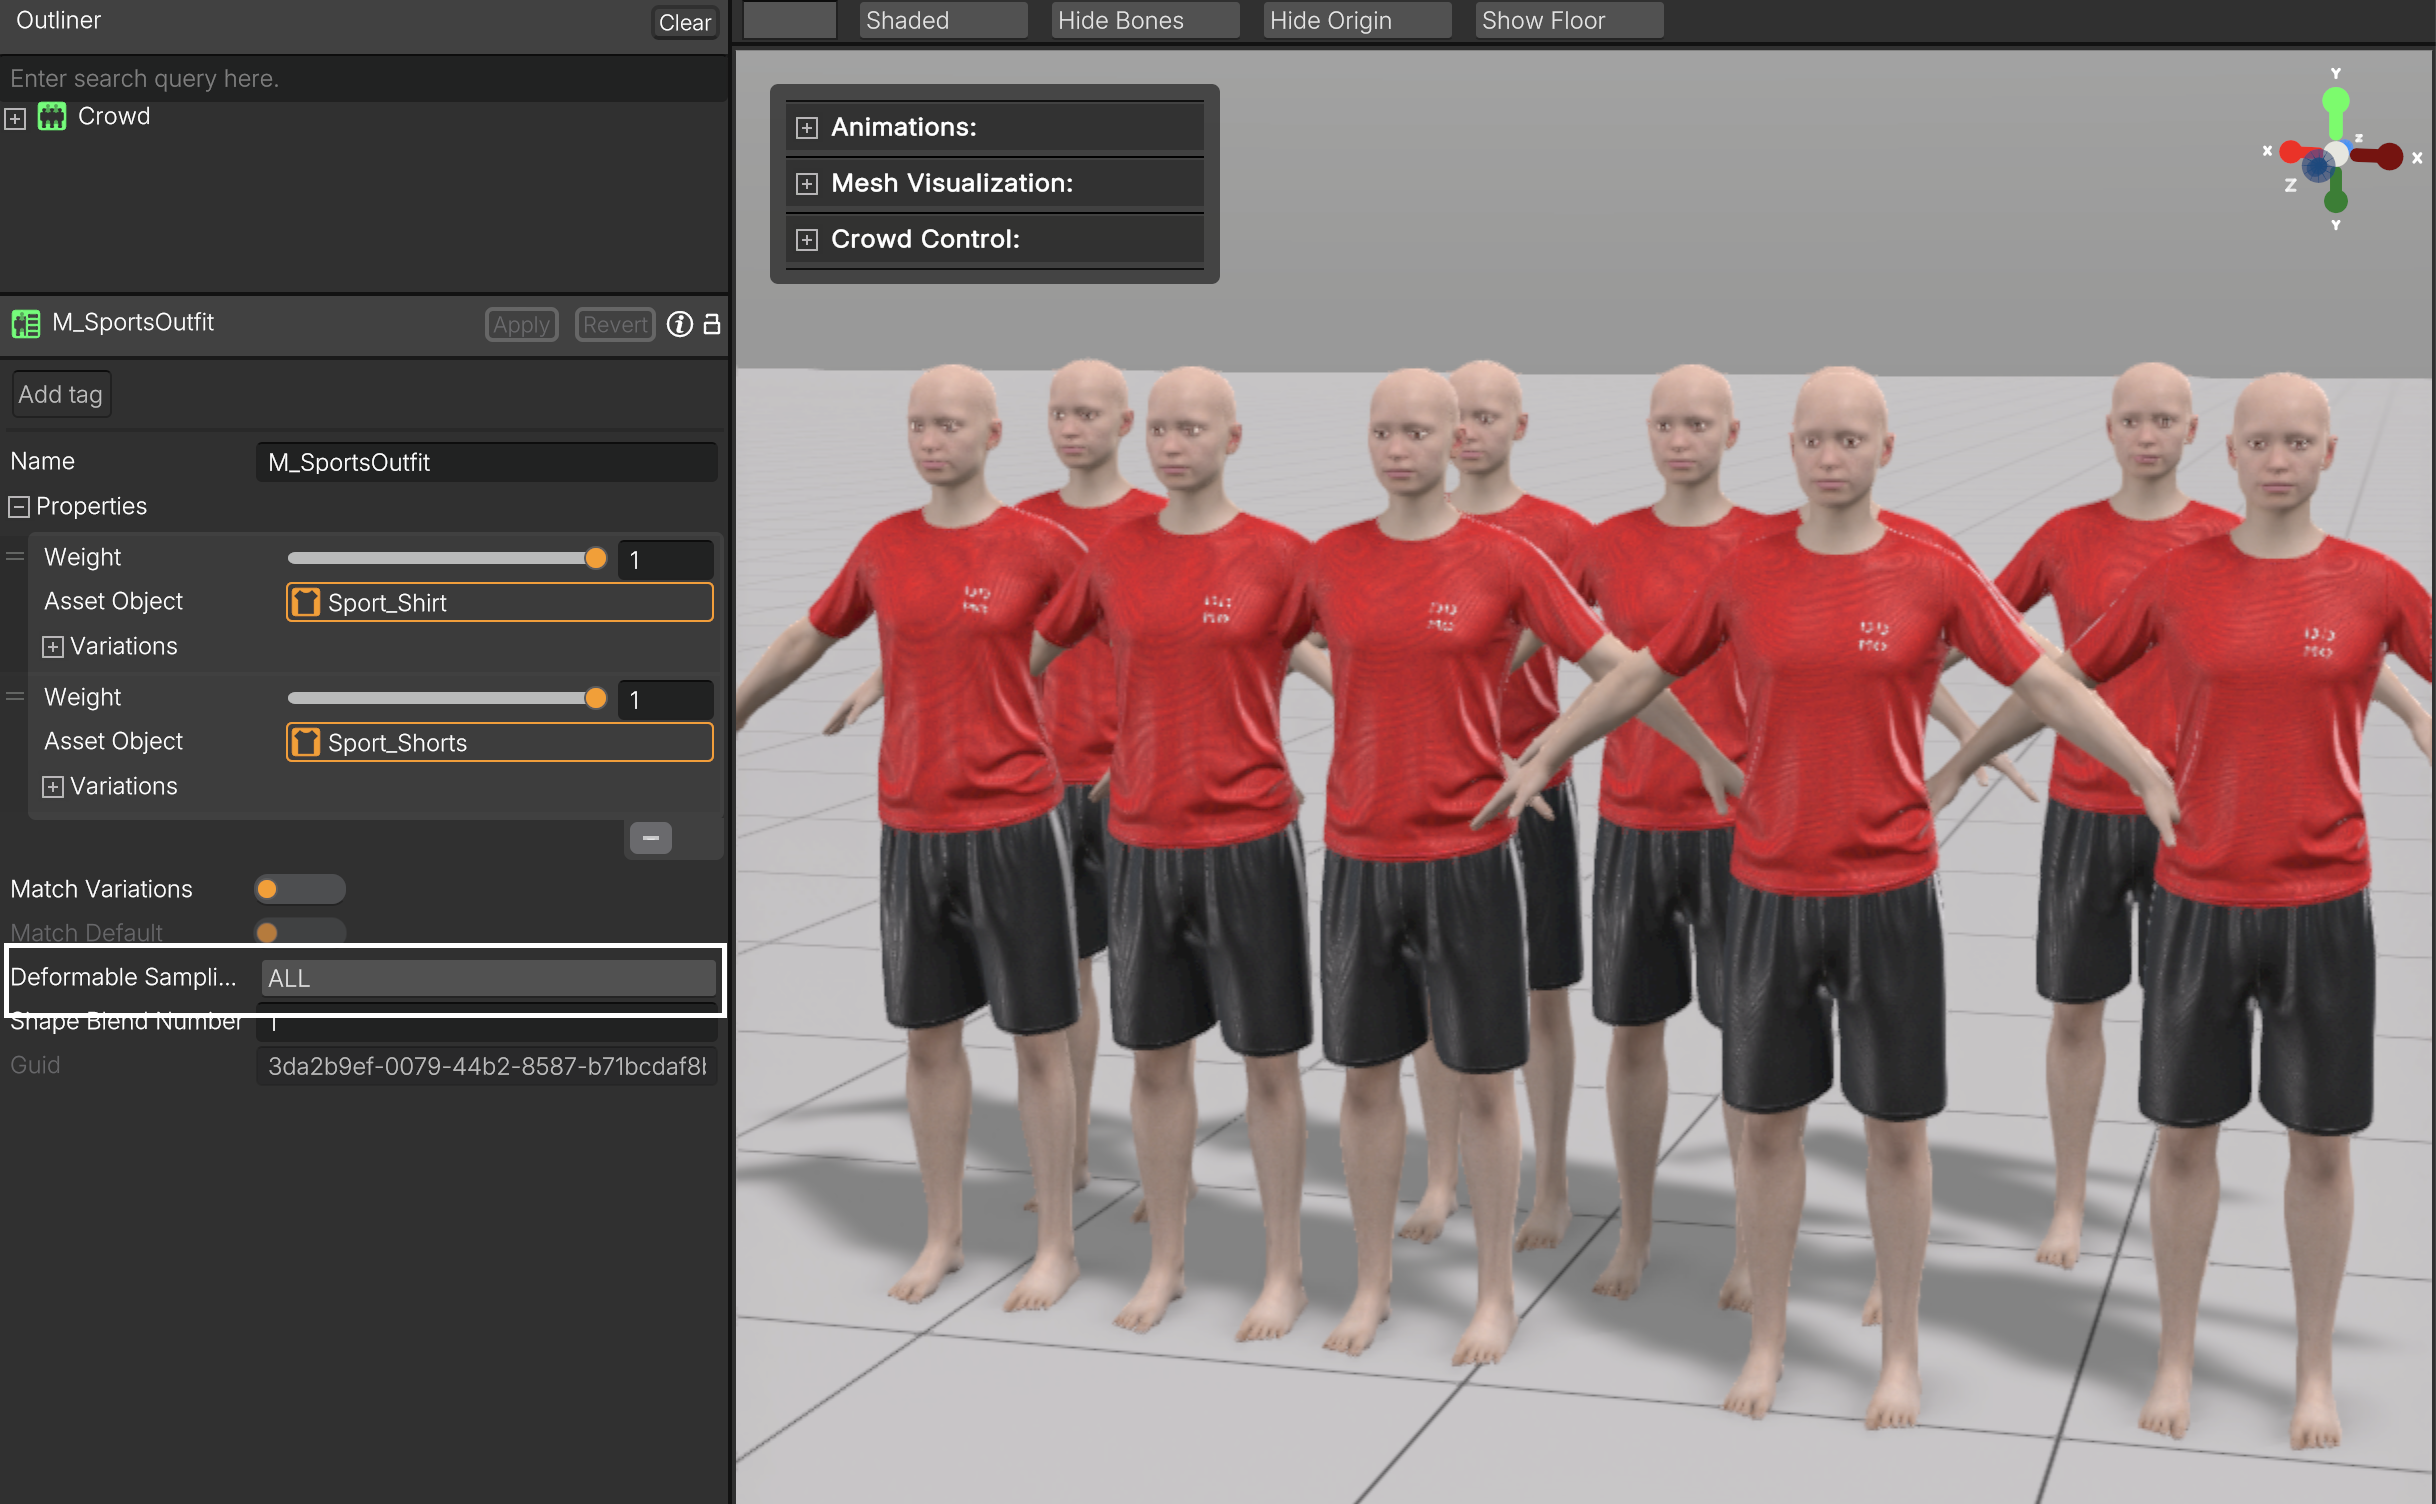
Crowd Rule with All Deformables Selected
Setup Custom Number
This is the default mode when creating a crowd rule. It uses the value defined in Deformable Selection to determine how many deformables will be selected from the rule.
For example:
- If the value is set to
1, only one deformable from the rule will be randomly selected. - If the value is set to
2, two deformables will be selected. This mode is useful for creating controlled variation while limiting the number of active assets
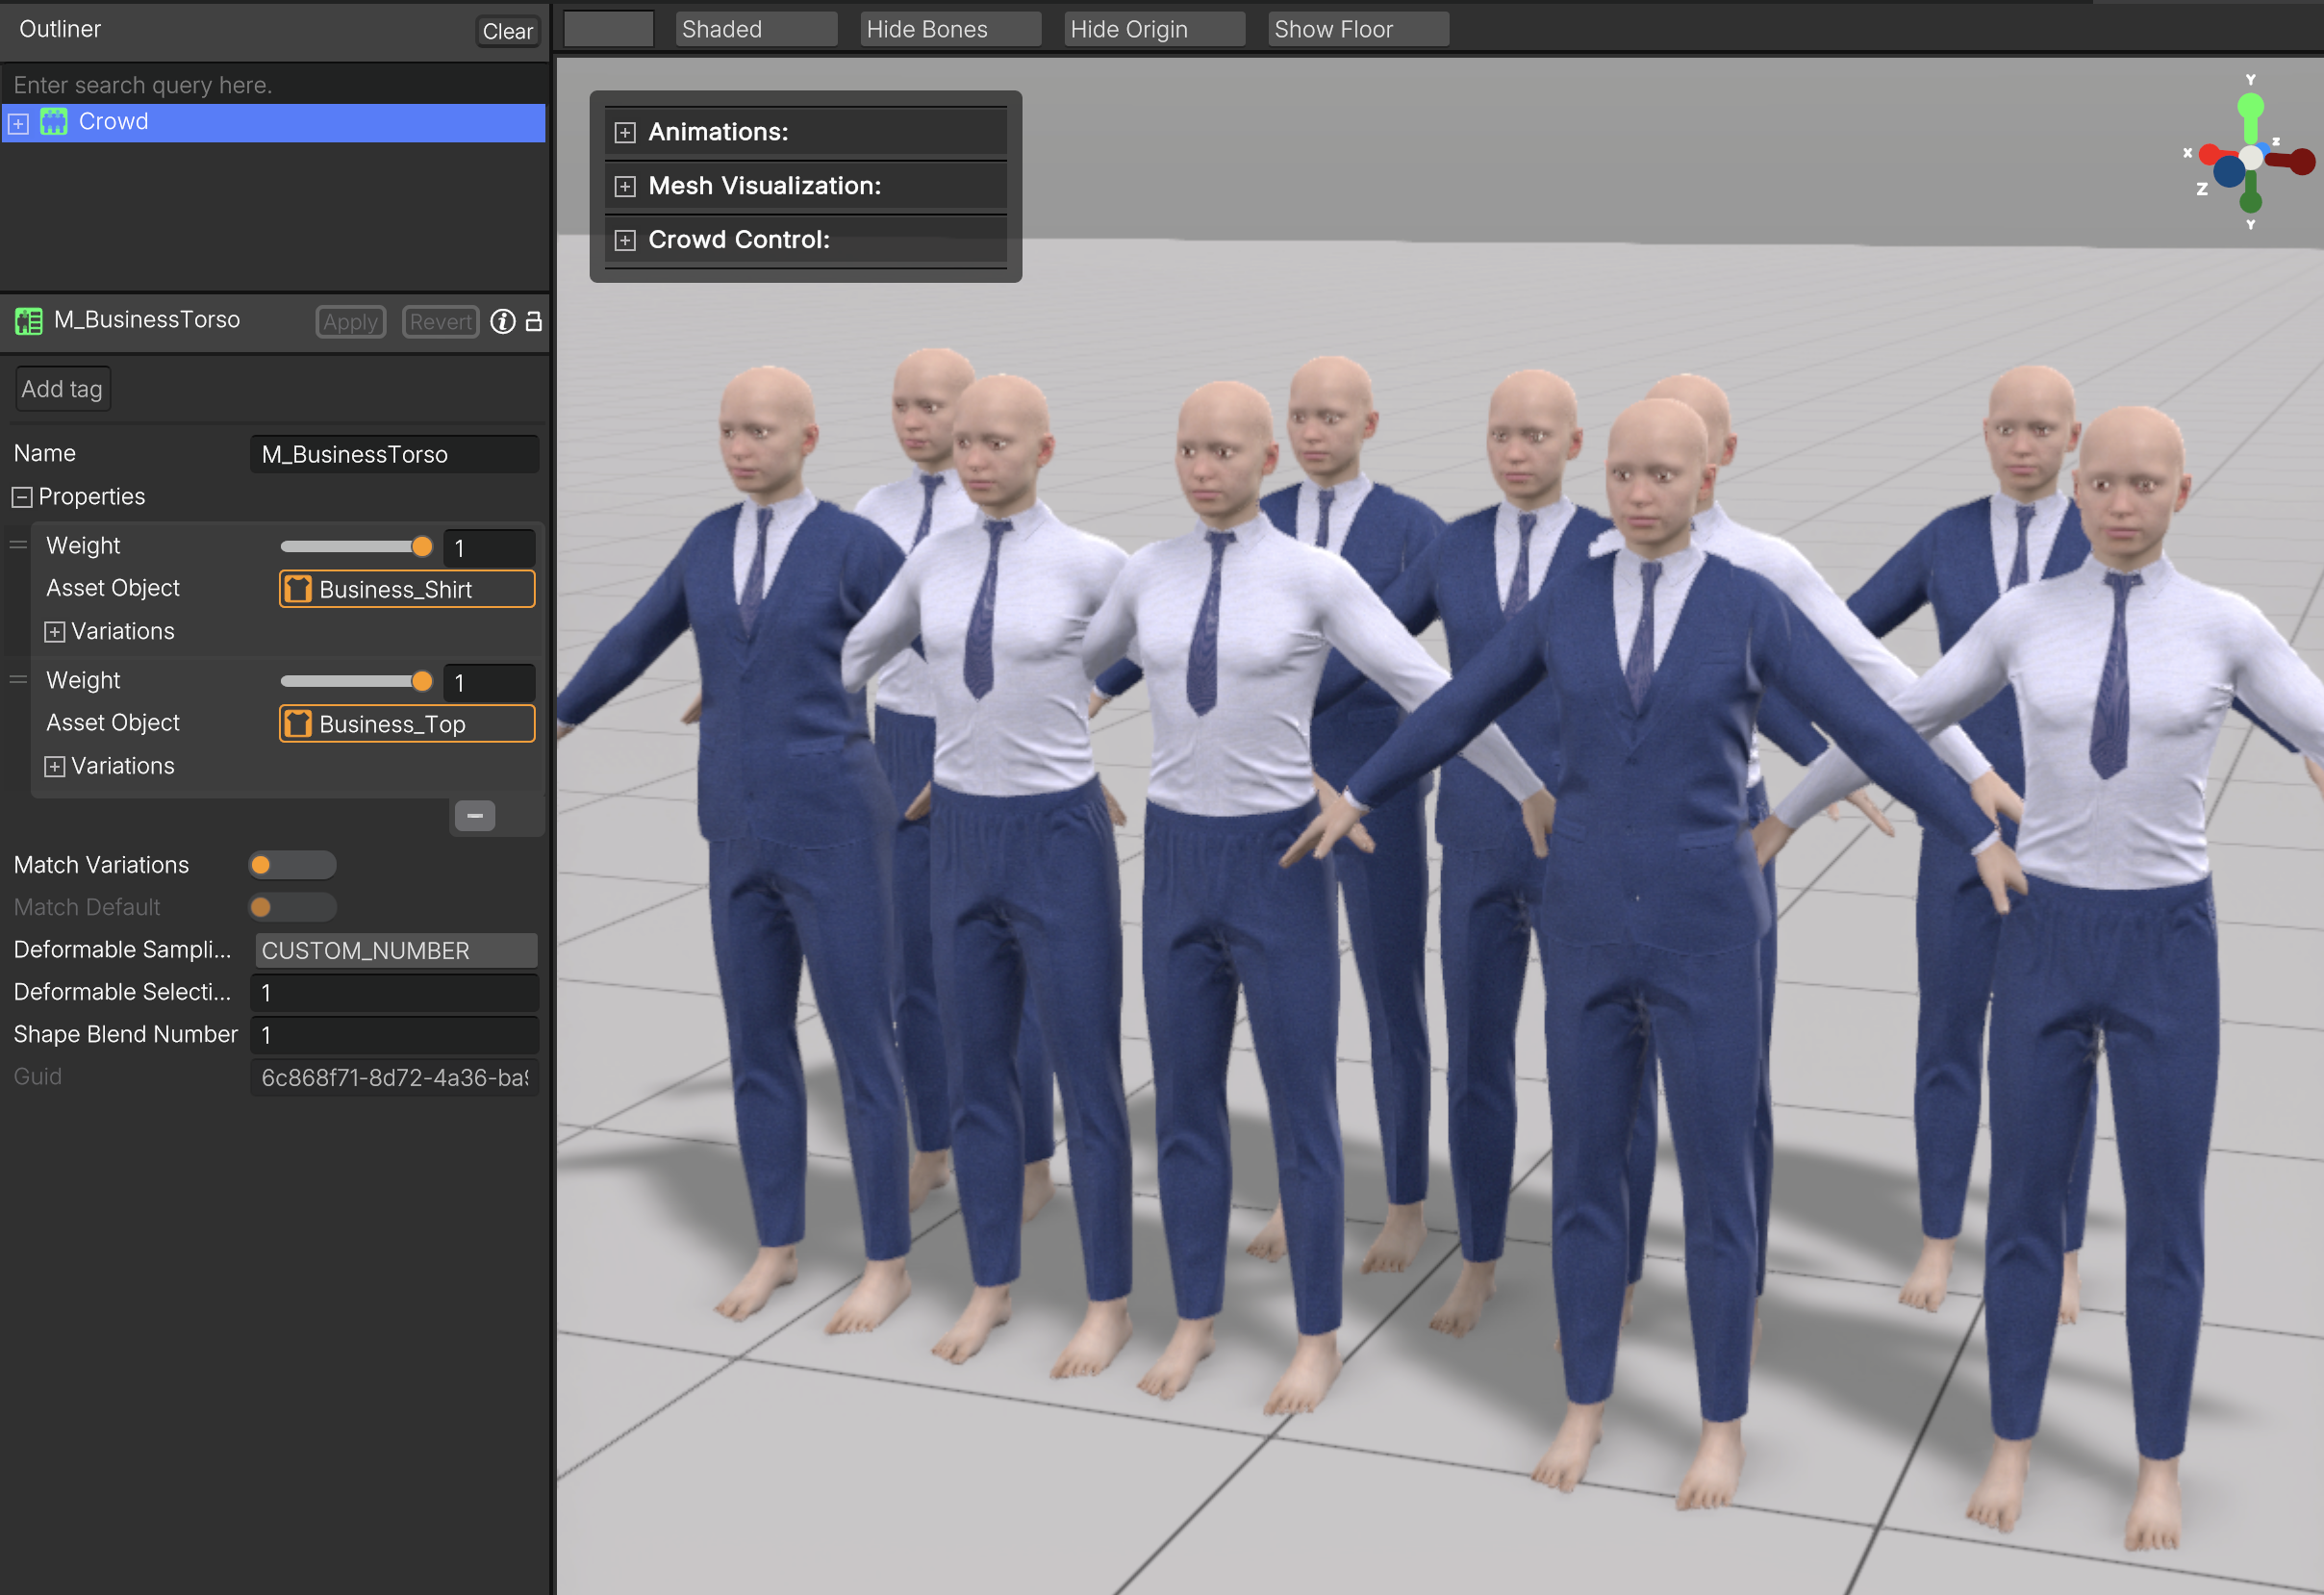
Crowd Rule with two Deformables and only one is randomly selected
Setup Custom Range
This mode is especially useful for optional accessories or hairstyle selection.
For example, if you want to create a crowd where some characters have hair and others are bald, you can configure the Deformable Custom Range with 0 or 1.
With this setup, the crowd rule will sometimes select one hairstyle and other times select nothing, resulting in natural variation across the crowd.
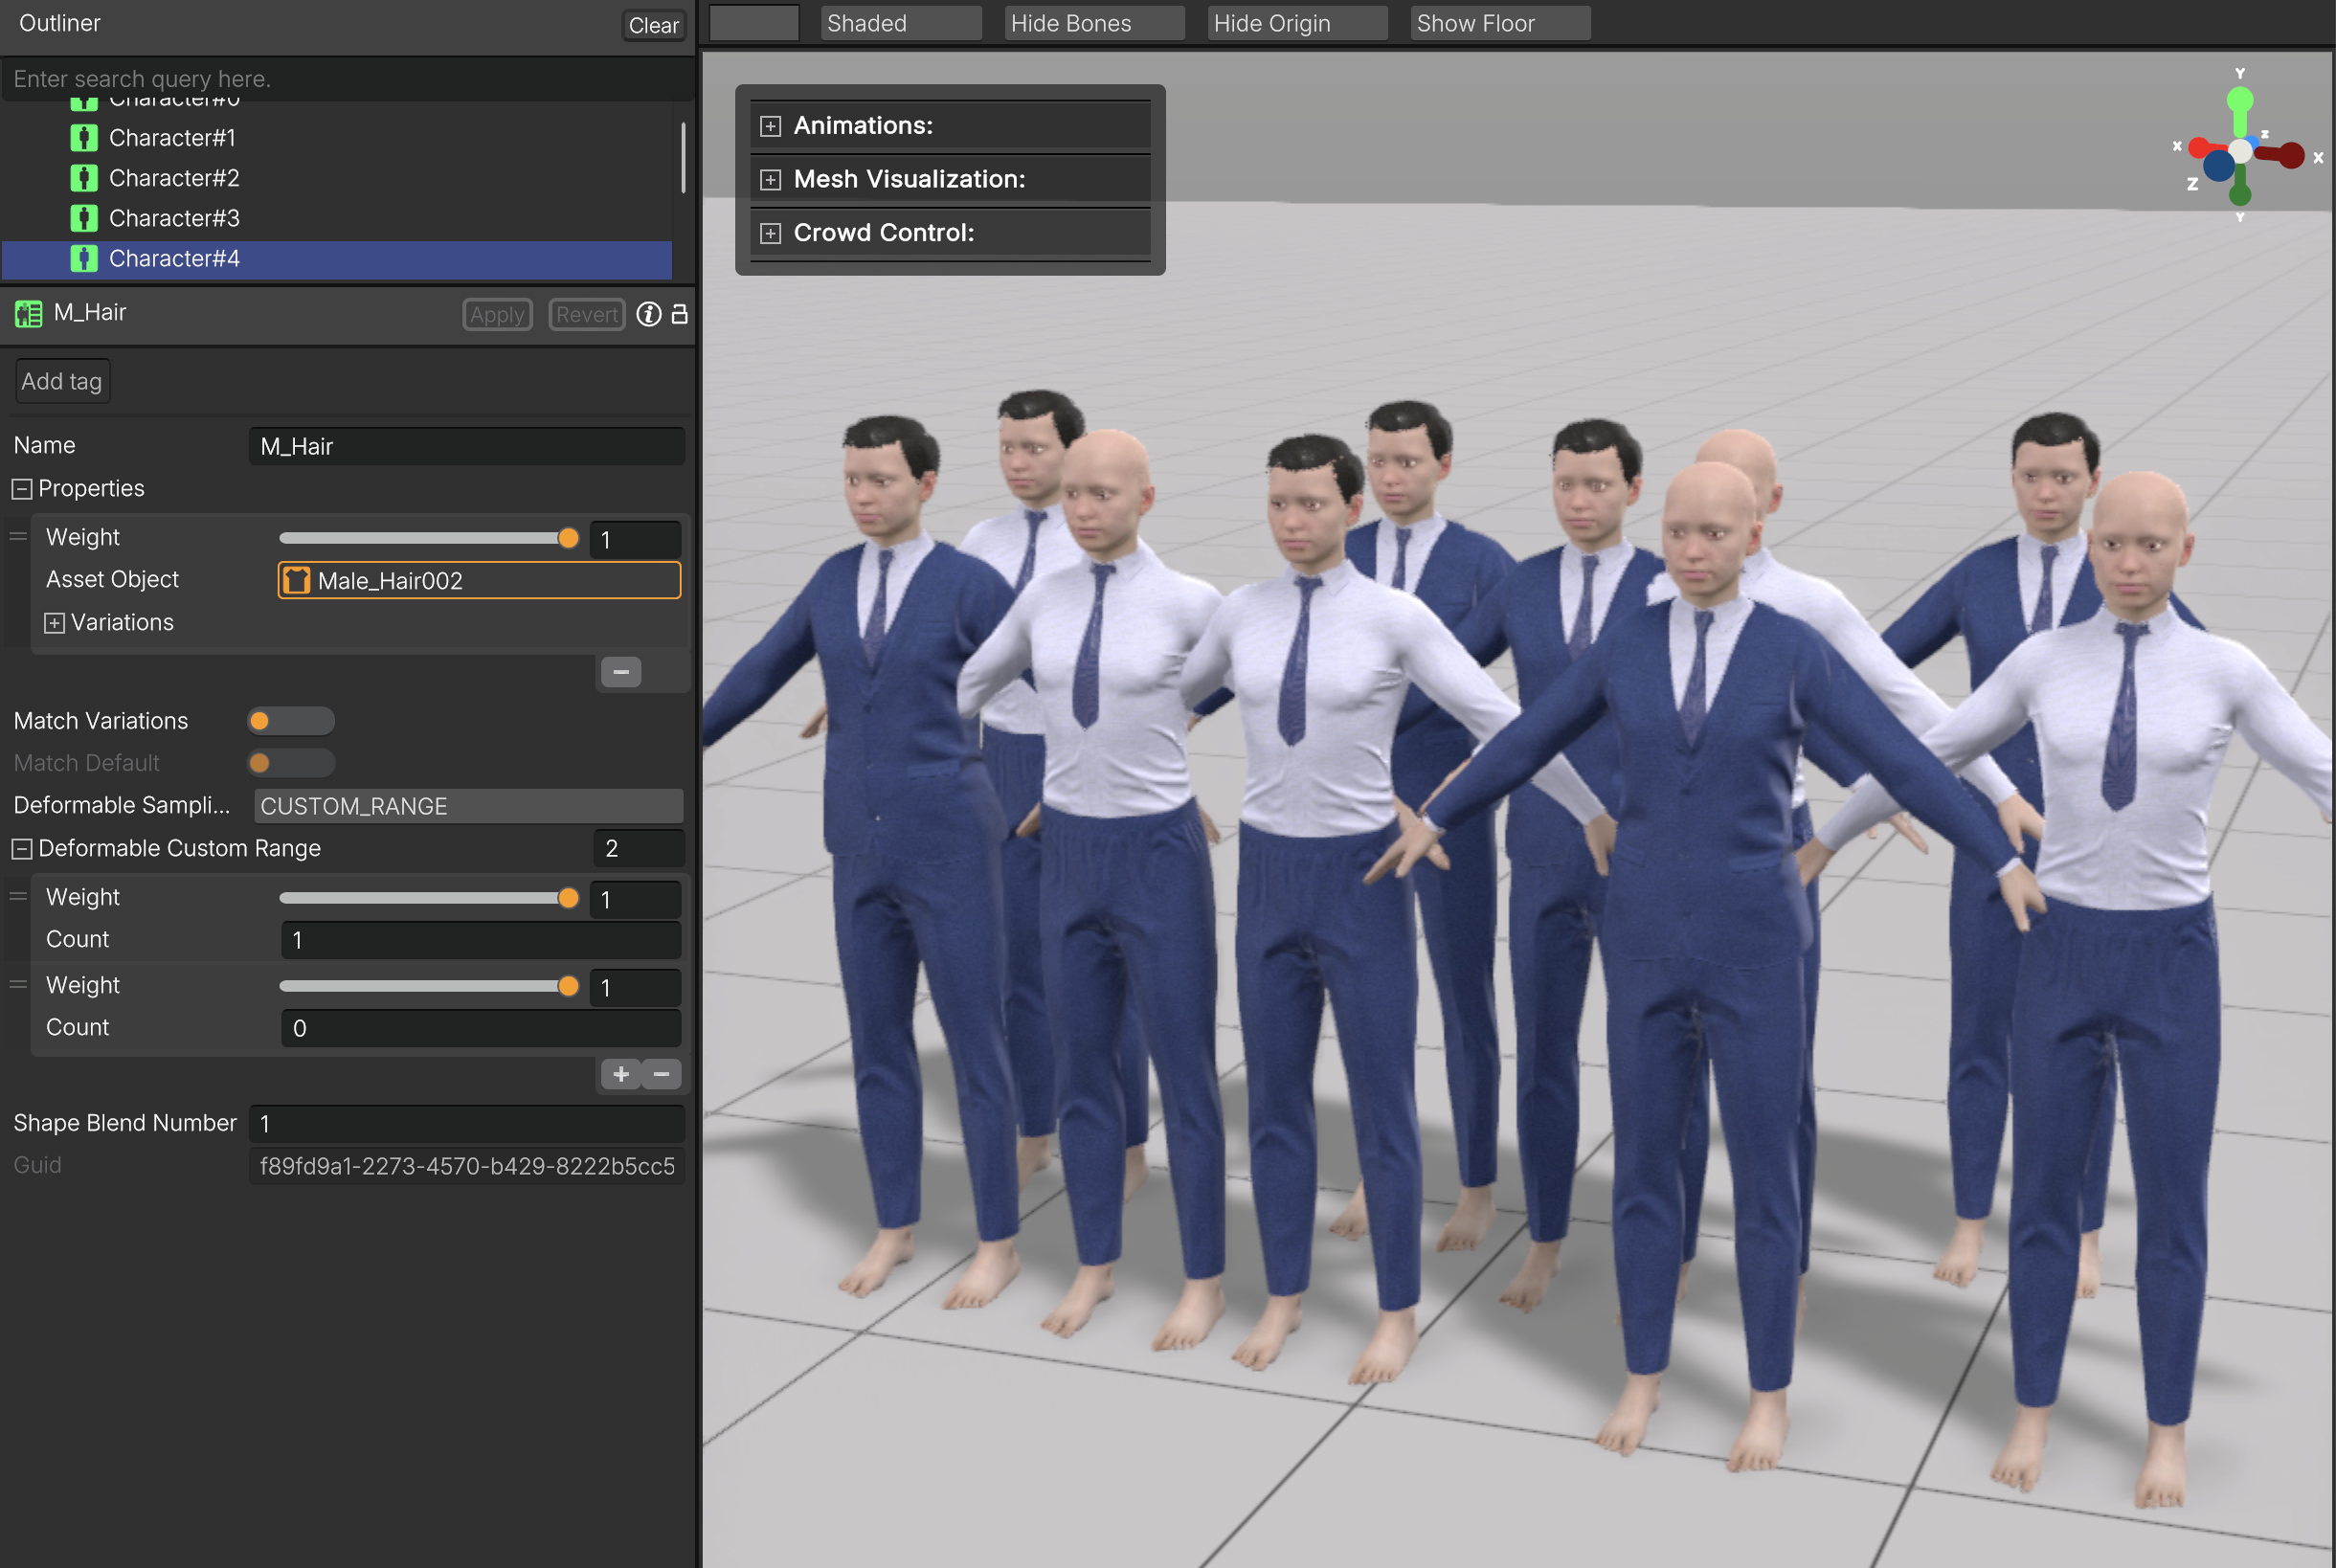
Crowd Rule with a Custom Range setup
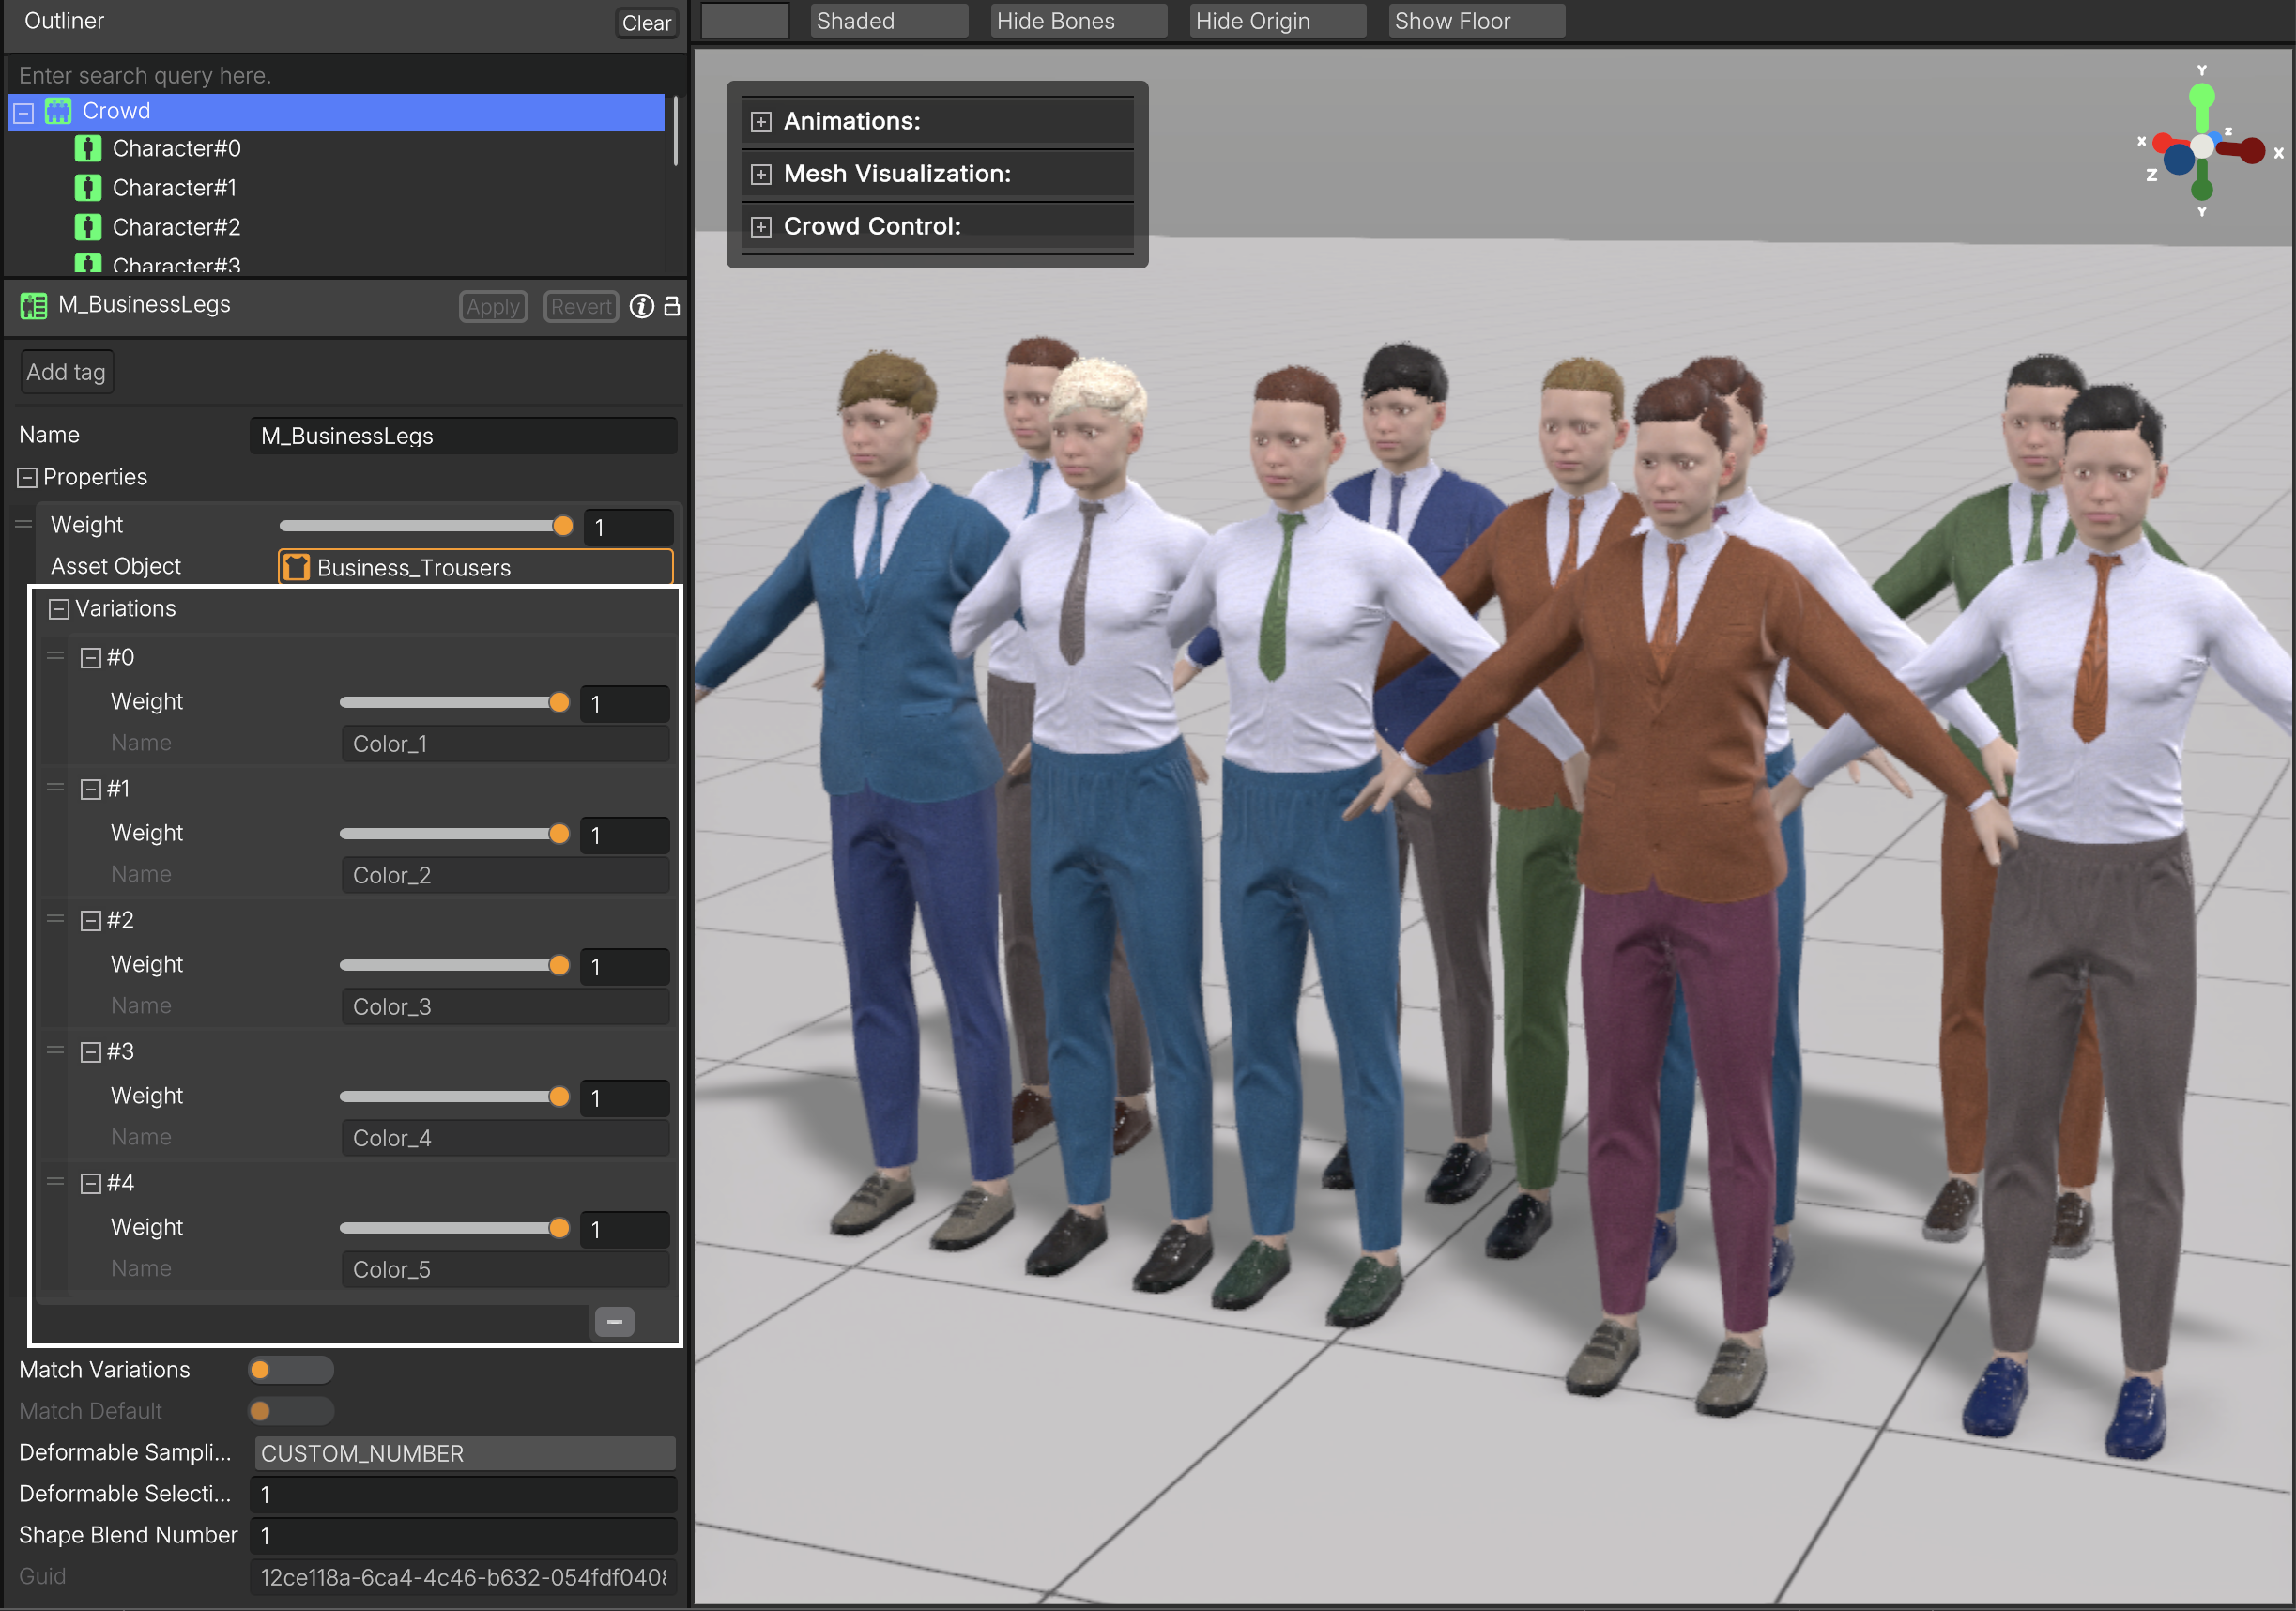
Adding Color Variation
In addition to these setup options, color variation can also be used to increase diversity within the crowd.
To achieve this, make sure the deformable as color variation and set its Weight to 1. This ensures that all available color variations are considered and applied across the crowd.
Alongside these options, two additional flags are available:
- Match Variations - Matches the names of existing material variations. When enabled, the system automatically selects compatible variations across different deformables;
- Match Default - Matches the main color variation when no variation name control is available on the default material.
| Crowd Rule with Match disabled | Crowd Rule with Match enabled |
|---|---|
 |  |
Advanced Crowd Randomization
Achieving the right balance of variation within a crowd often requires iteration. Whether you want to refine the appearance of a single character, such as adjusting height, proportions, or overall silhouette or regenerate the visual distribution of the entire crowd, the randomization system provides a fast and flexible workflow.
Characters can be randomized individually to fine tune specific results, or the entire crowd can be regenerated to explore new combinations of shapes, garments, grooms, colors, and accessories.
Tweak and Randomize Crowd Character
Randomize a Crowd
Advanced Hybrid Crowd Generation
Crowd variation does not need to be limited to standard body and facial customization.
By leveraging the Crowd blending system, it is possible to create highly stylized or experimental hybrid characters through the combination of different shape assets.
In DemoExpress (project available for download in Popul8), a hybrid crowd was created by blending multiple human shapes with a goblin shape to demonstrate the flexibility and creative potential of the blending system.
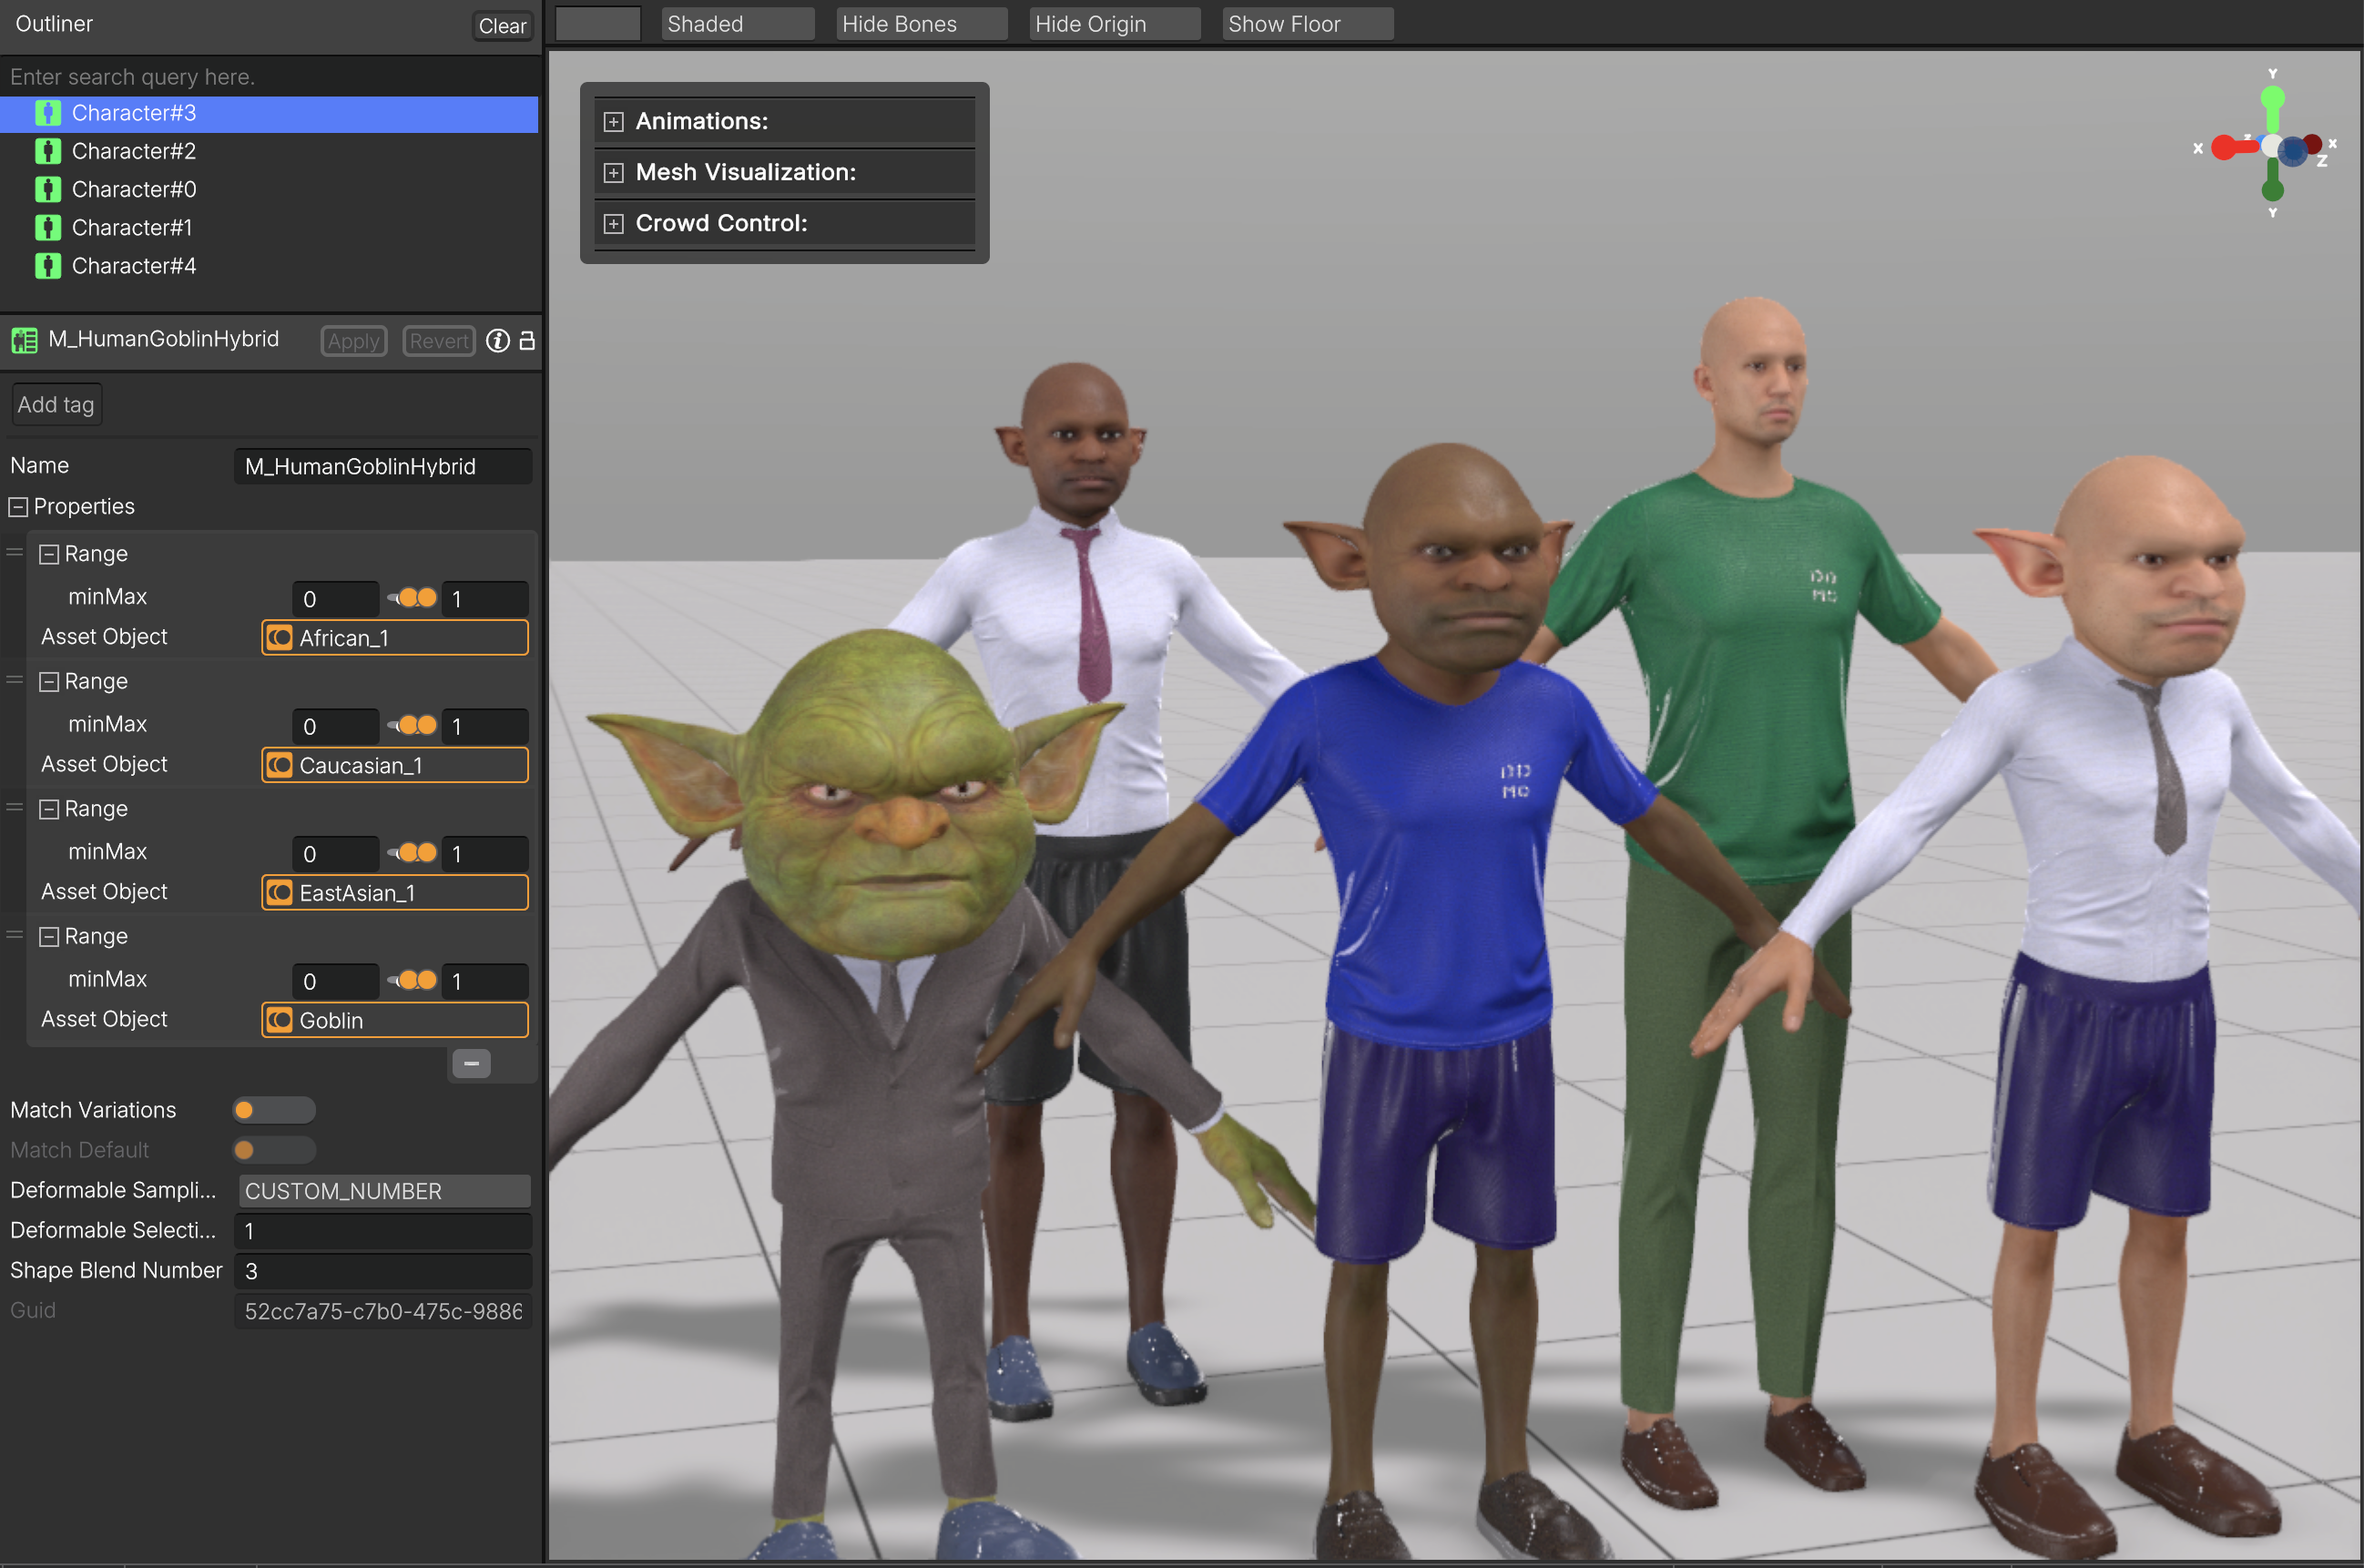
A crowd that blends human Shapes with a Goblin Shape.
Optimizing Crowds with CullMasks
Rendering large Crowds can be computationally expensive, or even produce undesired geometry penetrations, regardless of your engine choice. To reduce this load, you can cull parts of the body of your Crowd Characters that are occluded by the Deformables assigned to each Character. To do this, you’ll need to define cull masks for each mesh of the Character, for each Deformable. Here’s how:
- Enter the intended Deformable under the Template.
- Create an item in the Cull Data section.
- Drag a cull mask to the Texture slot and assign the appropriate Template mesh to the Mesh slot.
- Repeat steps 2 and 3 for all meshes that need to be culled.
- Click Apply Changes when you're done.
Finally, enter a Crowd Character using the Deformable with the Cull Data applied to see the culling in action!
Assigning cull masks to a Deformable under a Template will propagate the culling information to the fitted Deformable on the Shapes, and will automatically be used in your Crowd Characters!
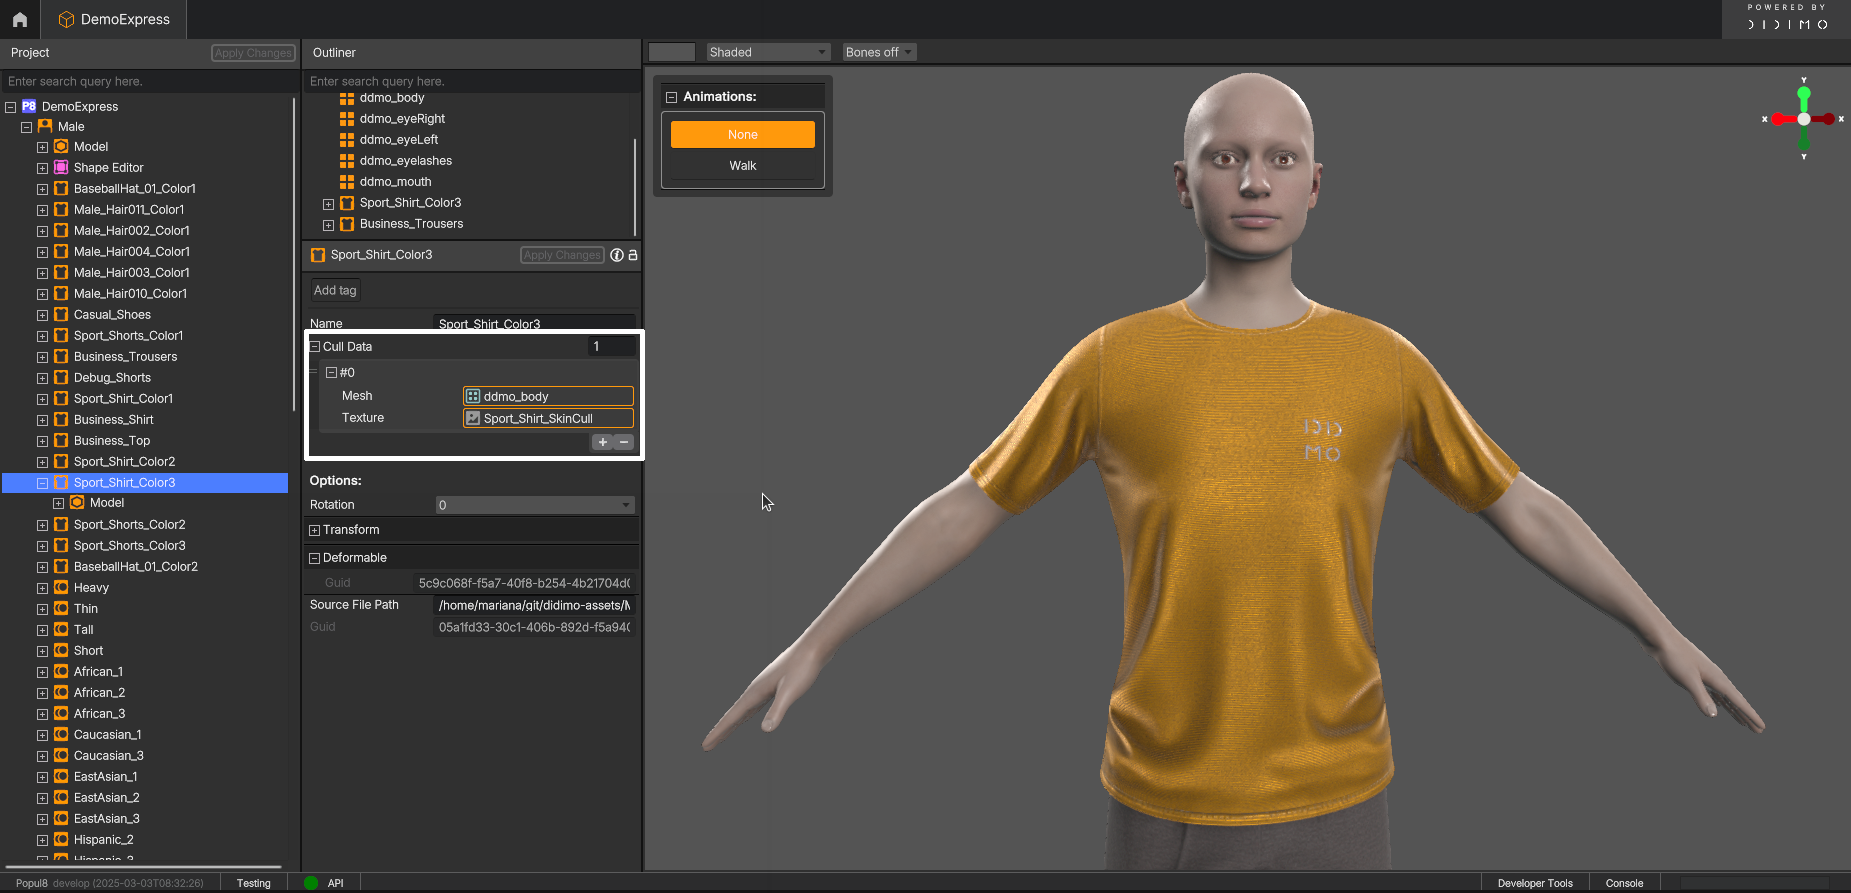
Assigning Cull Data to the body mesh of the Template on a specific Deformable.
Culling is also an alternative to solve intersections between a Deformable and a Shape/ Template in a Crowd!
The effect of applying Cull Data in a Crowd Character.
Updated 2 months ago