Adding Deformables, Shapes, and Animations
Once your project is initialized and you’ve added your first Base Character (Template), you can begin importing your assets, such as:
- deformable 3D models (e.g., clothing, hair)
- textures (.png, .jpg and .tga - type1, 2 and 10)
- alternative character variants (Shapes)
- animations
Popul8 Express recognizes different asset types, but each asset must be manually assigned to its correct category (Template, Shape, Deformable, Animation) in order to function properly.
🎬 Check our Tutorial Video:
1. Converting Assets to the Correct Type
In order for Popul8 Express to use an asset correctly, you need to assign it a type (see Base Concepts):
- Deformable
- Shape
- Animation
These options become available after importing your Base Character (Template), and are only applicable to models located under the Imported Assets folder.Follow Before You Start page about how to import your assets and Importing Your Own Base Character page for more information about how to import your Base Character.
1.1. Converting an Asset into a Deformable
- Navigate to the Imported Assets folder and select your Model to be converted into a Deformable:
(e.g., Imported Assets → Male → Categories → Deformables → Legs → Sport_Shorts)
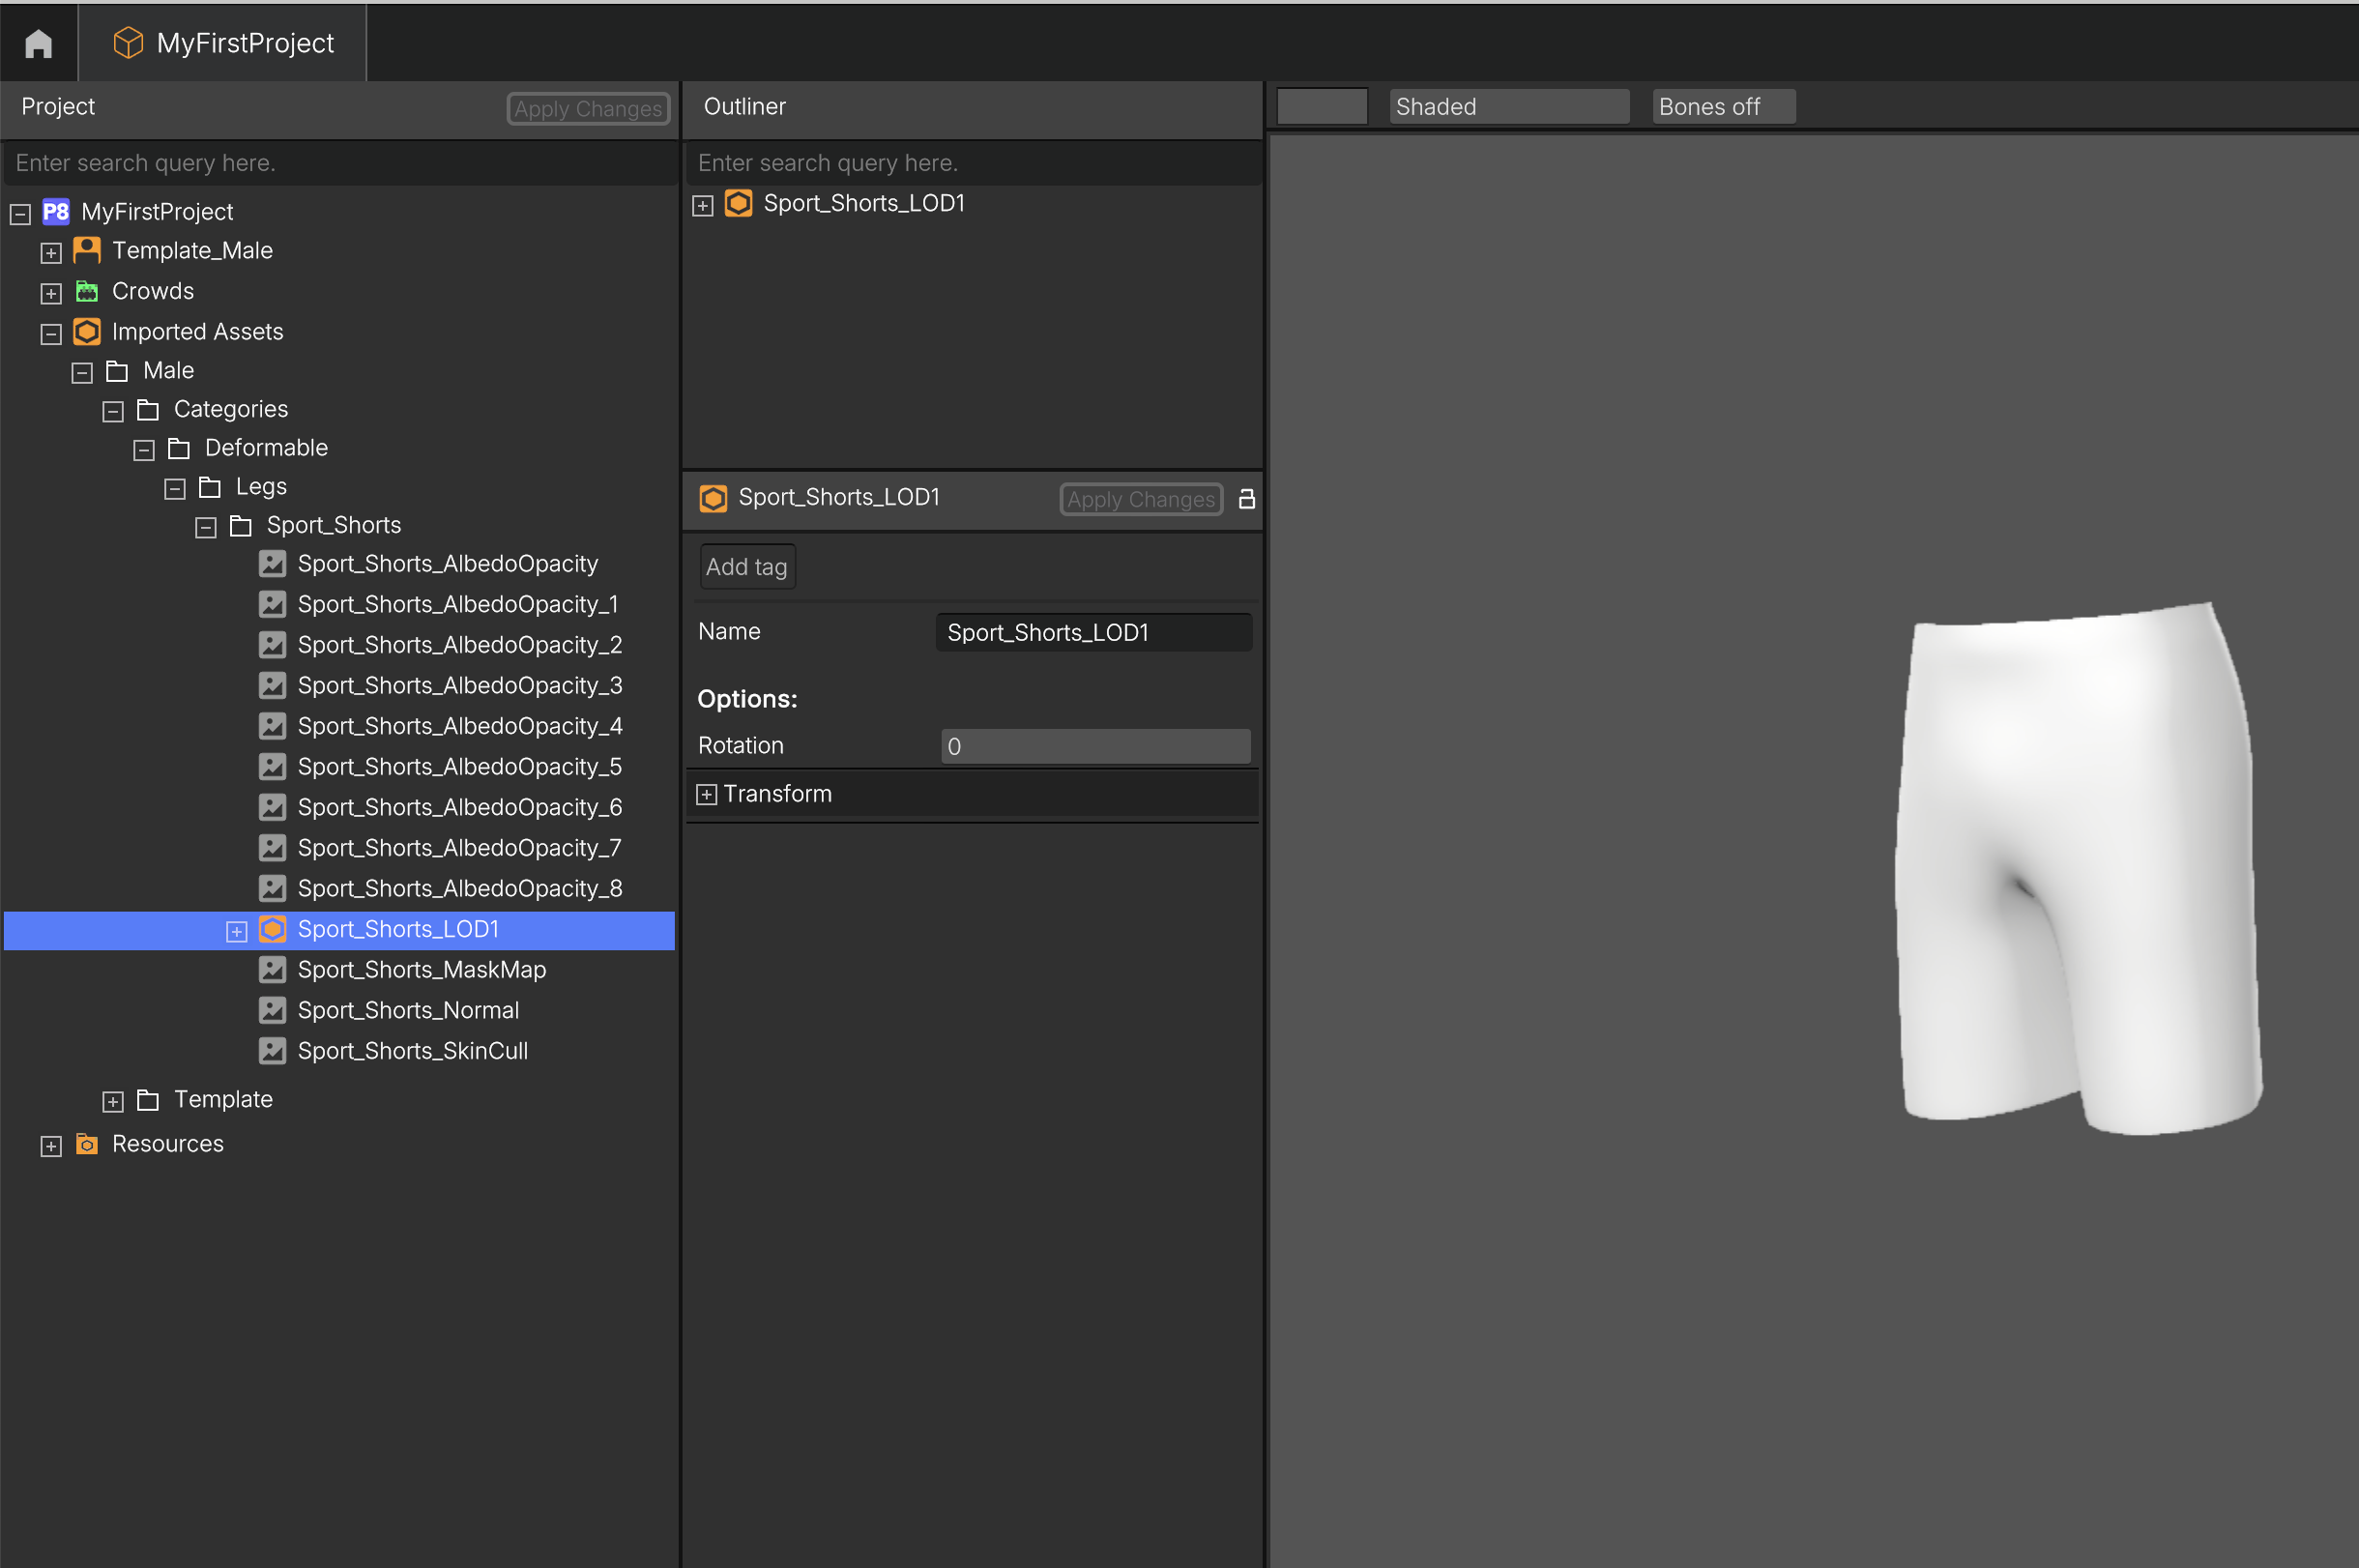
- Right-click the asset → Convert To → Deformable Of → [Template name]
(eg., → Convert To → Deformable Of → Male)
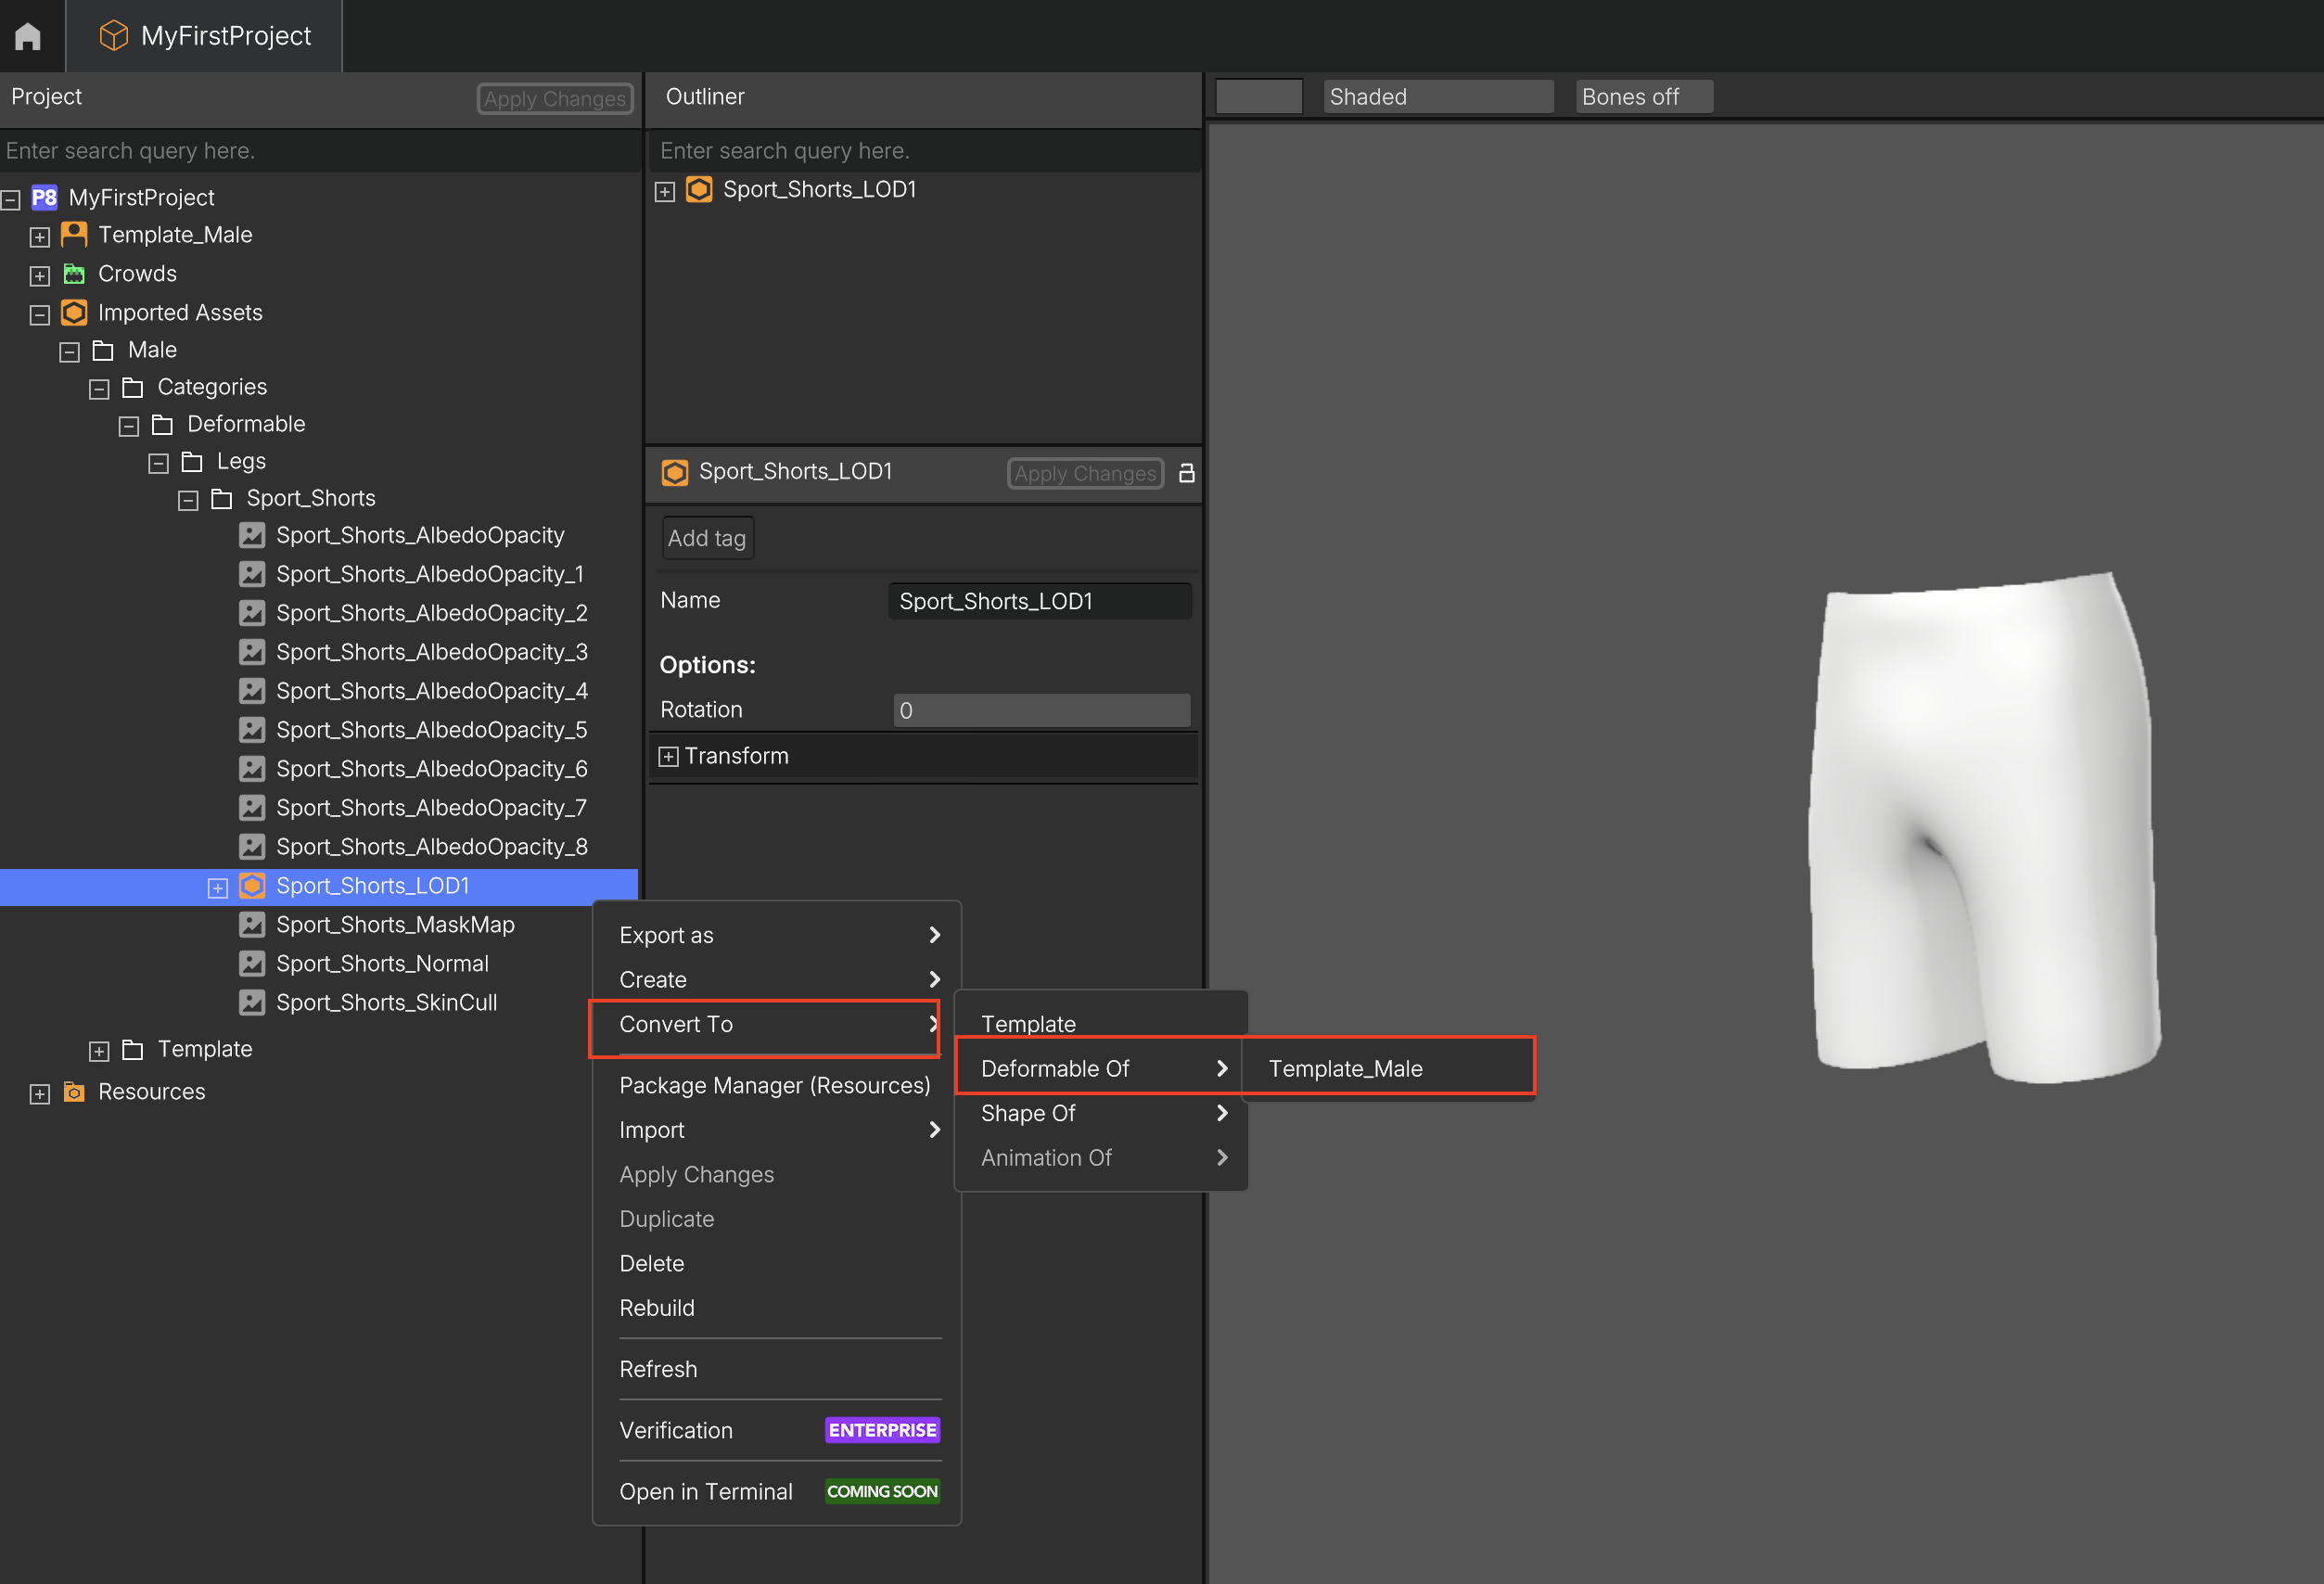
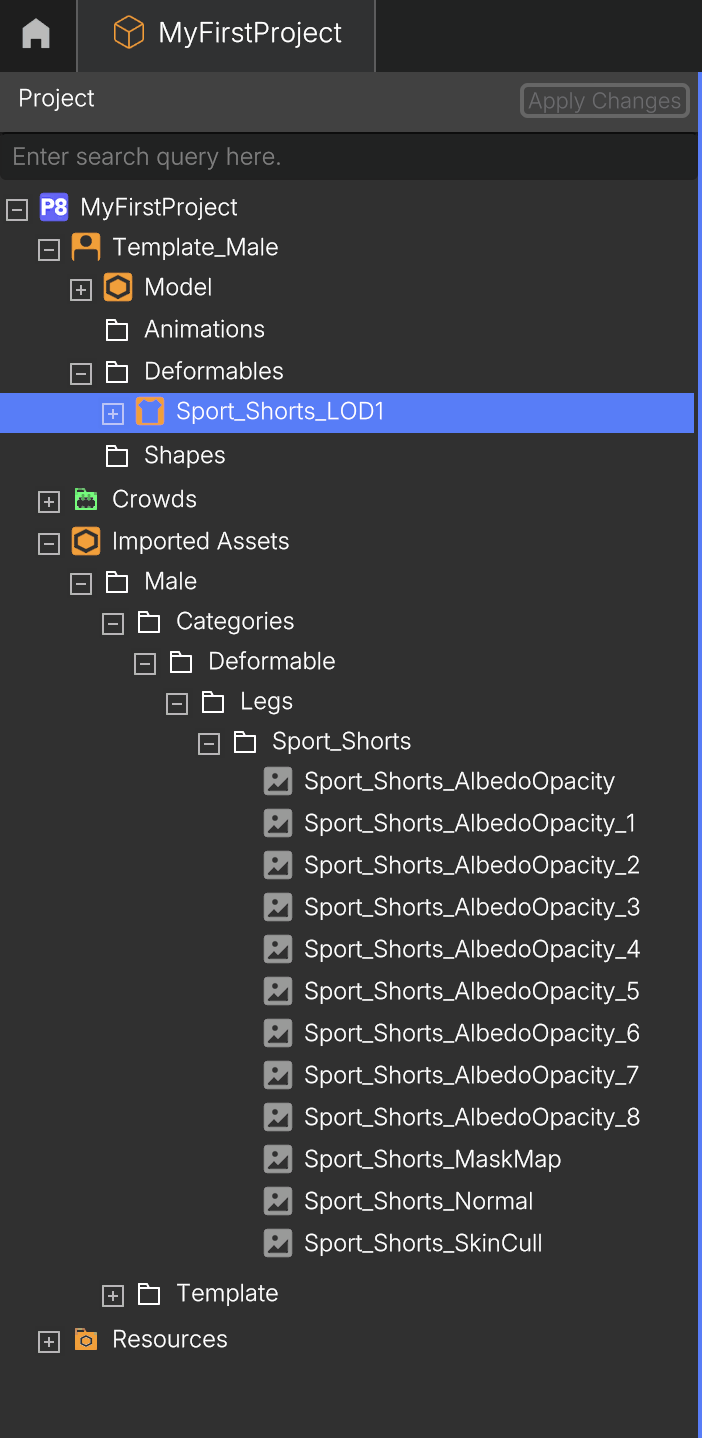
- After a moment, a new Deformable object (e.g., Sport_Shorts_LOD1) will appear under the selected Template in the tree view.
1.2. Converting an Asset into a Shape
- Navigate to the Imported Assets folder and select your Model to be converted into a Shape:
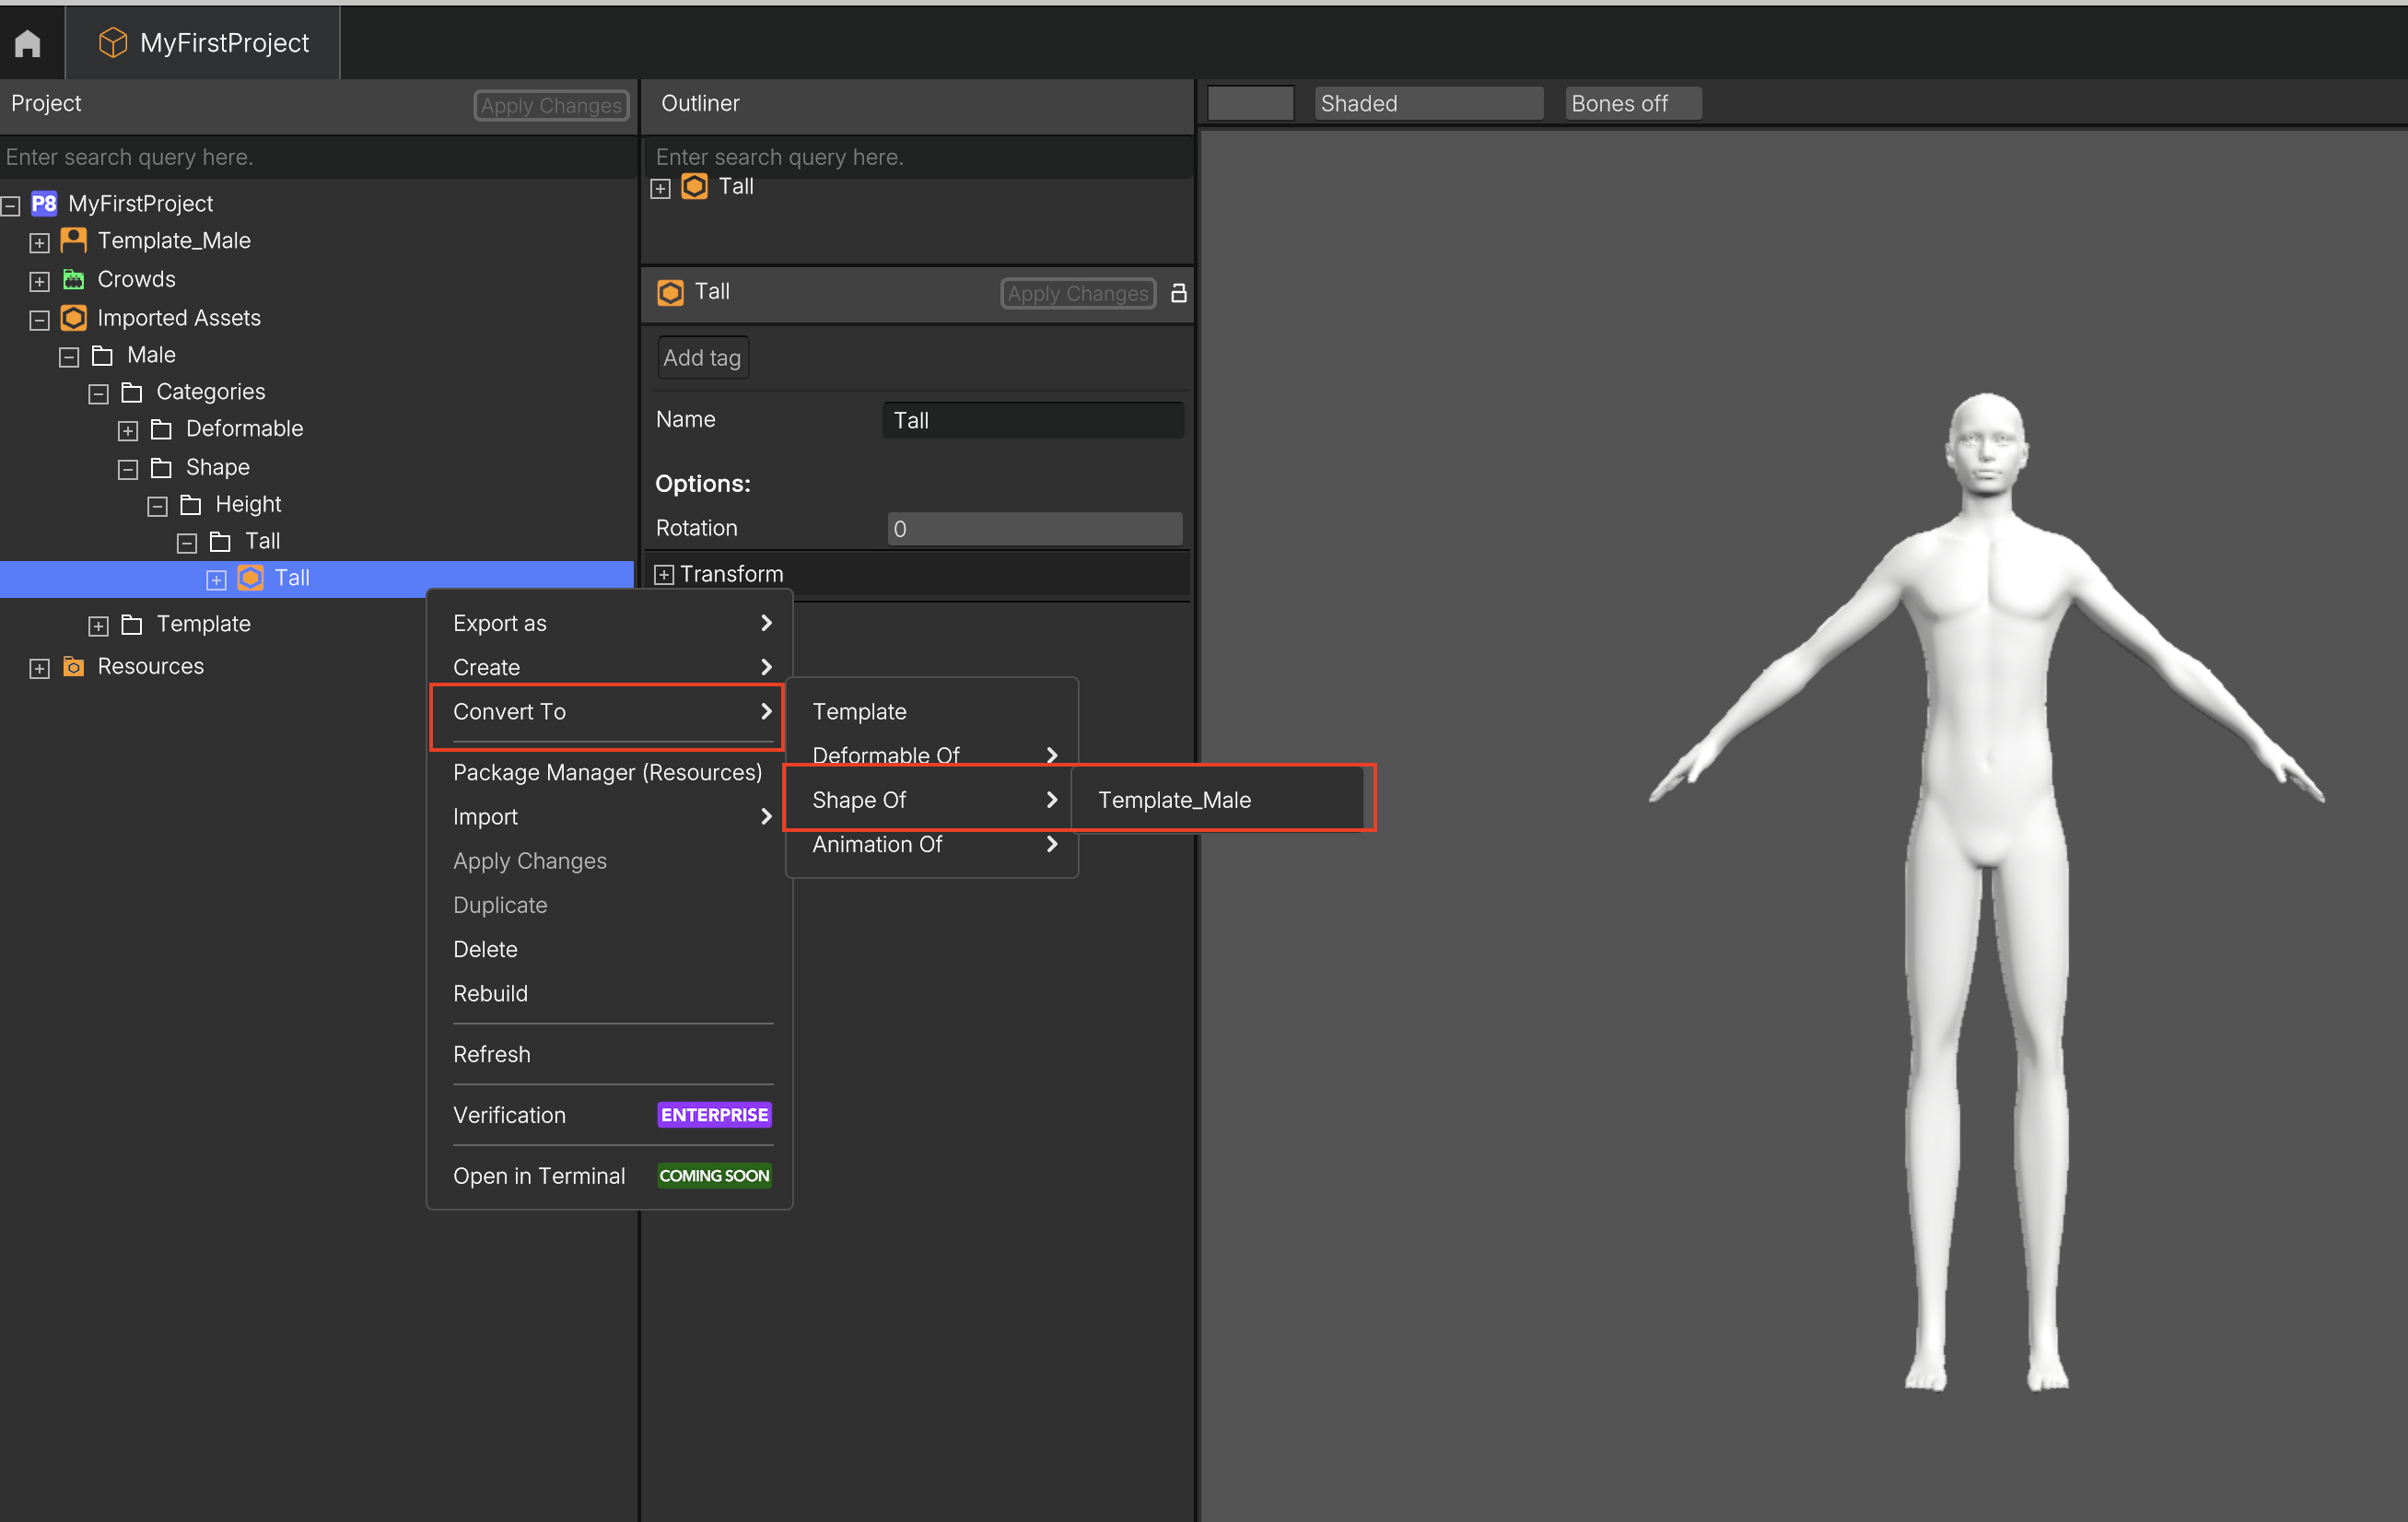
- Right-click the asset → Convert To → Shape Of → [Template]
(eg., → Convert To → Shape Of → Male)
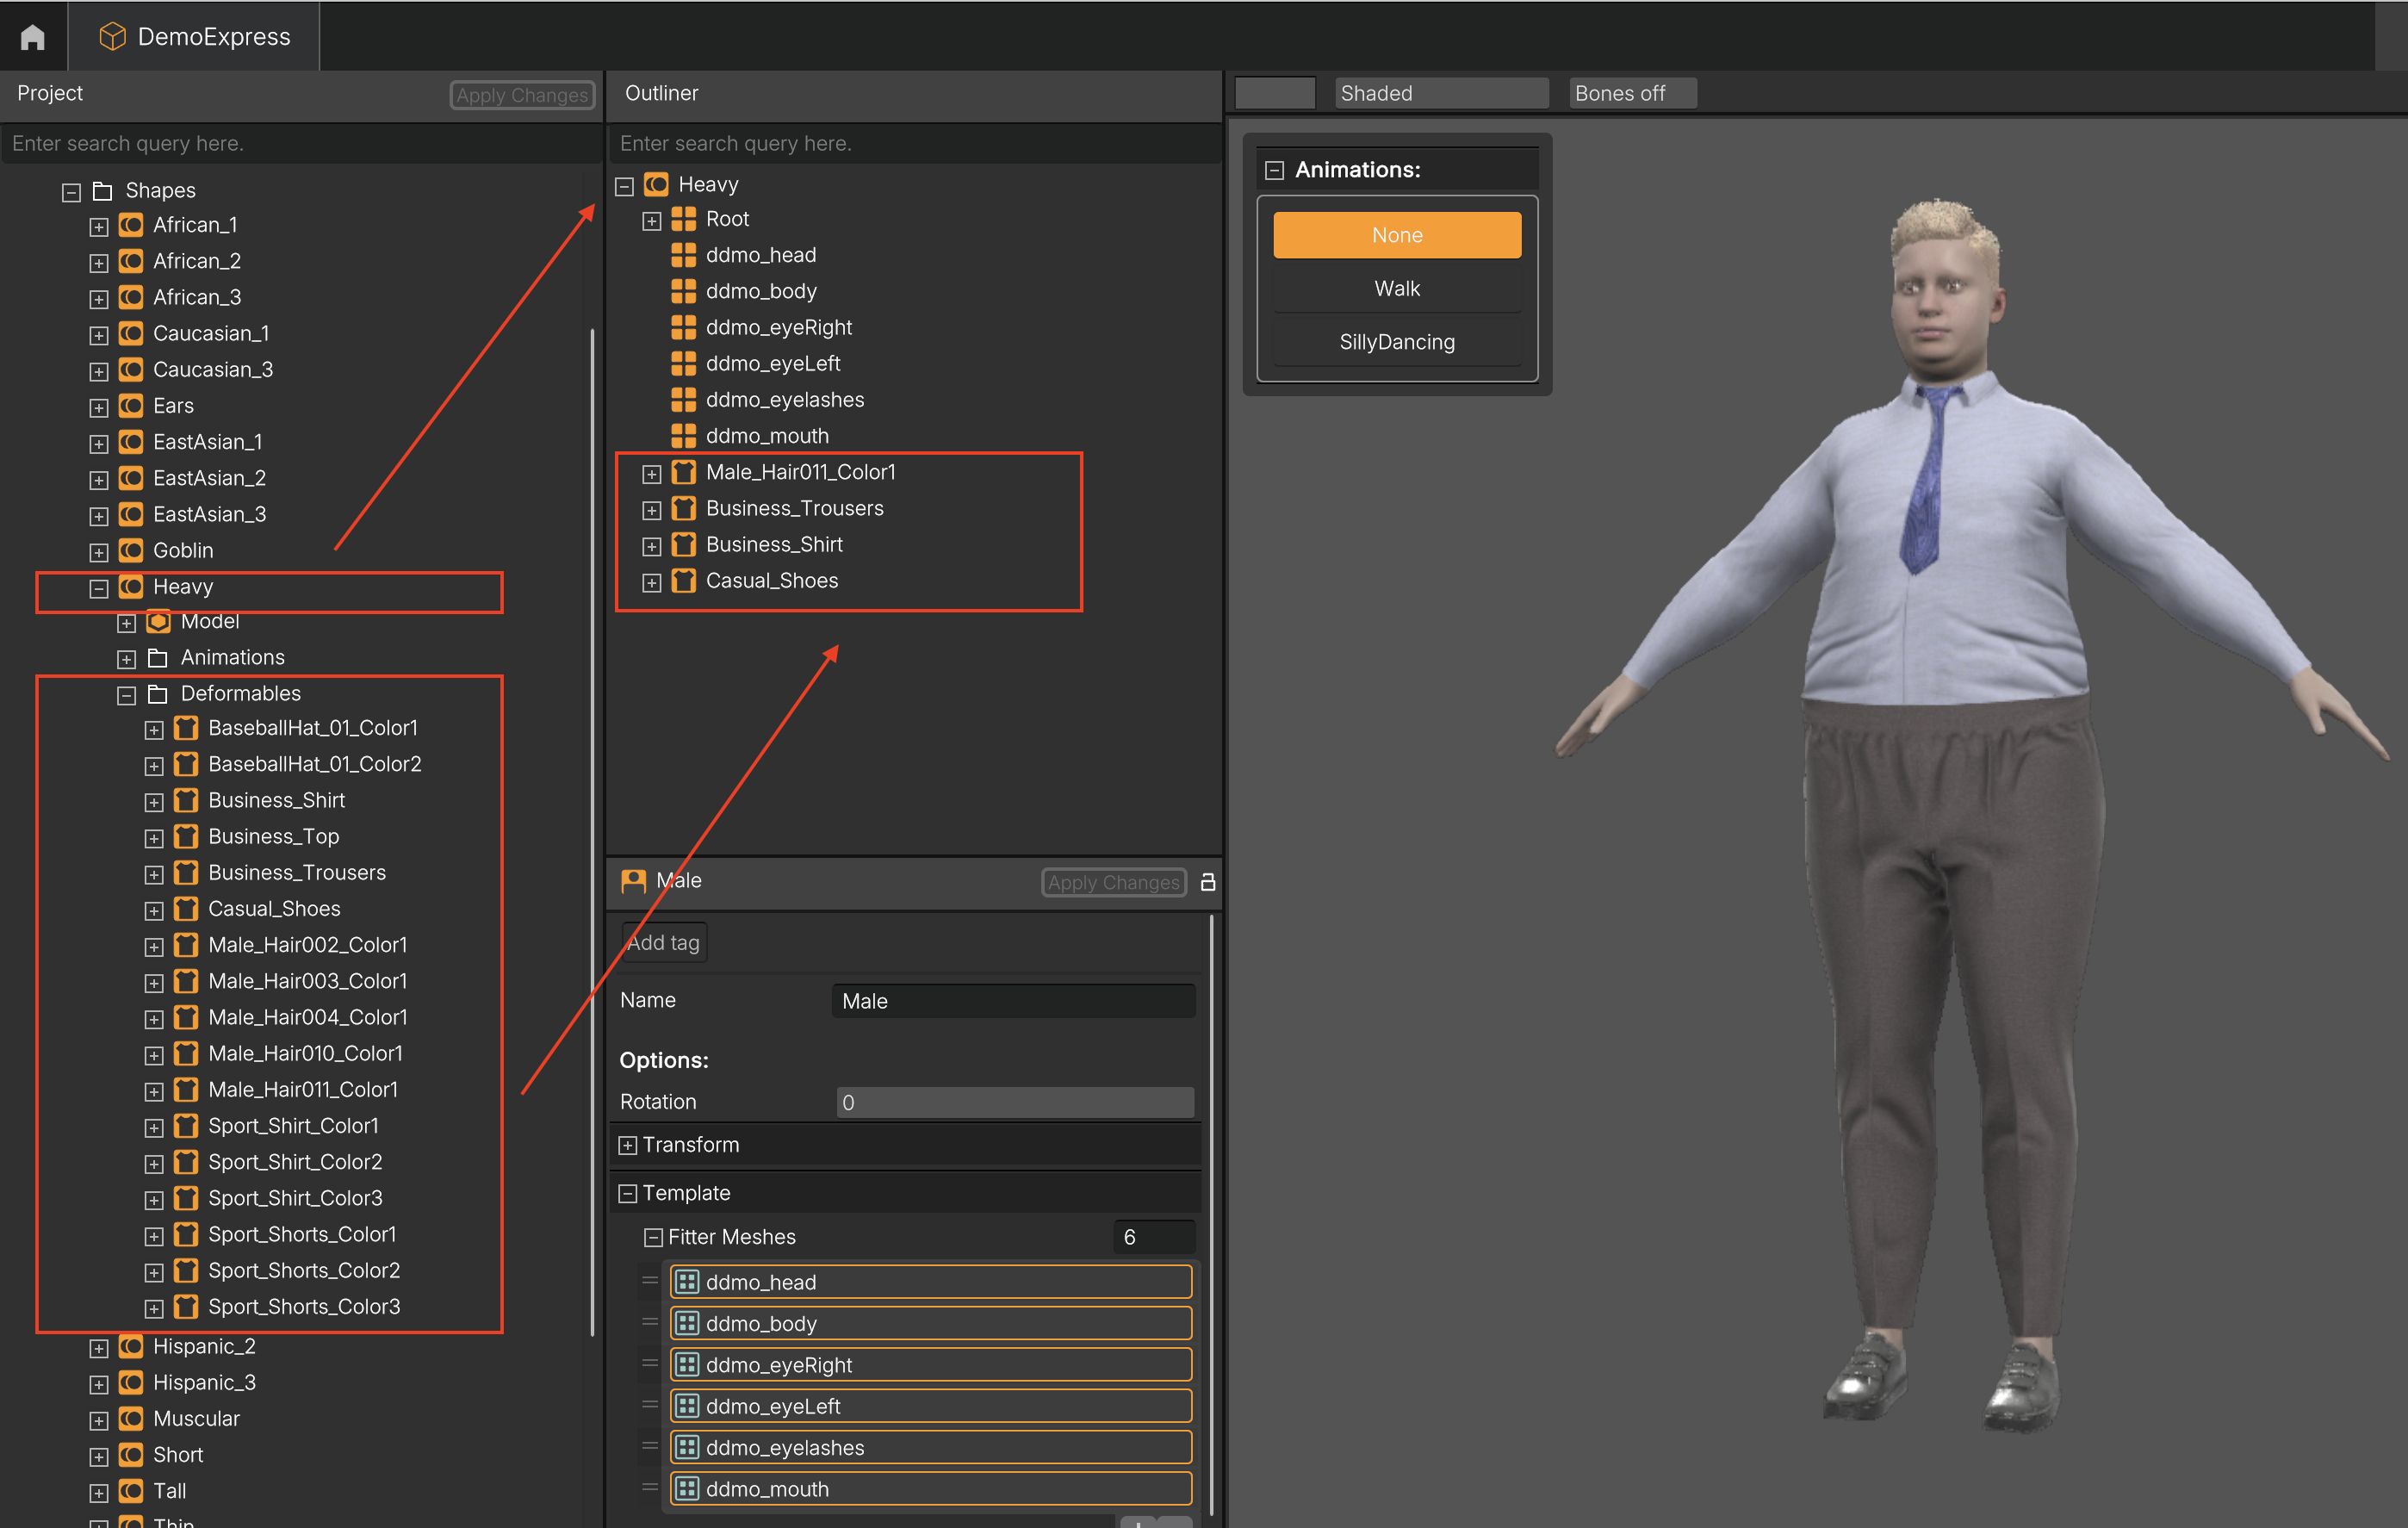
- Drag and Drop the Shape into the Outliner to preview the character; you can also drag in any Deformables assigned to the Template.

All Deformables previously assigned to the Template (e.g., clothing) will automatically be fitted to the new Shape!
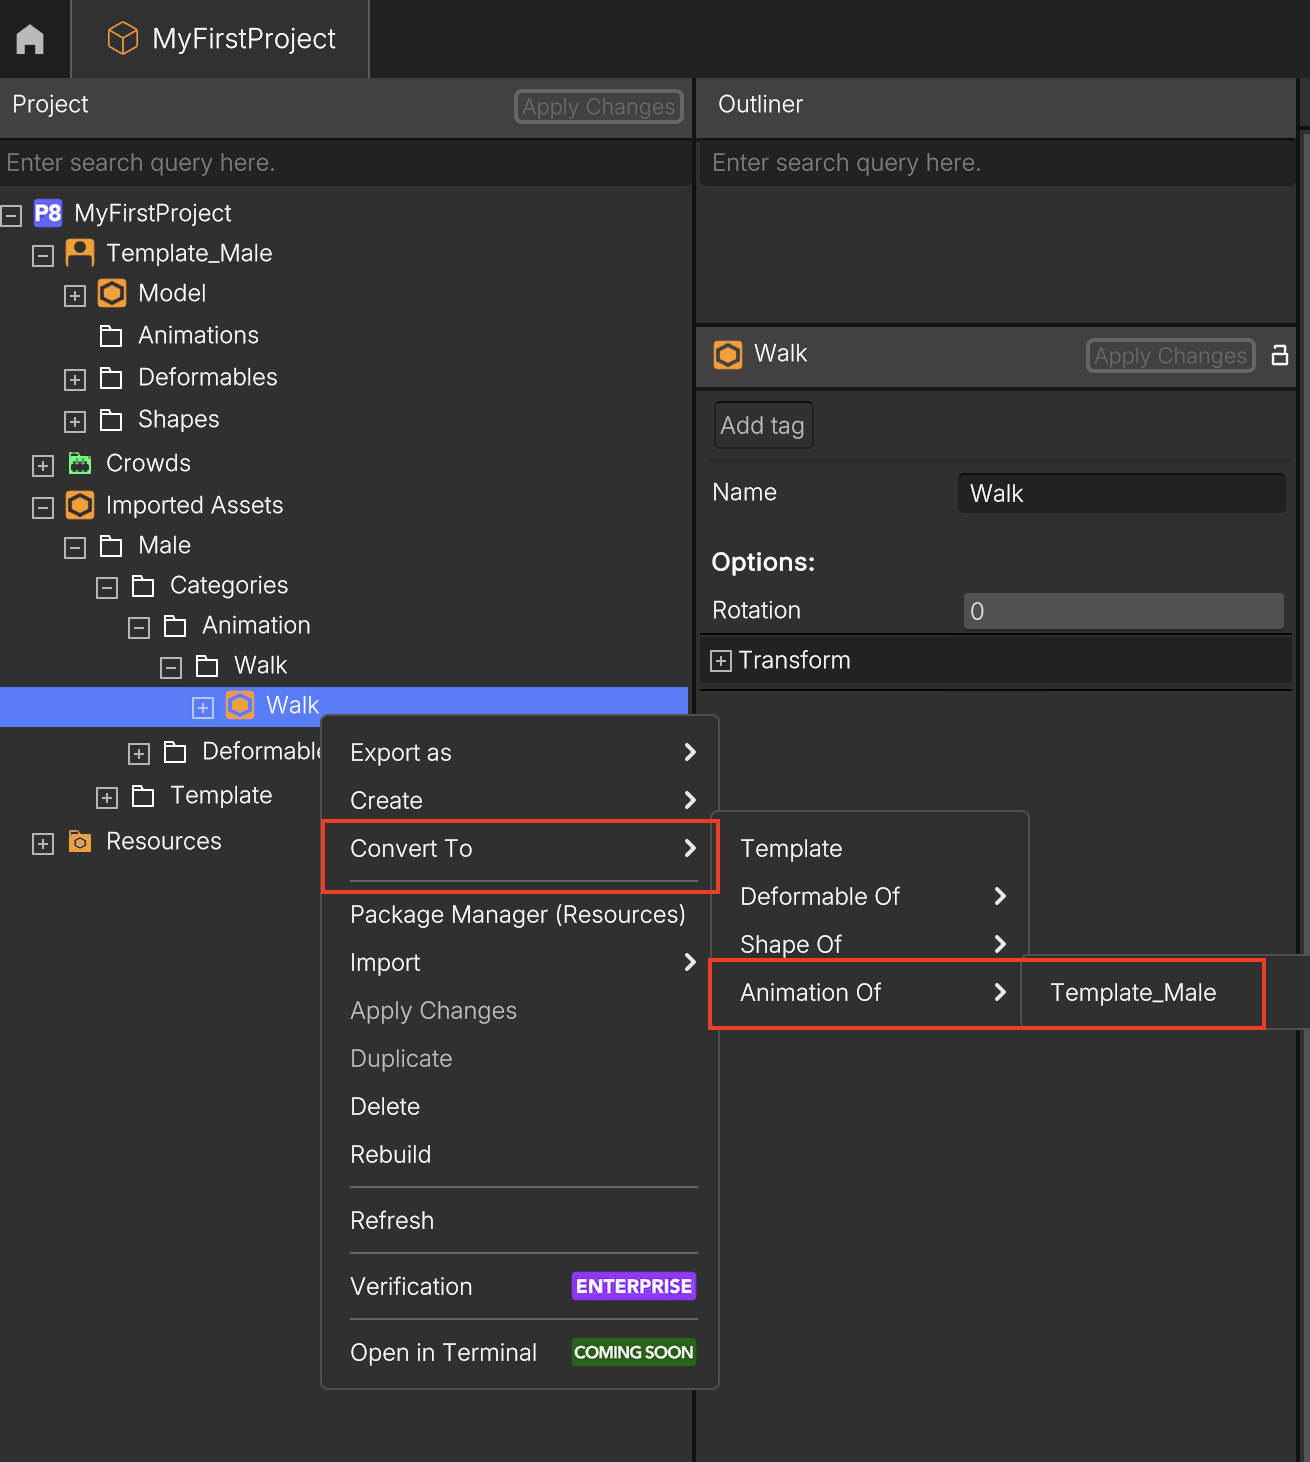
1.3. Convert Model into Animation
- Navigate to the Imported Assets folder and select your Model to be converted into a Animation
- Right-click the file → Convert To → Animation Of → [Template]
(eg., → Convert To → Animation Of → Male)
- The animation will automatically be linked to the Template and all its Shapes.
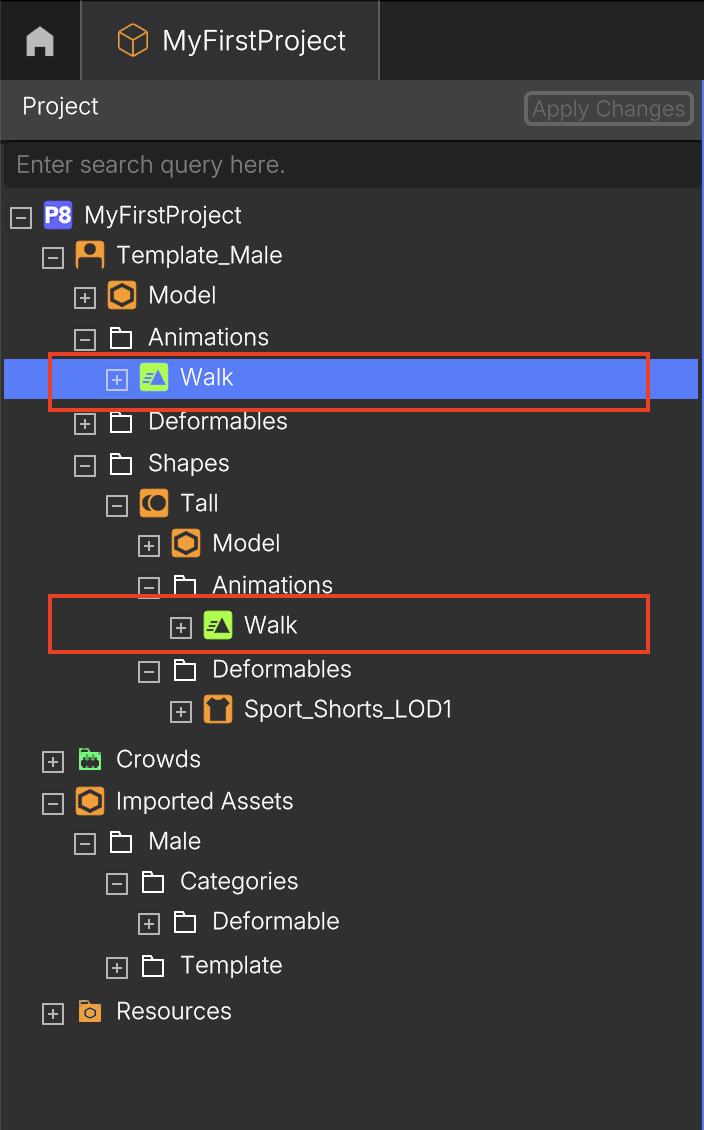
- Drag and Drop your Template or Shape into the outliner and select an option in the Animation panel (e.g., None or Walk) to see your character animated.
2. Setup Materials
Once the model is imported or even after conversion, you can assign textures to enhance and complete its visual appearance.
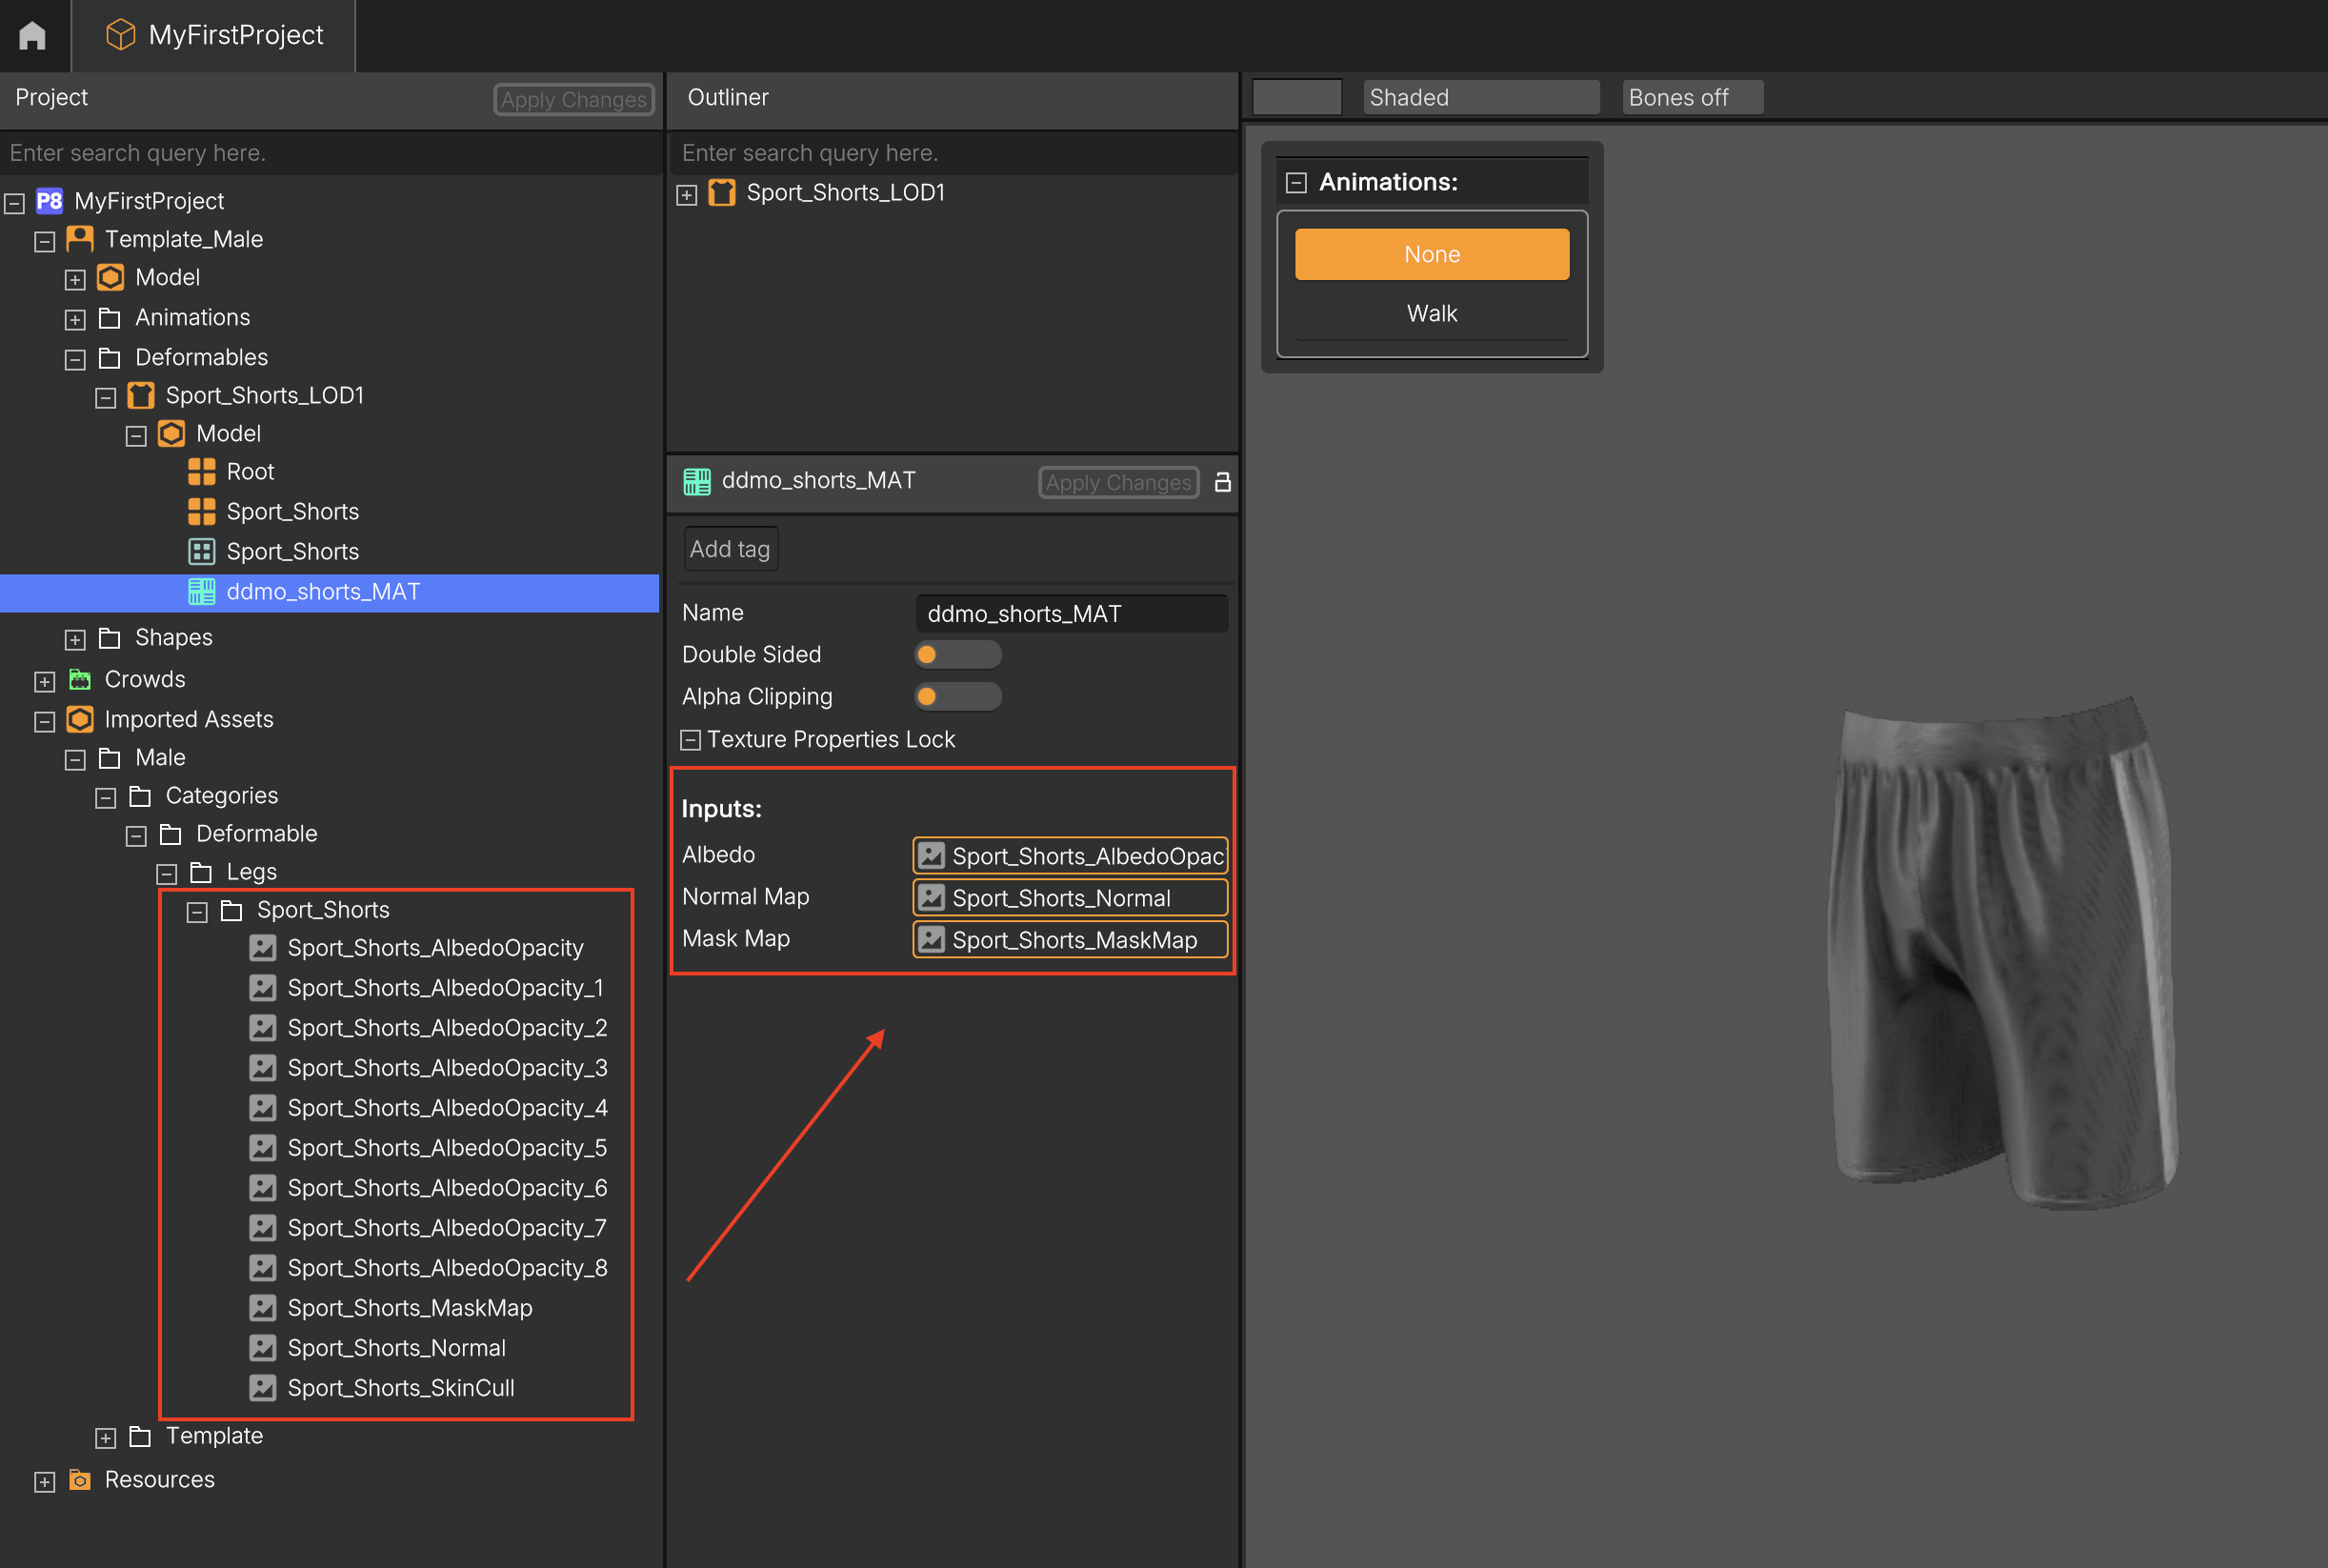
- Select the material expanding your model (eg., Male → Sport_Shorts_LOD1 → Model and select ddmo_shorts_MAT). All the inputs related with the material will be displayed in the Inspector View
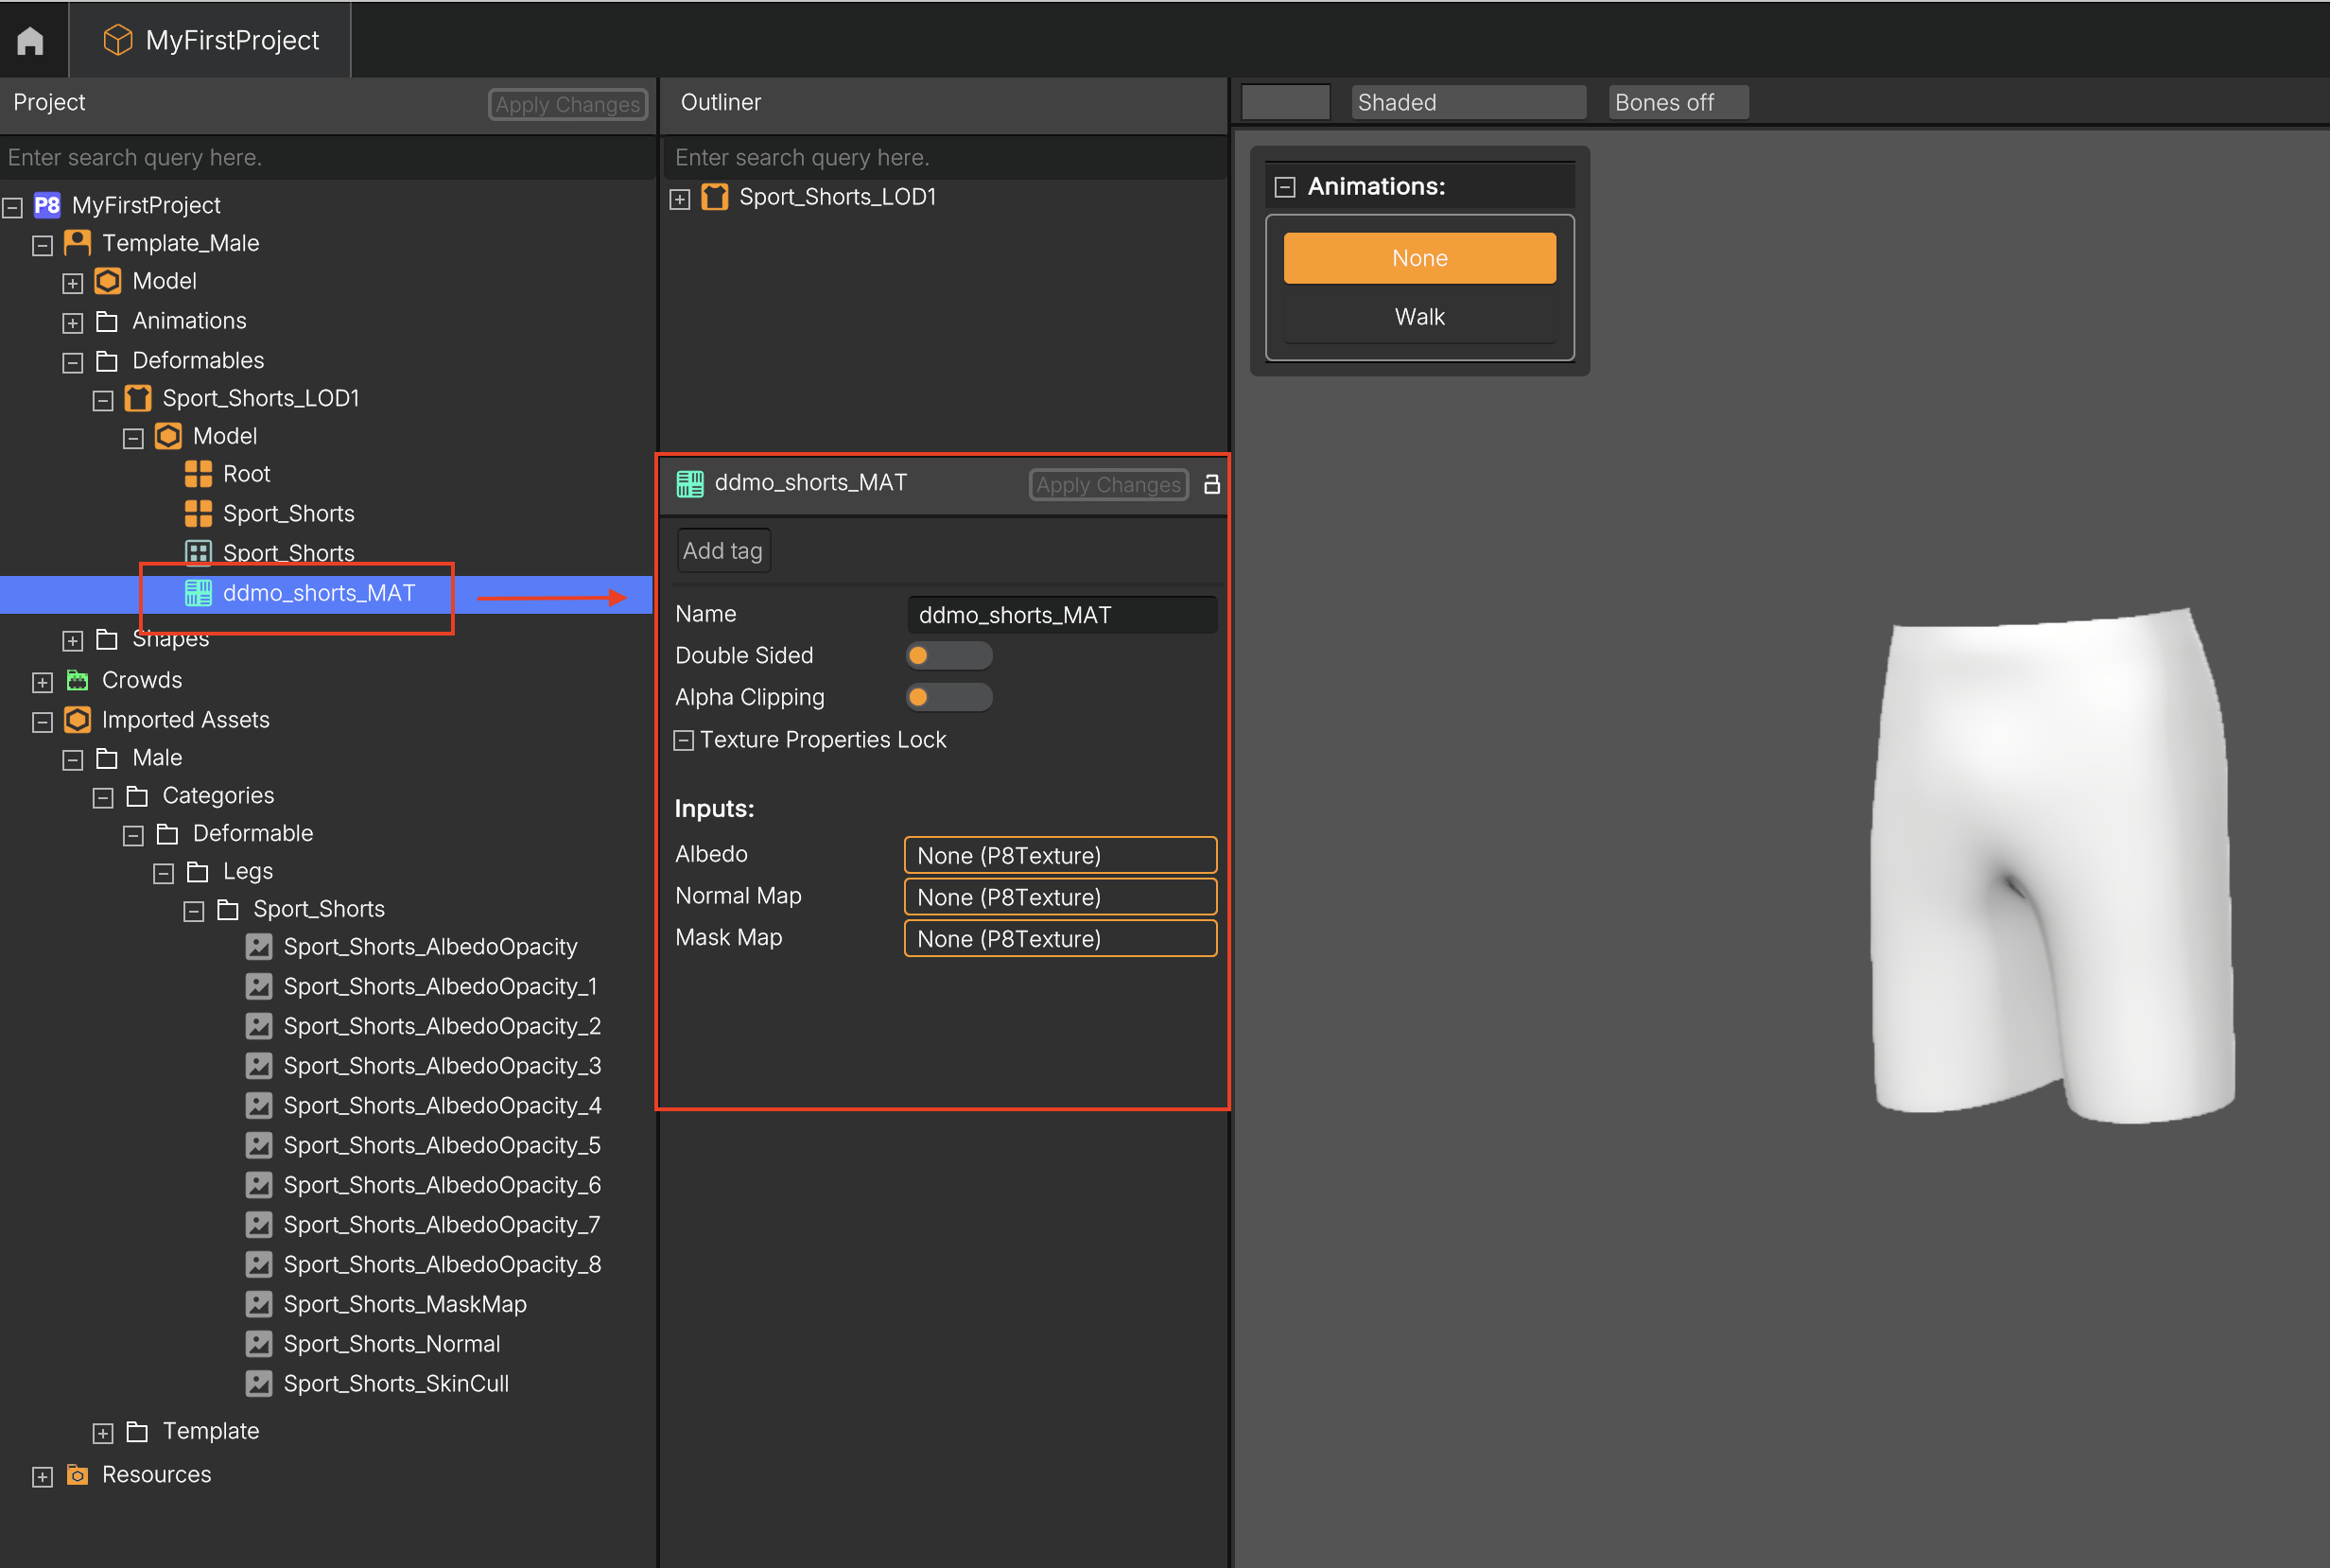
- Drag and drop the corresponding textures previously imported into the Inputs section under the Outliner (Albedo, Normal Map or Mask Map)
- Click Apply Changes. If your model is already placed in the Outliner, any texture or configuration updates will be applied automatically in real time.
3. Previewing Deformables on the Character
Popul8 Express supports dragging multiple assets into the outliner, enabling you to preview how different assets fit together within your scene.
In the outliner, only Deformables assigned to a Template can be combined and previewed together. For character shapes, only the Deformables associated with the selected shape can be combined.
- Drag your Template or Shape and next drag a Deformable into the Outliner
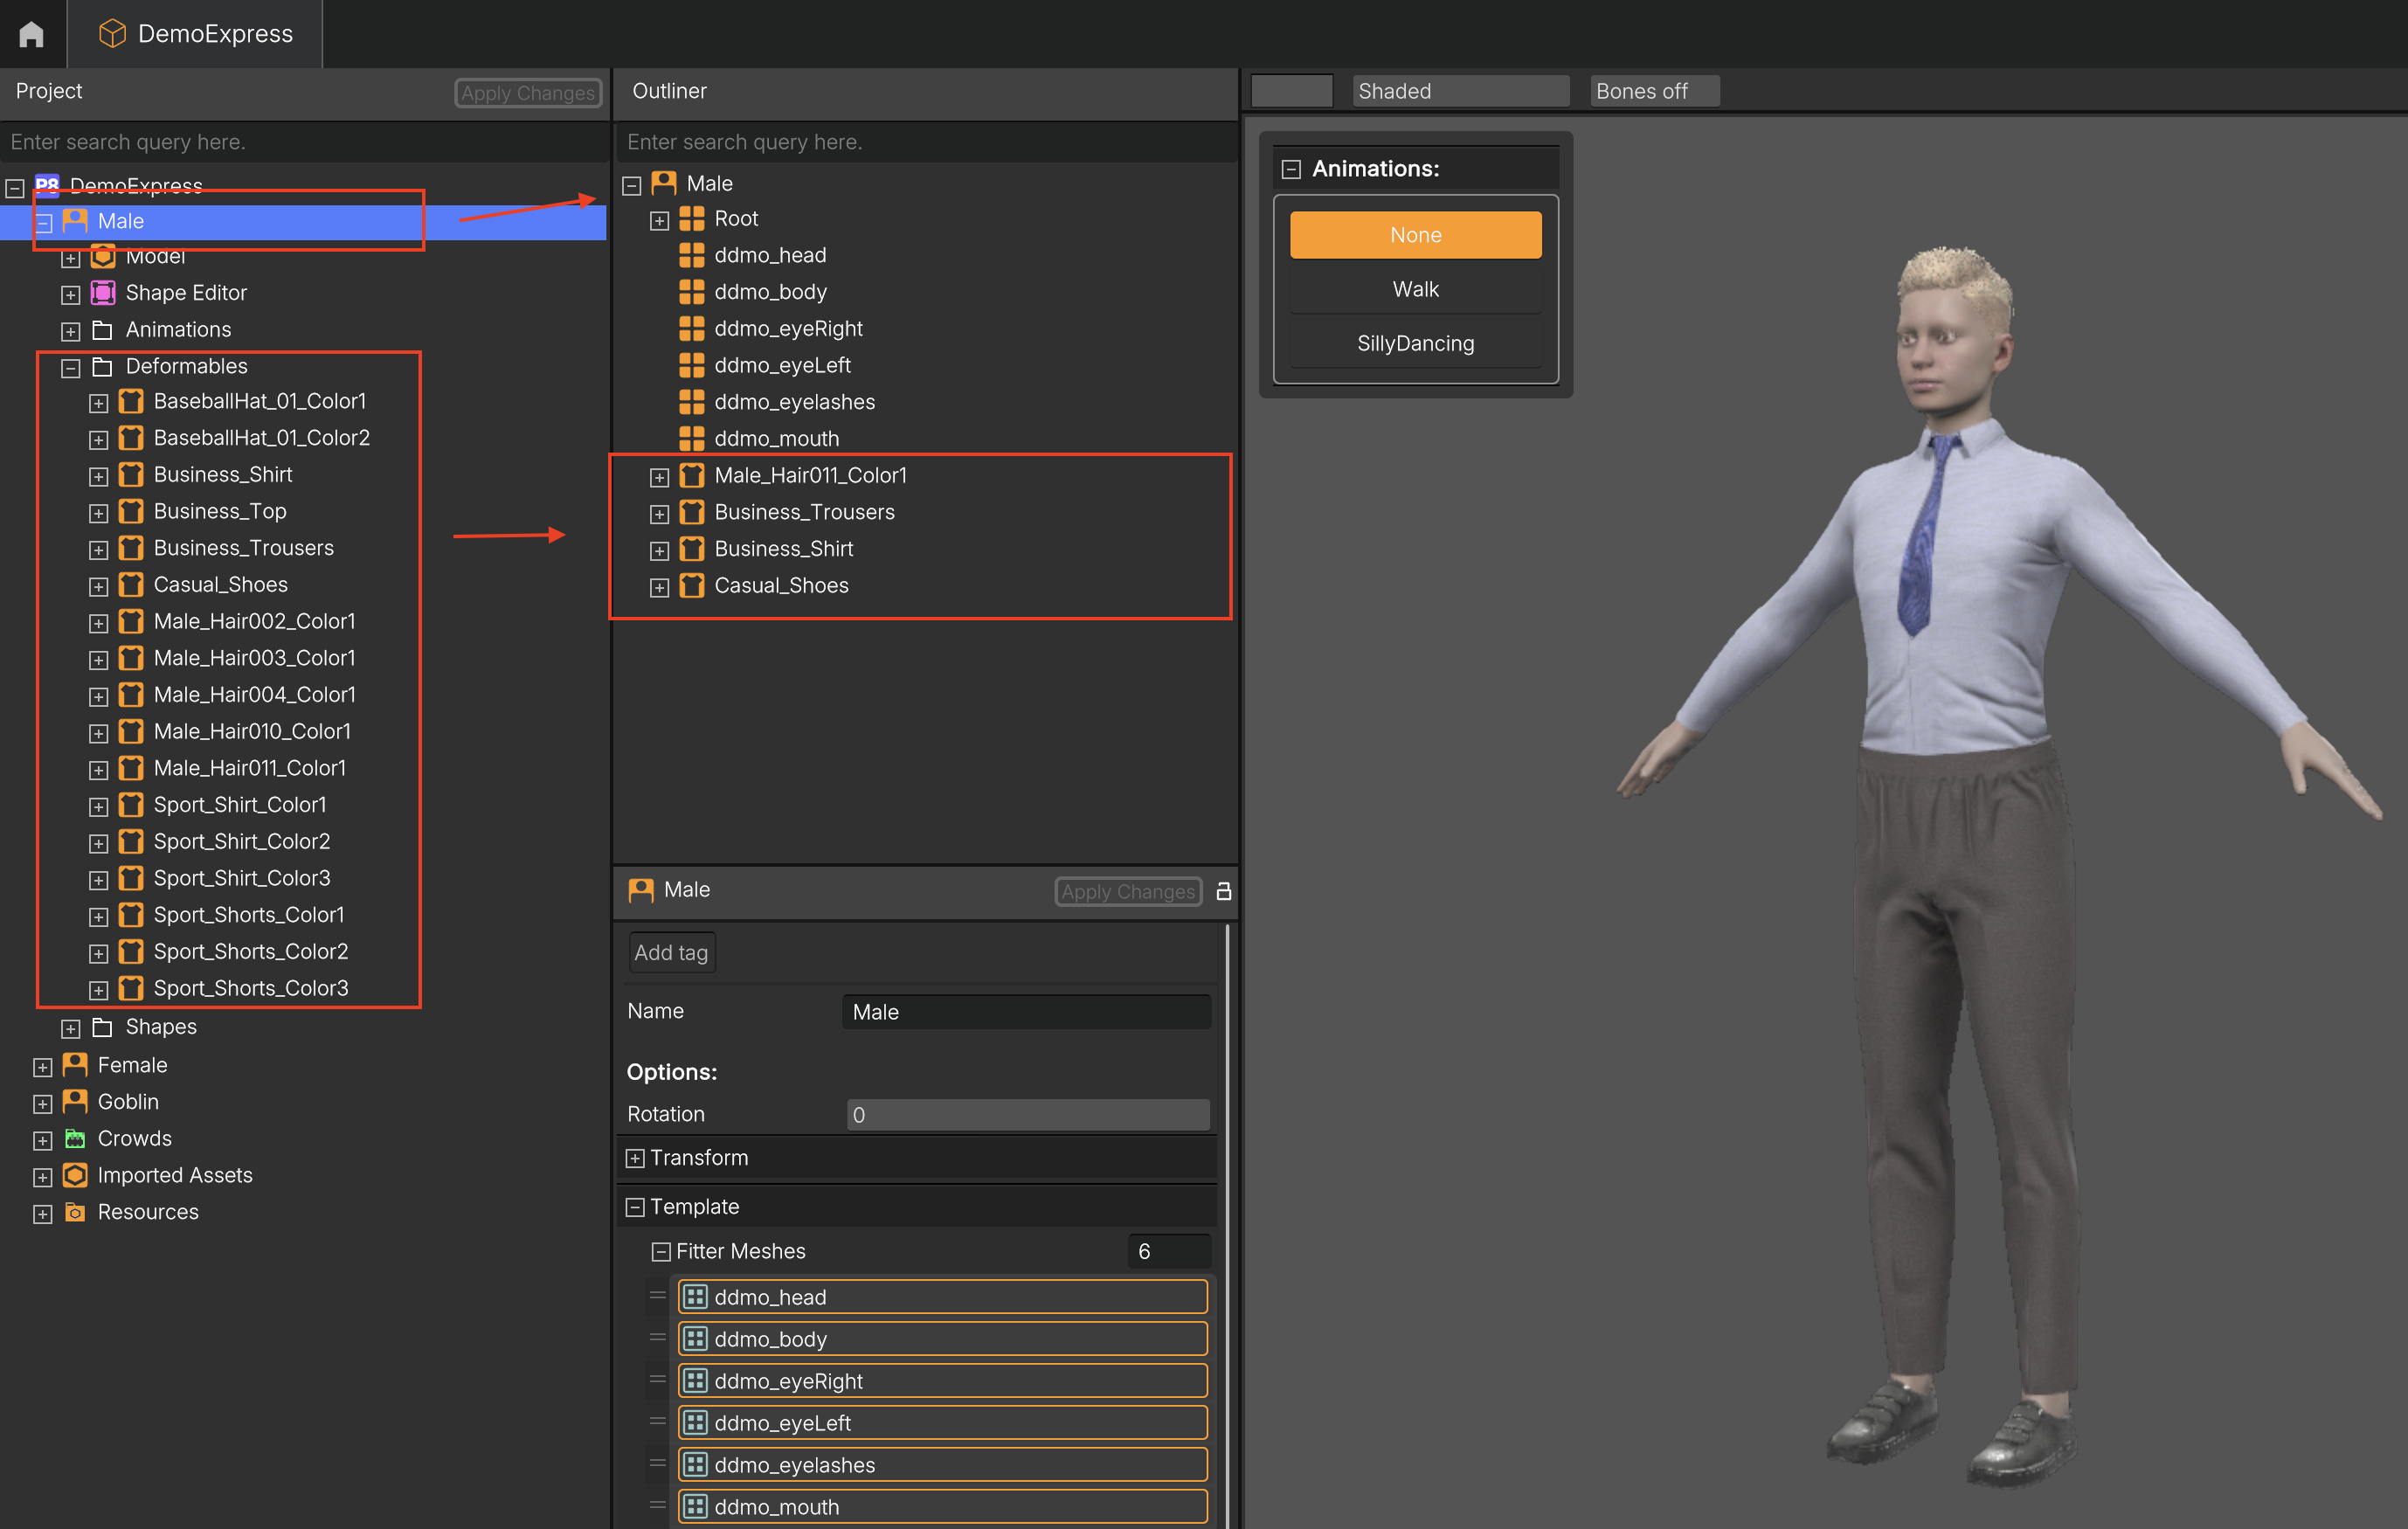
Popul8 Express Magic: Once assigned, a Deformable automatically works with all Shapes linked to that Template!
Updated 9 months ago