Integration: Omniverse Audio2Face
Version 2021.3.3
Audio2Face is a software created by NVIDIA which generates facial animation that is derived from an audio file.
This guide will showcase how to generate an animation on Omniverse’s Audio2Face, and play it on Unity. You will first need to install the Ominverse Platform. After that, install the Audio2Face app from the platform. Currently, this integration only works on 2021 versions of the software, since it produces unexpected results on 2022 versions.
We will first showcase how to generate an animation in Audio2Face, export it and how to play it on Unity. The next steps will teach how to setup the scene correctly, on A2F, but you can download it here, open it and start creating animations right away, as the setup is already done.
Generate an animation in Audio2Face
-
When you open the software, you are greeted with the demo scene, that showcases Mark (Audio2Face default model for driving animations) hooked into the A2F Pipeline. Create a new scene (File → New).
-
In the new scene, navigate to the Character Transfer tab and, in Tools, choose "+ Male Template".
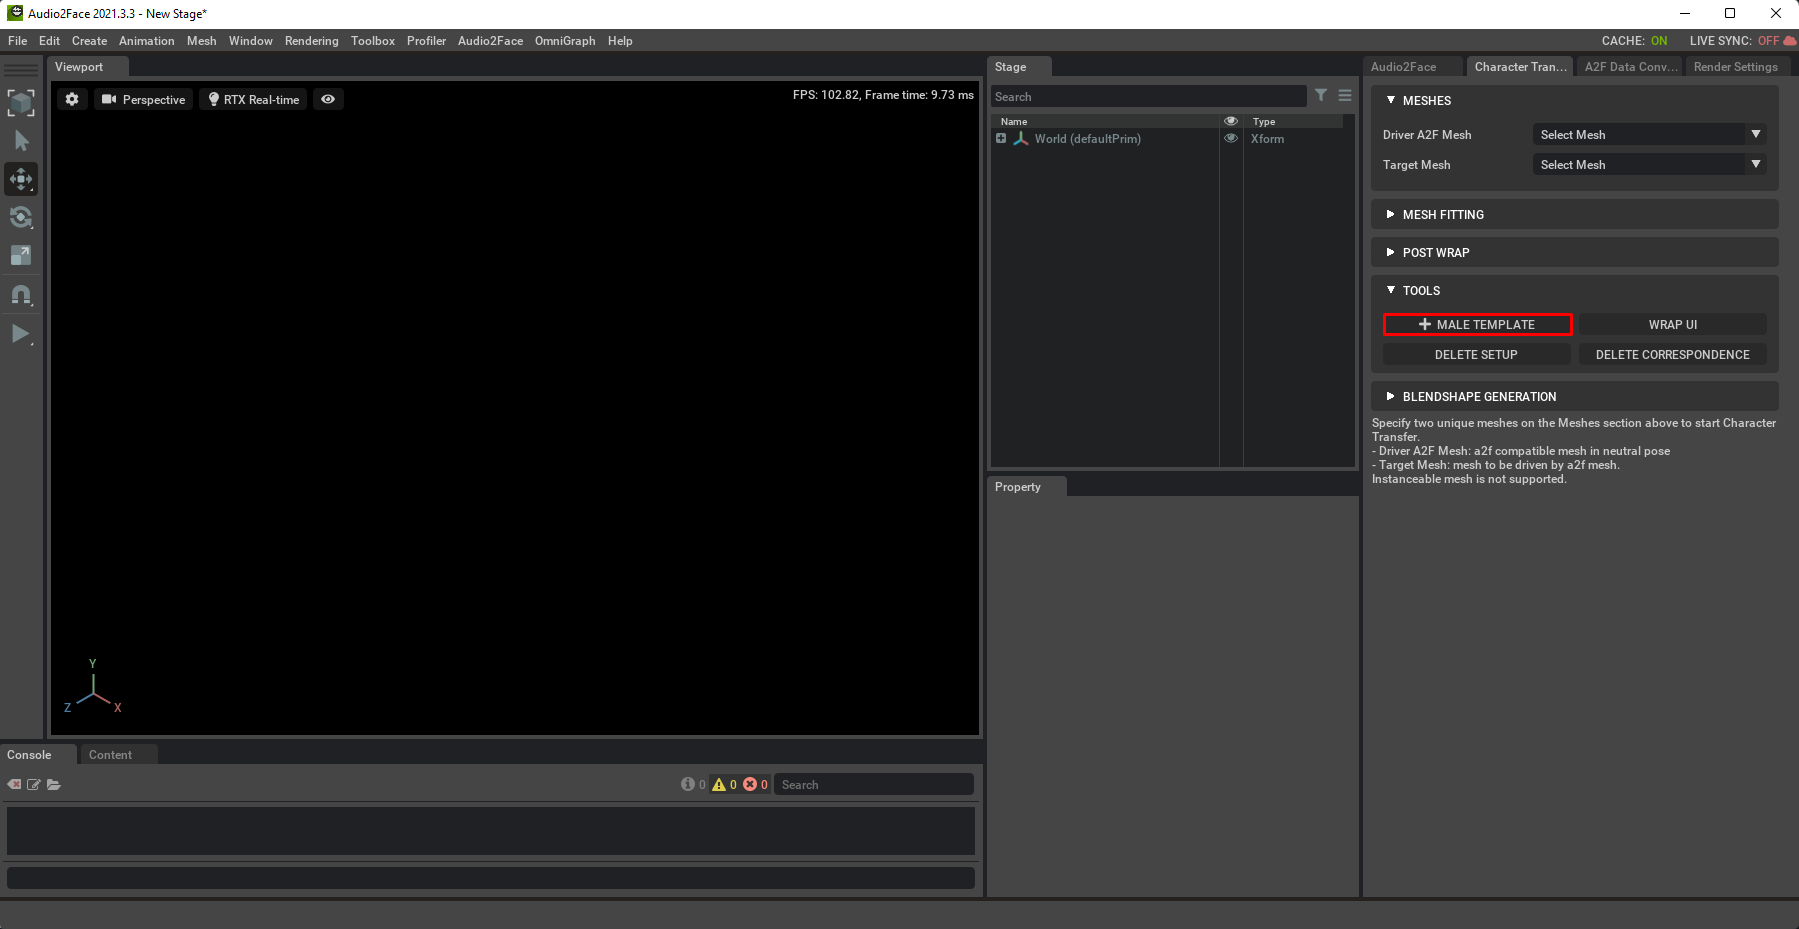
This will add the Mark template to the scene, along with a specific OpenMouth blendshape, in green.
- Navigate the Content tab, and drag the template didimo .USD file into Stage.
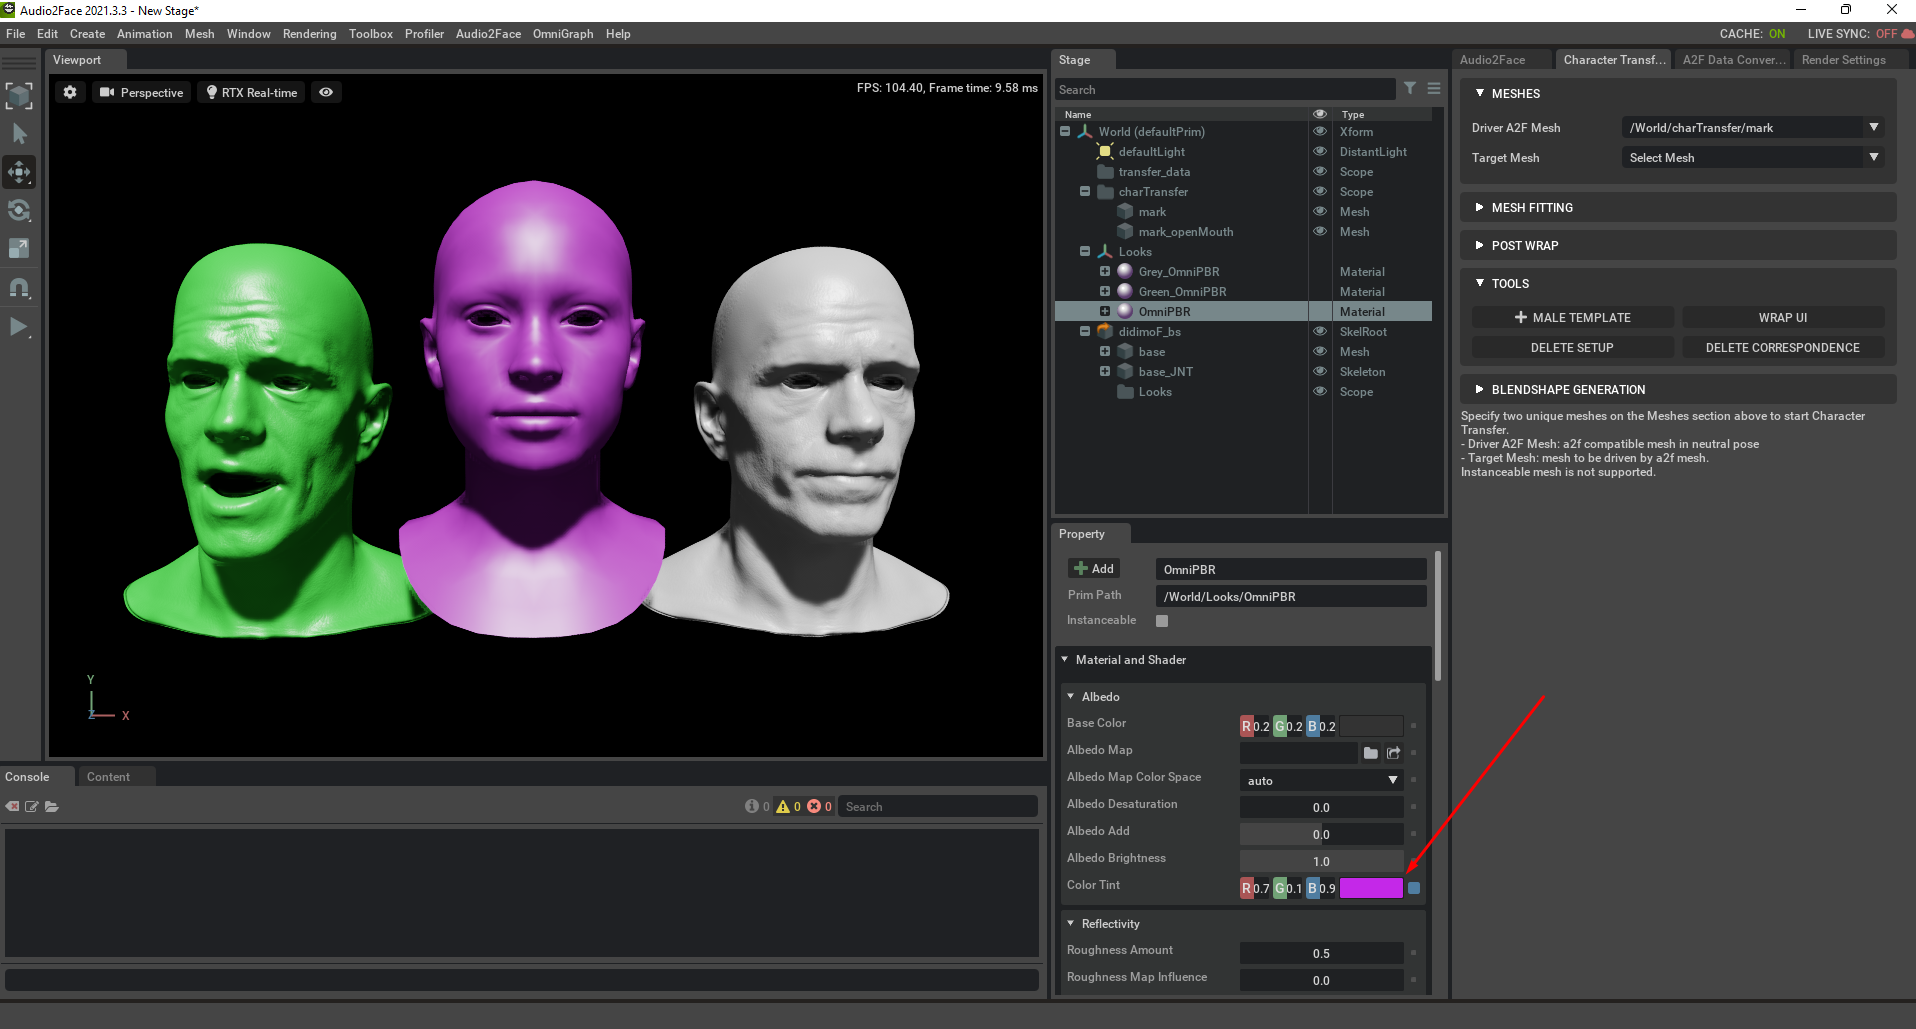
The didimo will be white by default, so it is advised to create a Material (Create → Material → OmniPBR), which will go under the Looks group in Stage. You can change the colour tint where the arrow is pointing on the above image. Drag the Material to the didimo base mesh on the viewport.
-
Go to Meshes and choose Mark as the “Driver A2F Mesh” and the didimo “base” mesh to be the “Target Mesh”. If it is not set up by default, choose the “mark_openmouth” mesh to be the “OpenMouth A2F Mesh”.
-
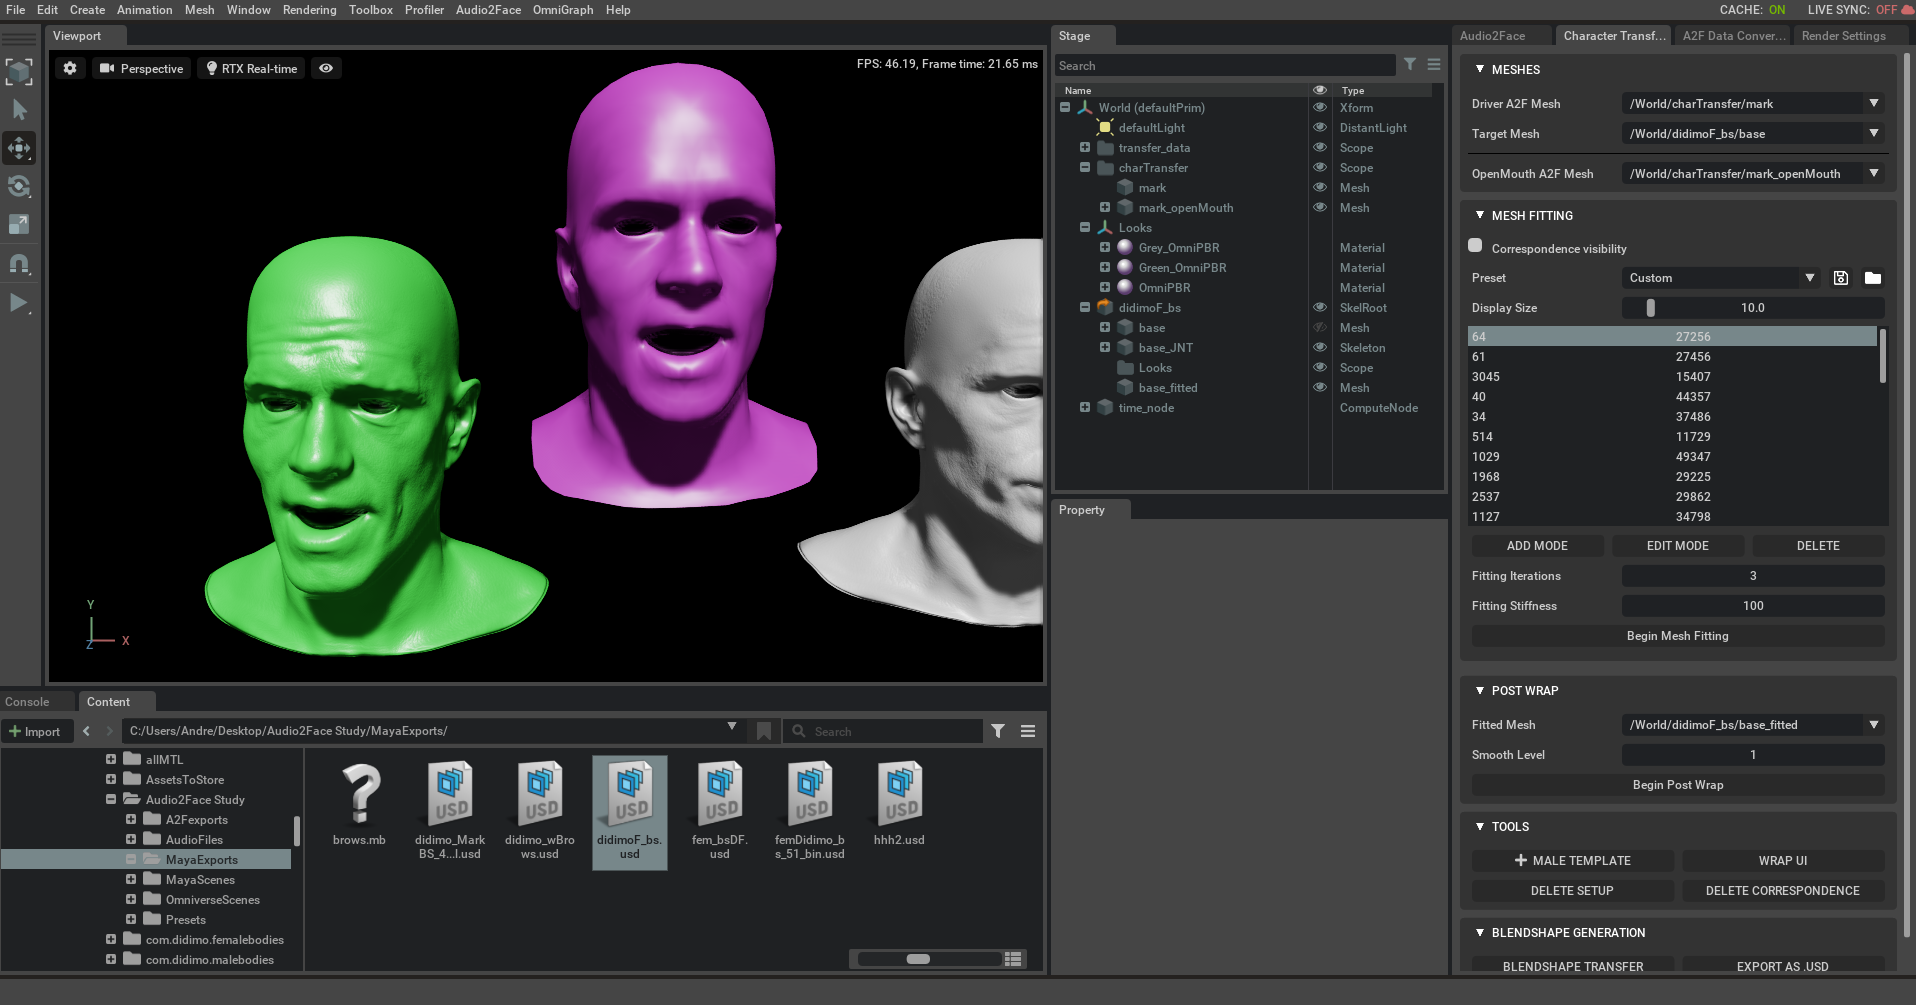
To begin the mesh fitting process, first start by making the correspondence between common points on the didimo face and the openMouth pose. Here is the didimo correspondence preset, with some of the correspondences highlighted, so you can load it up in A2F:
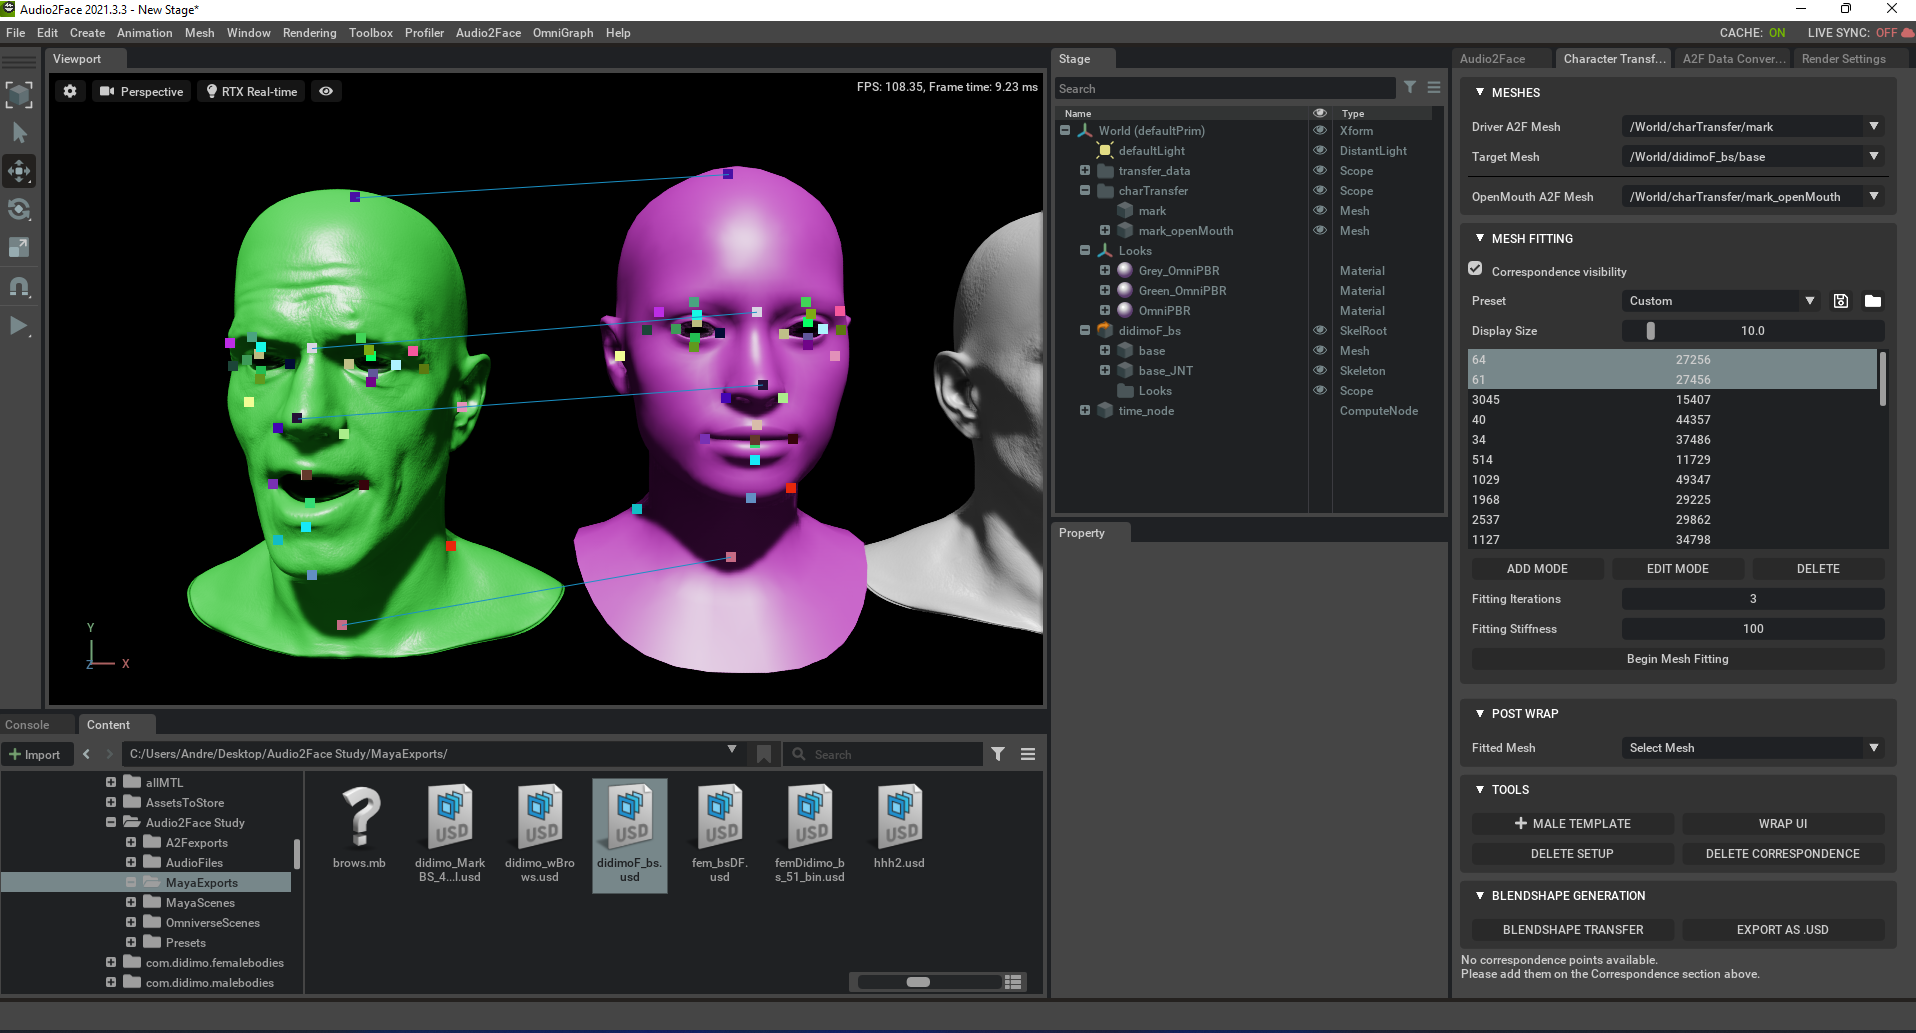
- When you are happy with the correspondence, run the mesh fitting algorithm. You will end up with a didimo deformed to look like Mark:
-
Run the Post Wrap tool.
-
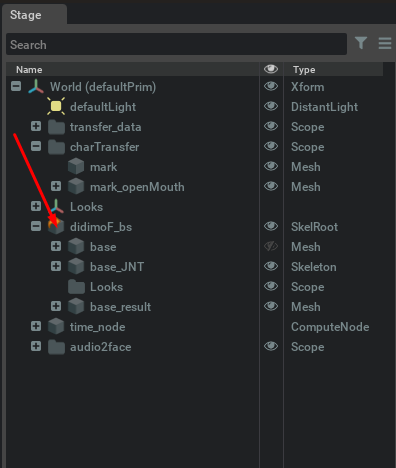
You will now notice, that a “base_result” mesh was added to the didimo group, and the default mesh we were seeing originally was hidden.
-
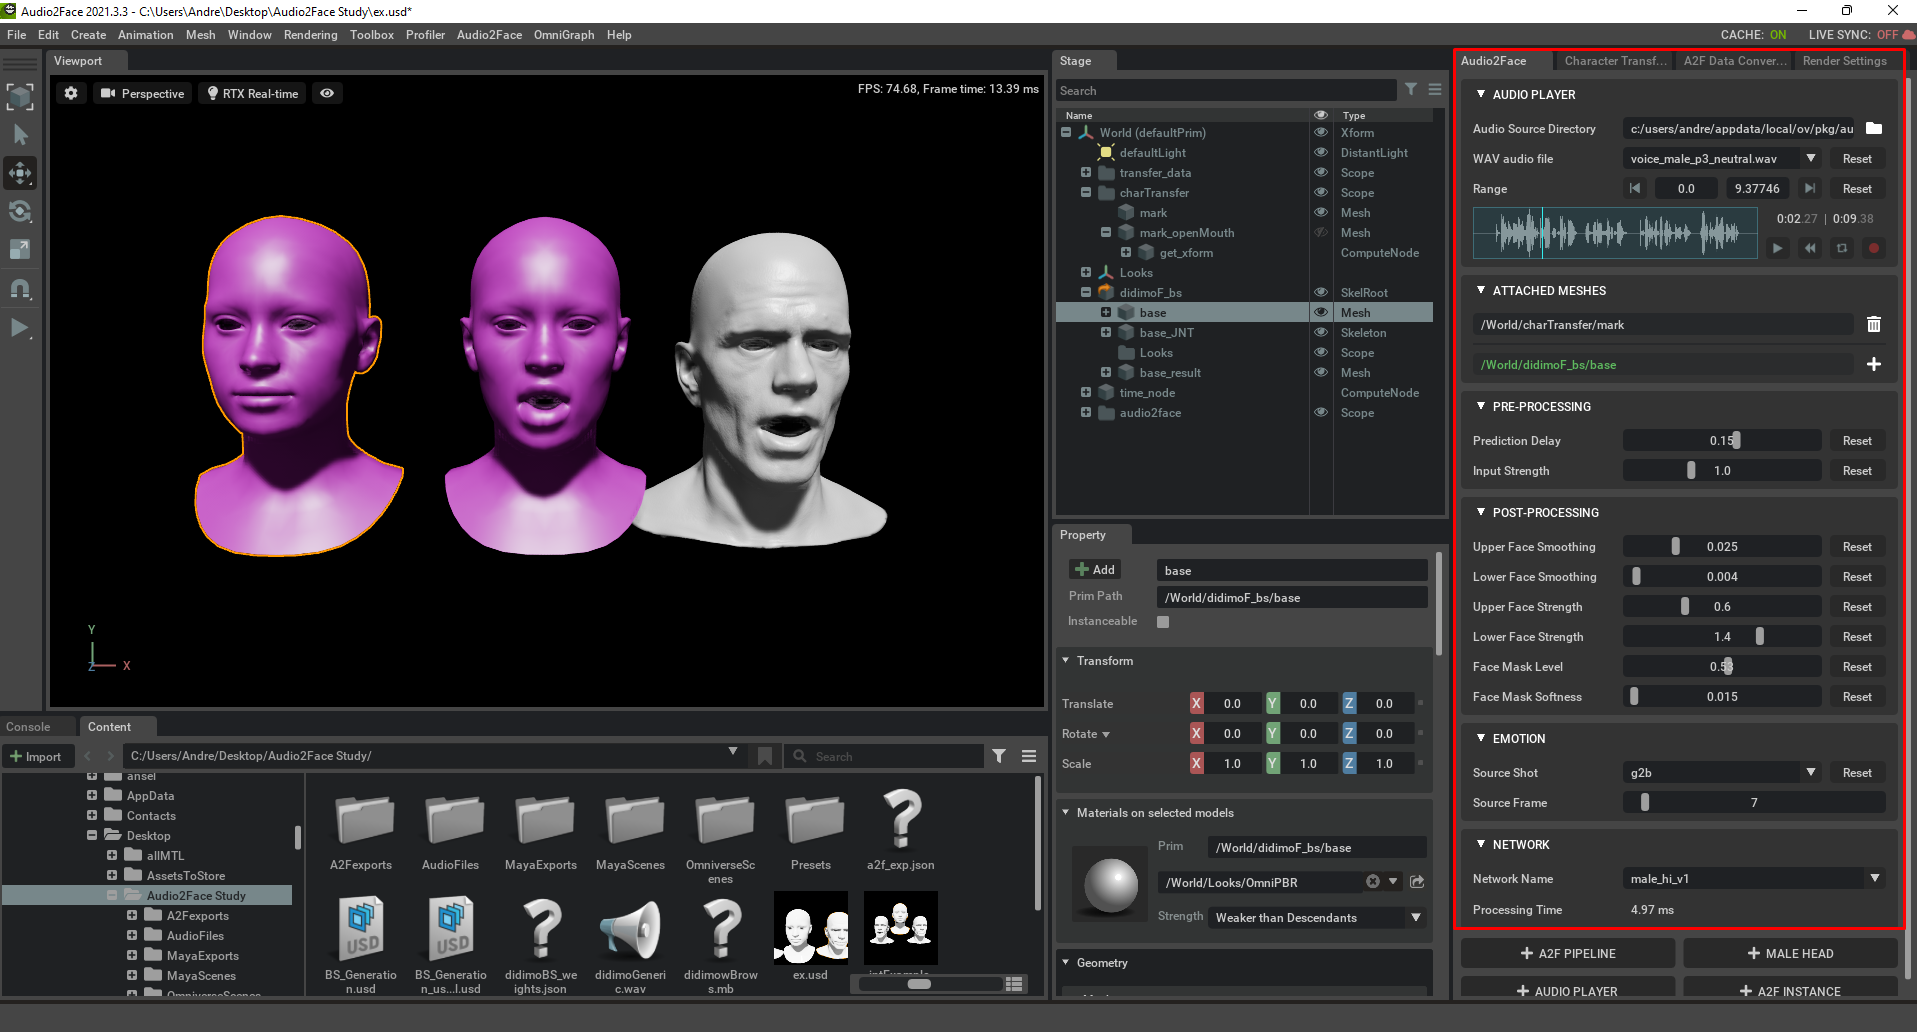
Navigate to the Audio2Face tab, click “/World/charTransfer/mark” and click "+ A2F Pipeline" and choose “Yes, attach” when asked if you want to attach Mark to the pipeline.
-
You now have mark attached to the A2F pipeline, and as the “base_result” was created from Mark, it is attached to him, making it also attached to the pipeline.
-
You can now explore the animation creation part. Choose a directory of audio files or click the red REC button to record a new track. Edit the animation look by changing parameters for the Pre-Processing, as well as Post-Processing, to control upper and lower face influence on the animation. You can also change here the Emotion the animation is supposed to portay.
-
Turn on the visibility of the “base” didimo mesh, and head to the A2F Data Conversion tab.
-
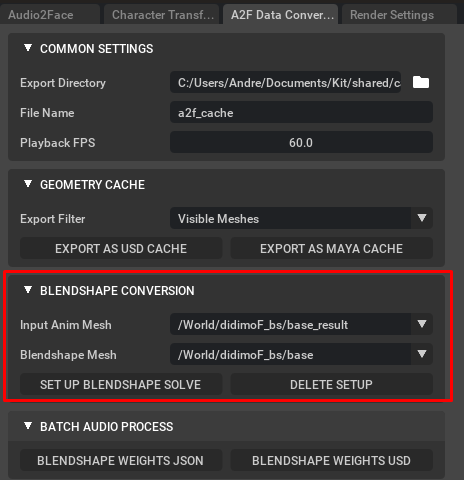
Go under Blendshape Conversion and select the resulting mesh from the character transfer process (baseresult) for the “Input Anim Mesh”. Choose the “base” mesh for the “Blendshape Mesh” field and click_Set Up Blendshape Solve.
-
You’ll notice the base mesh is now also hooked into the pipeline and is playing the same animation, but using its own blendshapes, if you go into the Audio2Face tab and hit play.
-
On the Blenshape Conversion section, all the blendshapes the didimo has are listed, and you can select which ones you want to be used in the animation. You can also tag/untag cancel and symmetry blendshape pairs, to further improve the animation, as well as finely control the weight of the blendshapes and other parameters. A preset was created that can be loaded here, correctly set up for didimos.
-
When you are happy with the outcome, go into Common Settings to specify an export directory, a name for the animation and the Frames Per Second you want it to ran at and choose “Export JSON”.
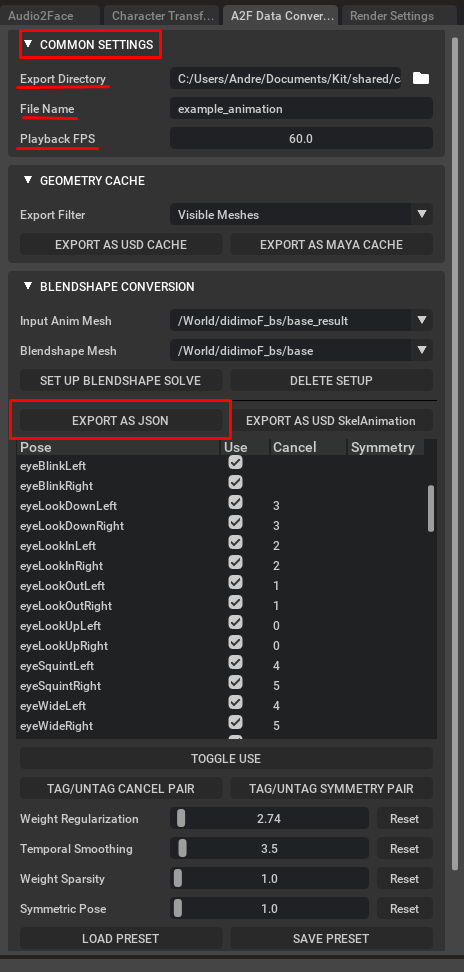
- Locate the audio files folder, and save the track that generates the animation.
Play the animation on Unity
Playing the animation using our Audio2Face Integration Sample.
-
Start by importing the JSON file and the audio track into your Unity project.
-
Download the Samples of the Didimo Core SDK and open the Audio2Face Integration sample scene.
-
On the Hierarchy, choose the Animation Controller GameObject:
a. Drag the generated JSON file into the “BS Weights File” field.
b. Drag the audio track into the “AudioClip” field.
c. Adjust the frame rate to the one you specified when you exported the animation. -
Press the Play button.
Playing the animation on any didimo
-
Add a GameObject to the scene and add a component to it called A2FtoDidimoAnimation.
-
Add the didimo you want to animate to the scene.
-
Drag the didimo avatar to the “Didimo” field of the component.
-
Repeat step 3 of the previous section.
-
Drag the GameObject that has the Audio Source component into the “Audio Source” field.
-
Press the Play button.
Updated 11 months ago
